How to clean drains: A practical DIY guide for homeowners
Learn how to clean drains safely with practical, step-by-step methods. This guide covers non-chemical and chemical options, tools, safety, and prevention, with Drain Guide expert tips.

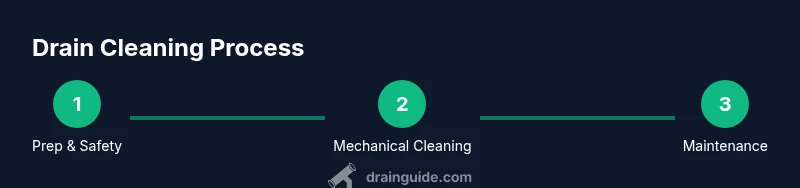
This guide shows you how to clean drains safely and effectively, covering non-chemical methods, safe chemical options, and preventive maintenance. You'll learn step-by-step actions you can perform with common tools, plus tips to protect pipes and avoid recurring clogs. For homeowners and DIY enthusiasts, this Drain Guide tutorial keeps your drains flowing smoothly.
Why cleaning drains matters for home hygiene and efficiency
According to Drain Guide, most home drainage issues stem from hair, soap scum, and grease buildup, and addressing them early with a proper cleaning routine pays off. A clean drain reduces odors, improves flow, and minimizes the risk of larger backups. By understanding the common culprits and the right sequence of actions, you can prevent minor clogs from turning into major headaches. This section sets the foundation for how to clean drains effectively, emphasizing planning, safety, and choosing methods that fit your plumbing and lifestyle.
Safety first: PPE, environment, and planning
Before you pick up a tool, prepare your workspace and PPE. Wear gloves and eye protection, and keep children and pets away from the area. Ventilate the room if you’re using cleaners, and never mix chemical products. Have a bucket, towels, and rags ready to catch spills. A quick plan saves time and reduces the chance of accidental damage to pipes or floors. This mindset aligns with Drain Guide's emphasis on safe, responsible DIY drain maintenance.
Essential tools and materials for DIY drain cleaning
Having the right tools makes the job safer and more effective. You’ll typically need a plunger with a flange, a hand-crank drain snake or auger, a bucket, adjustable wrench, pliers, rubber gloves, and a flashlight. For non-chemical methods, keep hot water and baking soda handy. Optional items include a funnel, towels for cleanup, and enzymatic cleaners for maintenance. Collect these before you start to avoid mid-task trips to the store.
Non-chemical methods to clear a simple clog
Non-chemical approaches work well for many everyday clogs. Start by removing standing water with a cup or sponge, then use a proper plunger to create pressure and suction. If plunger action doesn’t clear the blockage, introduce a drain snake and gently rotate it to break up the clog. Finish with a hot water flush and a controlled pour of baking soda followed by boiling water after a short pause. These steps minimize chemical exposure while restoring flow.
Mechanical methods: using a drain snake or auger
A drain snake is a versatile tool for hair, soap scum, and small gobs of gunk that resist plunging. Feed the snake into the drain until you feel resistance, then rotate the handle to break through the obstruction. Pull back slowly to remove debris, wiping the segments clean as you go. Rinse the line with hot water and re-test the drain. Proper technique reduces the chance of pushing the clog further into the system.
Safe use of chemical drain cleaners (if needed)
Chemical cleaners can help when non-chemical methods fail, but they carry risks to pipes and the environment. Read and follow the label precisely, use minimal amounts, and ventilate the area. Never mix products, especially with bleach or ammonia, and avoid prolonged exposure to the pipe walls. Drain Guide analysis warns about potential pipe damage; consider enzymatic cleaners for ongoing maintenance instead of harsh chemicals when possible.
Cleaning the P-trap and trap area to remove odor
If your sink or shower trap is accessible, place a bucket underneath and carefully detach the P-trap with an adjustable wrench. Clear out accumulated debris and rinse the trap with hot water before reassembling. This step eliminates foul odors that often accompany slow drains and can improve overall drainage when done regularly. Dry fit the trap before tightening to ensure a proper seal.
Maintenance routines to prevent future clogs
Establish a regular routine to keep drains clear. Rinse with hot water weekly, run a baking soda and hot water flush monthly, and avoid pouring grease or oils down the drain. Use a drain screen to trap hair and solids, and schedule annual checks of trap seals and venting. Consistency is key to reducing recurring clogs and odors, a principle echoed by Drain Guide.
When to call a professional
If multiple drains are slow, you experience sewage odors, or a clog persists after several attempts, it’s time to call a licensed plumber. Certain clogs may require camera inspection or specialized equipment to avoid damaging the piping system. A pro can diagnose hidden issues, such as pipe collapses or vent blockages, and provide a lasting solution.
Tools & Materials
- Plunger with flange(Choose a plunger sized for your sink or tub; for toilets, use a flange-specific plunger)
- Drain snake / auger(Hand-crank version is usually sufficient for most household drains)
- Bucket(To catch water when removing the P-trap or clearing debris)
- Adjustable wrench(Needed to loosen the P-trap nuts)
- Pliers(Assist with stubborn fittings)
- Rubber gloves(Protect hands from grime and cleaners)
- Safety goggles(Eye protection for splashes)
- Towels or rags(Contain spills and clean up afterward)
- Hot water(Not an item, but prepare heated water for flushing)
- Baking soda(Great for non-chemical maintenance routines)
- Enzymatic drain cleaner(Opt for maintenance use; less harsh than caustics)
Steps
Estimated time: 60-90 minutes
- 1
Gather tools and PPE
Collect the plunger, snake, bucket, wrench, gloves, and goggles. Inspect the area for any loose items or wet spots that could pose a slip hazard. This prep reduces interruptions and keeps you safe as you work.
Tip: Lay towels around the area to catch spills before you start. - 2
Remove standing water and prep the area
Use a cup or sponge to remove as much standing water as possible. Place a bucket under the P-trap if you plan to disassemble it later. Clear the counter and floor to prevent accidents during cleaning.
Tip: Keep a trash bag handy for debris you remove during the process. - 3
Plunge the drain effectively
Seal the drain with the plunger and pump with strong, steady strokes. If you’re dealing with a double-basin sink, block the other drain to maximize pressure. Stop if you hear a gurgle or the water starts to move.
Tip: Use a hot water flush after plunging to help clear loosened debris. - 4
Use a drain snake to break the clog
Insert the snake into the drain and rotate the handle as you push forward. When you feel resistance, gently pull back and remove debris. Rinse the line with hot water and re-test the drain.
Tip: Take small turns to avoid kinking the cable. - 5
Dislodge and clean the trap area
Place the bucket under the P-trap and loosen the nuts with an adjustable wrench. Remove the trap, clean out hair and gunk with a brush, and rinse inside with hot water before reassembling.
Tip: Hand-tighten fittings first, then snug with the wrench—avoid overtightening. - 6
Flush and test the drain
Run hot water through the drain to clear remnants. If using baking soda, add a couple of tablespoons, wait a few minutes, and then flush with hot water. Assess whether flow has improved and repeat steps if needed.
Tip: Record the process so you know what worked for future reference. - 7
Reassemble and clean up
Reattach the P-trap securely and ensure seals are intact. Wipe surfaces, remove tools, and store everything neatly. A clean workspace reduces the risk of recontamination or misplaced parts.
Tip: Run one more test to confirm system integrity after cleanup. - 8
Choose maintenance strategy
Decide whether to use enzymatic cleaners for ongoing maintenance or schedule regular flushing routines. Consider implementing drain screens to catch hair and solids between cleanings.
Tip: Set a reminder to perform routine maintenance every 4–8 weeks depending on usage. - 9
Know when to escalate
If the drain remains slow or backs up despite steps, or if you notice sewage odors, stop and call a licensed plumber. Persistent issues may indicate deeper problems in the sewer line or vent system.
Tip: Don’t force tools further into the pipe—this could cause damage.
Got Questions?
What is the best method to clean a clogged drain?
Start with mechanical methods like plunging and a drain snake. If needed, use safe cleaners and flush with hot water. Avoid harsh chemicals when possible and assess whether the clog persists.
Begin with plunging and a drain snake, then flush with hot water. Use safe cleaners and avoid harsh chemicals if you can.
Can baking soda and vinegar clear drains?
Baking soda and vinegar can help loosen minor buildup and freshen odors, but they may not clear solid clogs. Use as a maintenance step rather than a sole solution for stubborn blockages.
Baking soda and vinegar can help with minor buildup but might not clear stubborn clogs; use them as part of maintenance.
Are chemical drain cleaners safe for PVC and metal pipes?
Chemical cleaners can damage pipes if misused or left in place too long. Always follow label directions, ventilate, and avoid mixing with other products. Consider enzymatic cleaners for routine maintenance rather than harsh chemicals.
Chemicals can harm pipes if used improperly; follow directions and prefer enzyme cleaners for maintenance when possible.
How often should I clean drains to prevent clogs?
Clean on a regular maintenance schedule that fits your usage, such as periodic flushes and hair prevention measures. Establish routines to avoid buildup before it becomes a problem.
Set a regular maintenance schedule with routine flushes and prevention measures to avoid buildup.
When should I call a plumber?
Call a licensed plumber if multiple drains are slow, you notice sewage odors, or a clog persists after several attempts. It may indicate a sewer line, vent, or deeper plumbing issue.
Call a plumber if several drains are slow or the clog persists after attempts or you smell sewage.
Is it safe to disassemble a P-trap?
Yes, with the water drained and fittings protected, disassembly is safe. Use a bucket, wear gloves, and reassemble tightly to prevent leaks.
It's safe to remove the P-trap if you take precautions and reassemble it tightly.
The Essentials
- Assess and prep before starting.
- Combine non-chemical methods with safe tools.
- Disassemble the P-trap only if needed and safely.
- Maintain drains regularly to prevent recurring clogs.