Bath Drain Unclogging and Maintenance: DIY Guide 2026
Discover practical, DIY-safe methods to unclog and maintain a bath drain, with essential tools, safety tips, and guidance on when to call a professional. Learn step-by-step approaches to keep water flowing and prevent future backups.

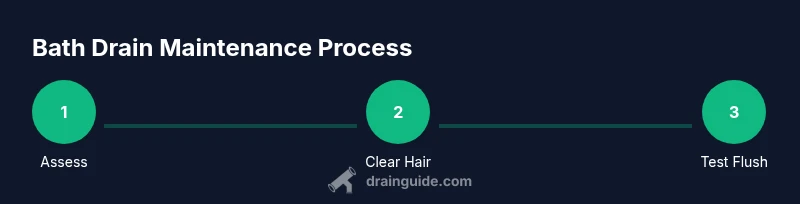
By following this guide, you’ll unclog and maintain a bath drain using safe, DIY methods. You'll inspect the drain, clear hair buildup, and restore flow with household tools—gloves, plunger, drain snake, baking soda, vinegar, and hot water. According to Drain Guide, start with non-chemical methods to protect pipes and only call a pro if backups persist.
Understanding the Bath Drain System
A typical bath drain is more than a hole in the tub; it's a small network designed to remove wastewater while preventing sewer gases from entering the bathroom. The main components include the drain strainer or grate, the overflow plate near the tub rim, and the P-trap hidden under the floor or behind the wall. When you remove the overflow cover, you expose the drain line that connects to the trap. Hair, soap scum, and mineral deposits are the usual culprits behind slow draining. Debris from bath products and occasional coins or jewelry can also end up in the drain path. Regular use of the tub increases the chance of hair catching on the strainer, which over time reduces flow.
According to Drain Guide, most bathtub clogs originate from hair and soap scum that cling to the interior surfaces of pipes. The trap holds a small amount of water to seal odors; when it dries out or becomes clogged, you may notice gas smells or gurgling as air tries to pass through the drain. Understanding these parts helps you choose the right approach: start with mechanical removal (hand clear, plunger, snake) before moving to chemical cleaners. Disassembly should be limited to what’s necessary to access the clog. Keep a flashlight handy to inspect the trap area, and check for any loose screws or corroded fittings that could indicate a larger issue.
Diagnosing Common Bath Drain Problems
Bath drains can fail for several reasons, but the most frequent is hair accumulation paired with soap scum. Slow drainage, standing water, or a drain that takes minutes to empty are typical signs. A gurgling sound during drainage often indicates a partial blockage or air trying to pass around an obstruction in the trap. Foul odors can indicate organic buildup or a dried-out trap. If more than one drain in the bathroom is slow, the problem may lie in a shared line or venting issue rather than a single bathtub, and you should consider a professional assessment.
Drain Guide analysis shows that DIY-friendly blockages usually involve lint, hair, and soap residues rather than concrete or mineral deposits. Begin with the simplest method—manual removal of visible hair from the drain grate—and then progress to mechanical tools like a plunger or a drain snake. If water backs up under the overflow plate or you notice persistent odors, these are signals to pause DIY fixes and seek professional help. Document any unusual sounds or damp areas, as these clues guide the next step.
Tools and Safety Precautions for Bath Drain Work
Before you begin, assemble the essential tools and protective gear. Use rubber gloves and safety glasses to protect your hands and eyes from debris and cleaning agents. A flashlight helps you inspect hard-to-see corners of the drain, the overflow pipe, and the trap. You will need:
- Bucket to catch standing water
- Plunger (cup-style or flange) for initial dislodging
- Drain snake or auger for deeper clogs
- Screwdriver or pliers to remove the overflow cover
- Baking soda and white vinegar for a chemical-free flush
- Hot water for rinsing and loosening gunk
- Enzymatic drain cleaner (optional, environmentally friendly)
Safety notes: never mix cleaners in the drain, avoid pushing debris back toward the wall, and unplug the drain only after you’ve reduced the risk of splashback. If your tub has an older vanity or restricted space, consider extra helpers to stabilize the components. If you encounter corrosion or damaged pipes, suspend the DIY approach and call a professional. When in doubt, ventilate the area well and avoid standing water near electrical outlets.
Deep Dive: Removal Methods for Bath Drains
Mechanical methods are the safest first line of attack. Remove the overflow plate to reveal the trap and remove obvious hair with gloved hands or a hair-catching tool. Use a plunger to generate a seal and push the blockage upward. A drain snake can reach deeper into the pipe to dislodge hair tangles or small objects. For stubborn clogs, use a gentle twist while feeding the snake to avoid tangling.
Chemical methods should be used sparingly. Baking soda followed by hot water can help emulsify gunk, while white vinegar creates fizz to dislodge soft buildup. Enzymatic cleaners are a more eco-friendly option for ongoing maintenance but may take longer to work. Avoid aggressive chemical drain cleaners in bathtubs; they can damage fixtures, seals, and metal parts. After any chemical treatment, flush with plenty of hot water to clear residues.
Quick Fixes Overview (No Disassembly Required)
If you notice the tub draining slowly but not completely blocked, start with low-disruption steps. Remove detectable hair, rinse the stopper area, and pour a pot of hot water down the drain to loosen residues. Follow with a baking soda flush (half a cup) and a cup of white vinegar; wait 15 minutes, then flush with hot water. For more stubborn clogs, proceed to mechanical methods described in the removal section, keeping safety in mind. Reset the overflow cover and test drainage after each technique. Document changes and any smells to track progress.
When to Call a Pro vs DIY
Most minor clogs can be managed with household tools, but certain scenarios require a pro. If water backs up into the tub after trying DIY methods, or if you hear persistent gurgling from the drains in multiple fixtures, a licensed plumber should assess the system. Sudden pipes damage, rotten odors, or signs of leakage near the drain point indicate a potential leak or venting problem that lies beyond routine maintenance. If you’re uncomfortable with disassembling the overflow or if space is tight, hire a professional to avoid injury or accidental damage.
Maintenance To Keep Your Bath Drain Flowing
Preventing clogs is easier than removing them. Use a hair catcher and clean it after each bath or shower, especially if you shave or wash long hair. Schedule monthly or bi-monthly maintenance using a mild enzymatic cleaner, followed by hot water flush. Avoid pouring grease, oil, or heavy cleaning products down the drain, which can accumulate and slow drainage over time. Periodically inspect the overflow cover and trap for signs of corrosion or leaks. A small annual check with a plumber can identify issues before they become emergencies. Drain Guide emphasizes that proactive maintenance saves time and reduces the risk of backups.
Tools & Materials
- rubber gloves(protect hands from debris and cleaners)
- bucket(catch water and debris)
- flashlight(inspect dark drain areas)
- drain plunger (cup or flange)(initial clog dislodging)
- drain snake/auger(reach deeper clogs)
- screwdriver or pliers(remove overflow cover screws)
- baking soda(safe chemical-free flush)
- white vinegar(gentle cleaning fizz)
- hot water(rinse and loosen gunk)
- enzymatic drain cleaner(optional maintenance)
- towel or rag(catch spills and dry area)
- glasses or goggles(eye protection when spraying cleaners)
- overflow plate removal tool(thin blade or screwdriver for cover)
Steps
Estimated time: 40-60 minutes
- 1
Remove the overflow cover to access the drain
Turn off the tub water if accessible and place a towel to catch spills. Use a screwdriver to remove the overflow plate screws, then carefully lift the cover. Inspect the opening for visible debris and remove with gloved hands or tweezers.
Tip: Keep screws in a magnetic tray to prevent loss. - 2
Clear visible hair from the drain grate
With gloves on, remove the drain grate and pull out hair and gunk with fingers or pliers. Rinse the grate and clean it with hot water and soap. This quick action often dramatically improves flow if the clog is near the surface.
Tip: Work over a bucket to catch loose debris. - 3
Use a plunger to dislodge the clog
Position the plunger to seal the drain, ensuring a tight fit. Pump the plunger with steady pressure to push the blockage upward. If water rises, pause and adjust the seal before proceeding.
Tip: Add a small amount of water to the tub to improve suction. - 4
Insert a drain snake into the drain
Insert the snake into the drain and rotate the handle to extend the cable. When you feel resistance, pull back slightly and reel in debris. Repeat until you reach a clear line and debris is removed.
Tip: Keep the snake aligned with the drain axis to avoid tangling. - 5
Flush with hot water and natural cleaners
Boil water and slowly pour down the drain in two stages. Follow with baking soda (half cup) and then hot water or vinegar fizz to dissolve remaining buildup. Let it sit for 5–15 minutes before flushing again.
Tip: Do this in a well-ventilated area and avoid pouring boiling water on delicate finishes. - 6
Reassemble overflow cover and test
Replace the overflow plate and screws; ensure all parts are seated securely. Run a test fill to observe drainage and listen for any new gurgling. If flow remains slow, consider more aggressive mechanical methods.
Tip: Check for water leaks around the overflow area after reseating. - 7
Consider enzymatic treatments for maintenance
If the drain remains slow, consider an enzymatic cleaner to reduce organic buildup over time. Follow label directions and flush with hot water after the recommended dwell time. Do not rely on enzymatics for immediate relief of heavy clogs.
Tip: Enzymatic cleaners are gentler on pipes and the environment. - 8
Document progress and schedule future maintenance
Record the date, symptoms, and techniques used to track improvements. Schedule routine maintenance every 1–2 months and consider adding a hair catcher to prevent future clogs. Keeping a log reduces repeated ineffective methods.
Tip: Set reminders to stay on top of maintenance.
Got Questions?
What causes bath drains to clog most often?
Hair buildup combined with soap scum is the most common cause of bath drain clogs. Regular maintenance reduces this risk.
Hair and soap scum are the usual culprits you should check first.
Can baking soda and vinegar actually unclog a drain?
They can help loosen light buildup and deodorize, but they may not clear a stubborn clog. Use them as a preventive flush.
Baking soda and vinegar can help for mild buildup but may not clear a strong clog.
Are chemical drain cleaners safe for a bathtub?
No; they can damage tubs and pipes and should be avoided in baths whenever possible. Use mechanical methods first.
Chemical cleaners can harm tubs; avoid when possible.
How often should I clean a bath drain?
Do a preventive flush every month or two and a deeper clean every 3–6 months, depending on usage.
Clean regularly—monthly flushes plus deeper cleans every few months.
Will a drain snake damage my tub?
If used properly and gently, a hand-crank snake is safe for most tubs; forceful use can scratch porcelain.
Used carefully, a drain snake won't damage the tub, but be gentle.
What should I do if water backs up after cleaning?
Stop and re-evaluate. If backups persist, call a pro; avoid repeated chemical treatments.
If it backs up, pause, reassess, and consider a plumber.
Watch Video
The Essentials
- Assess the drain system before taking action.
- Prefer mechanical methods over chemicals when possible.
- Install a hair catcher to prevent clogs.
- Know when to call a professional.
- Maintain regularly to prevent backups.