How to Clean a Tub Drain: Step-by-Step Home Guide
Learn how to clean a tub drain with practical, step-by-step instructions, safety tips, and maintenance routines designed for homeowners and DIY enthusiasts. Identify signs of trouble, choose the right tools, perform hair removal and trap clearing safely, flush the system, test drainage, and adopt preventive habits to reduce clogs, odors, and mildew.

Goal: clean a tub drain safely and restore drainage. This quick answer previews the steps: inspect the drain, remove hair and buildup, clear the trap, and flush with safe cleaners. Gather gloves, a drain snake or hair-removal tool, pliers, a bucket, a flashlight, rags, and a mild cleaner. Plan for about 30–45 minutes.
Why a clean tub drain matters
A clean tub drain keeps water flowing and prevents the inconvenience of standing water. When hair, soap scum, and mineral deposits accumulate, water drains slowly and odors can form. A dirty drain can also become a breeding ground for bacteria and mold in damp bathrooms. In addition, soap scum can corrode seals and slow the overall drainage system over time. According to Drain Guide, a clean tub drain is not only about quick water flow; it also reduces the likelihood of bigger clogs and costly repairs later. The Drain Guide team emphasizes regular, simple maintenance as the first line of defense against recurring clogs. By understanding where clogs form and how a tub drain operates, you can tackle problems before they become emergencies. This foundation supports safe, effective cleaning that protects your bathroom’s plumbing and hygiene.
Signs your tub drain needs cleaning
Slow drainage is the most obvious indicator, but listen for gurgling sounds, notice standing water after showers, or detect lingering bathroom odors. If water backs up into nearby fixtures, that can signal a more serious blockage. Regularly check under the drain cover for visible hair or soap scum buildup. Addressing these issues early minimizes the risk of a complete clog. Drain Guide recommends scheduling routine inspections and small cleanouts to maintain steady flow and reduce the need for drastic interventions later.
How a tub drain is designed and where clogs form
A typical tub drain includes a removable cover, a strainer, an overflow plate, and a P-trap connected to the drain line. Clogs commonly form where hair and soap scum collect in the strainer, in the trap, or along the trap arm. Debris can accumulate behind the overflow cover, especially in showers with low maintenance. Understanding this layout helps you target the most likely sites for clogs and plan your cleaning steps efficiently. Proper access to the trap is essential for effective maintenance and to prevent repeated trouble.
Method A: manual hair removal and debris extraction
Begin by turning off any water supply to minimize splashing and lay towels to protect the floor. Remove the drain cover using a screwdriver if needed, then inspect for hair and residue. Put on gloves, grab visible hair, and pull out debris in manageable sections. Use a drain snake to snag hair deeper in the canal while rotating gently. Clean the exposed area with a damp cloth before moving on. This method is the cornerstone of tub drain cleaning and often resolves slow drainage without harsh chemicals.
Method B: clearing the P-trap and trap arm
Place a bucket beneath the P-trap to catch water and debris. Detach the trap’s slip nuts or screws and carefully remove the trap, letting water drain into the bucket. Rinse the interior of the trap with warm water, removing hair and buildup with a brush or cloth. Reassemble the trap tightly, ensuring a good seal to prevent leaks. If you notice cracks or corrosion in the trap, replace it rather than reusing a damaged piece.
Method C: safe cleaners and when to avoid harsh chemicals
For minor buildup, a mixture of baking soda and hot water followed by a vinegar rinse can help loosen gunk and deodorize the drain. Enzymatic cleaners are a gentler option for ongoing maintenance, especially in septic or older systems. Avoid caustic or acidic chemical drain cleaners in a tub, as they can degrade seals and pipes and may be dangerous to skin and eyes. Always flush with plenty of water after using cleaners and ventilate the bathroom to minimize fumes.
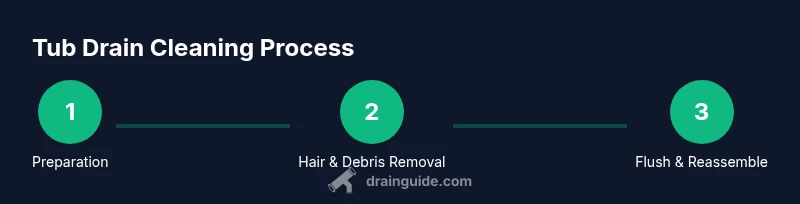
Step-by-step quick reference (overview of the process)
This overview summarizes the overall approach: prepare the area and gather tools, remove the drain cover, extract hair and debris, clear the P-trap if needed, flush with hot water, reassemble, and test drainage. If water still pools after cleaning, repeat with a more thorough hair removal and trap check. Consistent maintenance reduces the frequency of DIY cleanouts and protects your plumbing.
Maintenance routines to prevent future clogs
Establish a simple routine: remove visible hair from the strainer after each use, perform a light clean monthly, and flush the drain with hot water weekly during periods of heavy use. Consider keeping a small bottle of enzymatic cleaner on hand for monthly maintenance. A quick wipe-down of the overflow panel and drain cover after showers can also reduce soap scum buildup. Regular maintenance saves time and helps your plumbing last longer.
Troubleshooting and when to seek professional help
If you cannot access the trap, experience repeated clogs after cleaning, or notice persistent odors, it may indicate a deeper issue in the main line or a more serious blockage. Do not force fittings or use aggressive tools beyond what you can safely manage. When in doubt, consult a licensed plumber to prevent water damage or leaks. The Drain Guide team recommends safe, measured steps before escalating to professional help.
Tools & Materials
- Protective gloves(Latex or nitrile, long sleeves)
- Old towels or rags(Protect floor and catch drips)
- Bucket(To collect water and debris)
- Drain snake or hair-removal tool(6-18 inch flexible snake if possible)
- Pliers(Useful for stubborn covers or parts)
- Screwdriver (flathead or Phillips)(To remove overflow cover screws)
- Flashlight(Illuminates hidden debris under cover)
- Mild cleaner (baking soda + vinegar or dish soap)(Avoid caustic chemicals)
Steps
Estimated time: Total: 30-45 minutes
- 1
Prepare the area
Clear the bathroom space, lay towels, and gather tools. Put on gloves and eye protection to avoid splashes and contact with debris. This step minimizes mess and keeps your work area organized.
Tip: Have a bucket ready to catch water and a flashlight to inspect under the cover. - 2
Remove the drain cover
Using a screwdriver if needed, carefully remove the drain cover or overflow plate. Inspect for hair and residue under the cover before proceeding. Place the cover and screws in a labeled container to prevent loss.
Tip: Keep screws visible and organized so you can reassemble quickly. - 3
Extract hair and debris
Wear gloves, grab visible hair, and pull out debris in small sections. Use the drain snake to snag hair deeper in the channel while you rotate gently. Wipe the exposed area with a damp cloth as you go to prevent spreading grime.
Tip: Avoid forcing the snake; if it resists, re-angle and try again. - 4
Clear the P-trap
Place a bucket beneath the P-trap and loosen the slip nuts to remove the trap. Rinse the interior, removing hair and buildup with a brush. Reassemble tightly and test for leaks.
Tip: Check for cracks or corrosion on the trap; replace if necessary. - 5
Flush and test
Run hot water through the drain for several minutes to flush out residual debris. Reattach the overflow cover, wipe surfaces, and test drainage by running water again. If pooling persists, repeat steps 3–4.
Tip: If the water drains slowly, a second pass often resolves stubborn clogs.
Got Questions?
What are common signs a tub drain needs cleaning?
Common signs include slow drainage, gurgling sounds, standing water after showers, and lingering odors. If these persist after basic cleaning, it may indicate a deeper blockage.
Common signs are slow drainage, gurgling, and odors. If these persist, deeper blockage may exist.
Can baking soda and vinegar clear a tub drain?
Baking soda and vinegar can help loosen minor buildups and freshen a drain when used in small amounts. Do not rely on them alone for heavy clogs.
Baking soda and vinegar can help with minor buildup, but for big clogs you need mechanical cleaning.
Is it safe to use chemical drain cleaners in a tub drain?
Most chemical cleaners are not recommended for tubs, because they can damage seals, pipes, and fixtures and may harm skin. Use mechanical cleaning first and follow manufacturer guidance.
Chemical cleaners can harm pipes and seals. Use mechanical cleaning first.
Should I remove the overflow plate to clean the drain?
If the overflow plate blocks access to the drain, remove it carefully to clean. Reattach with proper sealant if needed to prevent leaks.
If accessible, remove the overflow plate and clean behind it.
How often should I clean a tub drain?
Regular maintenance—every 3-6 months—helps prevent buildup. Clean more often if you notice signs of slow drainage or odor.
Clean every few months or when you notice slow drainage or odor.
Watch Video
The Essentials
- Inspect before you touch the drain to identify main clog sites
- Remove hair and debris with gloves first, then use a snake for deeper clean
- Clear the P-trap and trap arm, then flush with hot water
- Reassemble correctly and test drainage before finishing
- Establish a maintenance routine to prevent future clogs