How to Drain a Hot Tub
Learn to drain your hot tub safely, protect electrical components, and rebalance water chemistry with our clear, DIY-friendly guide from Drain Guide.

Goal: Drain your hot tub safely and efficiently. This quick guide summarizes the essential prerequisites—power off with a GFCI, prepare a compliant drain hose and discharge area, and clear the area of bystanders—and provides a concise, step-by-step process that minimizes mess, protects electrical safety, and sets you up for refilling and balancing water chemistry afterward.
Why draining a hot tub matters for safety and longevity
Regular draining is part of responsible spa maintenance. Draining helps remove concentrated minerals, sanitizers, and organic matter that build up over time, which in turn protects seals, jets, and the shell. A well-planned drain also reduces chemical exposure when you clean and refresh the tub, and it makes it easier to inspect for leaks or wear. According to Drain Guide, a controlled drain minimizes electrical risk by ensuring power is isolated first, preventing shock and short circuits during the process. For DIY homeowners, understanding the why behind each step makes the task safer and more predictable, reducing the chance of water damage or chemical exposure in the surrounding area.
Before you start, know that the goal isn’t to evacuate water in a rush but to drain to a safe level for maintenance or refilling. If your tub has a built-in filtration or heater, plan for a brief cooling period before you begin draining to protect sensitive components from thermal shock. This section lays the groundwork for a safe, organized approach that respects both your equipment and your home environment.
Safety first: electrical, chemical, and environmental cautions
Electrical safety is the non-negotiable foundation of draining any hot tub. Always shut off power at the breaker or disconnect the GFCI, and verify there is no voltage present with a non-contact tester. Avoid handling electrical cords or plugs near wet surfaces. Chemically, drain water should not be disposed of where it can contaminate soil or water supplies; many jurisdictions require draining to a designated area and away from storm drains. Environmentally, consider the chemical composition of the spa water—high sanitizer levels and pH adjustments should be respected, especially if you have septic systems or nearby gardens.
In practical terms, create a dry work zone around the tub, use rubber-soled footwear, and keep pets and children at a safe distance. If you are unsure about electrical safety or local disposal rules, consult a qualified electrician or your local waste authority before you begin. This ensures you stay compliant and safe while performing routine maintenance.
Preparing the tub area and planning the discharge path
Plan the discharge route to a legal, safe, and practical location. A gravity-fed drain works if you avoid downhill runoff that could cause soil erosion or water pooling near foundations. Tools and setup should include a pump or gravity drain kit, a discharge hose long enough to reach the chosen outlet, and adapters to seal connections. Lay down a tarp or towels to catch any splashes and to protect your patio or deck surfaces. Having a clear plan helps you avoid last-minute trips to the hose bib or power source and reduces the chance of accidental spills.
Before you begin, check the tub surface for leaks or cracks; draining can expose underlying issues that deserve attention. Inspect the filter and interior components once the water level drops; this is a good time to replace a worn gasket or tighten fittings if needed. A well-prepared area makes the actual draining smoother and safer.
Step-by-step overview: what you’ll actually do (high-level)
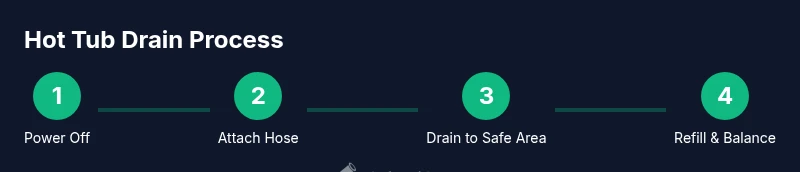
Here’s a concise mental map of the actions you’ll perform, so you’re not surprised by any intermediate steps: isolate power, set up your drain method, attach the hose, start draining, monitor water level, disconnect and clean up, then refill and rebalance.
This overview complements the detailed steps that follow and helps you anticipate the flow of work. It also emphasizes pacing—rushing can lead to leaks or electrical mishaps, while slow draining minimizes splash and oversaturation of nearby surfaces.
Post-drain tasks: cleaning, refill, and water chemistry balance
After draining, inspect the tub interior for residue and wipe down the shell to prevent mineral deposits. If you’re planning a deep clean, this is the ideal moment to remove and rinse the filter, then reassemble. Begin refilling gradually to avoid overfilling or thermal shock to the shell and plumbing. Once the tub is refilled to the recommended level, test and adjust water chemistry: pH, alkalinity, sanitizer, and calcium hardness. A balanced start reduces corrosion and scaling, extending the life of pumps, jets, and seals.
Keep a log of test readings and chemical additions as you refill, so you can track how the water changes over the first 24 hours. Circulation helps stabilize the balance and minimizes post-fill adjustments.
Common mistakes and how to avoid them (troubleshooting tips)
Even seasoned DIYers can slip up during drainage. Common mistakes include draining too quickly, which can splash onto sensitive surfaces; failing to disconnect power properly, risking shock or equipment damage; and disposing of water in areas that violate local regulations. To prevent these issues, follow the safety steps first, use a properly rated pump, and respect local disposal rules. If you encounter a slow drain, check hose fittings and source voltage; leaks can reduce flow and create a messy work area. If you see persistent chemical odors after refill, re-test sanitizer and pH, and adjust gradually. This proactive approach reduces repair calls and keeps your spa ready for use.
Authority sources for further reading
- OSHA: Electrical safety basics for wet environments (https://www.osha.gov/)
- CDC: Healthy swimming and water safety guidance (https://www.cdc.gov/healthywater/swimming/index.html)
- EPA: WaterSense and home water safety tips (https://www.epa.gov/watersense)
These sources provide additional safety and best-practice guidance to complement this step-by-step approach.
SEO-friendly notes and meta guidance
This section bridges practical how-to steps with safety and environmental best practices. If you want to publish this as a complete how-to article, ensure the text includes the keyword how to drain hot tub naturally in headings and body content. Use related terms like spa maintenance, water balance, and drain disposal to improve search visibility while keeping the content readable and useful for homeowners.
Authority Sources
- OSHA: Electrical safety basics for wet environments (https://www.osha.gov/)
- CDC: Healthy swimming and water safety guidance (https://www.cdc.gov/healthywater/swimming/index.html)
- EPA: WaterSense and home water safety tips (https://www.epa.gov/watersense)
Tools & Materials
- GFCI-protected power source or labeled breaker(Turn off power to the hot tub at the breaker and confirm with a tester.)
- Submersible pump with discharge hose(Choose a pump suitable for tub volume; ensure hose reaches discharge area.)
- Drain hose adapters and clamps(Secure connections to prevent leaks during pumping.)
- Plastic tarp or towels(Protect surfaces from splashes and spills.)
- Personal protective equipment (gloves, safety glasses)(Keep hands dry and eyes protected from splashes.)
- pH test kit and basic chemicals for replenishment(Use after refilling to rebalance water chemistry.)
Steps
Estimated time: Estimated total time: 60-90 minutes
- 1
Power off and verify safety
Turn off the hot tub at the main breaker or disconnect the GFCI. Use a non-contact tester to confirm there is no live voltage around the tub. This prevents electric shock and protects equipment.
Tip: Double-check all power sources, including any auxiliary equipment, before touching water. - 2
Set up the drainage system
Place the pump at the tub bottom and attach the discharge hose. Make sure all fittings are tight with clamps to avoid leaks as water begins to move.
Tip: If you’re using gravity drainage, ensure the hose is oriented to prevent backflow and use a secondary container if needed. - 3
Choose and prepare the discharge path
Select a safe, legal discharge location that won’t cause erosion, water damage, or runoff into storm drains. Lay down a tarp to catch splashes and designate a clear work area.
Tip: Check local regulations on where you can discharge spa water to avoid fines. - 4
Start draining and monitor
Turn on the pump and monitor the flow. Stop when water level reaches just above the jets or the recommended refill level. Keep an eye on hose connections for leaks.
Tip: Do not leave the pump unattended for long periods; periodic checks reduce accidents. - 5
Disconnect, clean, and prep for refill
Power down the pump, remove hoses, and wipe down the tub interior to remove mineral buildup. Store equipment properly for the next use.
Tip: Take a quick photo of chemical levels before draining to reference after refilling. - 6
Refill gradually and rebalance
Refill the tub slowly to avoid splashing and thermal shock. Re-test pH, alkalinity, and sanitizer after filling and adjust as needed. Allow the system to circulate and re-check after a few hours.
Tip: Never mix shocking chemicals directly in the tub; add them gradually to the water.
Got Questions?
Do I need to drain all the water from a hot tub?
Not always. Many tasks require draining to a safe level for cleaning, filter replacement, or chemical refresh. A full drain is common for deep cleaning, but always follow manufacturer guidelines and local regulations.
Usually you drain to a safe level for maintenance; a full drain is only needed for deep cleaning or significant system work.
Can I drain hot tub water onto my lawn or garden?
Yes, if local codes permit and sanitizer levels are low. Avoid high concentrations of chlorine or bromine and prevent runoff into storm drains or sensitive vegetation.
Yes, but only where permitted and with low sanitizer levels to protect plants and the environment.
Is it safe to drain the tub with the cover on?
No. Remove the cover to avoid trapping heat or moisture and ensure access for hoses and safety checks. A covered tub can create hazards during drainage.
No—remove the cover so you can safely monitor and connect hoses.
What if I don’t have a pump?
Gravity drainage works if the tub is elevated above the discharge area, but it can be slow. A siphon or bucket-and-pail method is less reliable and messier.
If you don’t have a pump, you can gravity drain, but it will take longer and may be messier.
How long does it take to drain a typical hot tub?
Drain time varies by tub size and pump capacity. Plan for roughly 30–90 minutes for standard portable models when using a dedicated pump.
Most drains take about half an hour to an hour and a half, depending on your setup.
Can I reuse the water after draining?
Reusing spa water is generally not recommended due to mineral buildup and sanitizer residues. Drain and refill with fresh water, then balance chemistry.
It’s usually best to drain and refill with fresh water, then rebalance.
Watch Video
The Essentials
- Power off before draining to prevent shocks.
- Use a proper drain hose and safe location for discharge.
- Refill gradually and rebalance chemistry after draining.
- Inspect components and clean after drainage for longevity.