How to Drain JP Drain: A Homeowner's Step-by-Step Guide
Learn how to drain JP drain safely with a practical, step-by-step method. This home guide covers prep, tools, techniques, and maintenance tips to prevent clogs and leaks. Drain Guide analysis informs best practices for quick, effective drainage.

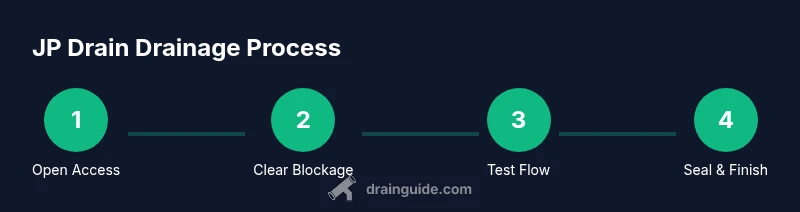
This guide shows you how to safely drain a JP drain and clear blockages. You'll need basic tools and protective gear, and you should shut off water before starting. Follow the step-by-step process to access the drain, clear debris, and test for proper drainage. This includes inspecting for leaks after reassembly and keeping a bucket ready for spills.
Understanding JP Drain Systems
JP drains are common in many residential settings, especially for kitchen sinks and some laundry hookups. The term 'JP drain' can refer to a J-shaped trap and adjacent piping that forms a seal to prevent sewer gases from entering the living space. Over time, grease, hair, food particles, mineral buildup, and foreign objects can accumulate in the trap and outlet, reducing flow and creating odors or backups. The goal of draining a JP drain is to remove standing water and clear blockages while preserving the integrity of the seals and fittings.
According to Drain Guide, the most reliable way to address this kind of drain problem is to approach it in three stages: safety and access, mechanical clearing, and verification and maintenance. Understanding the layout of your JP drain — including the trap, the cleanout, and any tees or junctions — helps you target the blockage without disassembling more than necessary. This approach minimizes mess and reduces the risk of leaks. Before you start, identify the exact fixture (sink, laundry tub, or other) and locate the shutoff valve so you can isolate water quickly if needed.
Note: JP drains vary in construction. If you’re unsure about the configuration, take photos as you go or label connections before disassembly. No chemical drain cleaners are used in this guide; mechanical clearing and careful reassembly provide safer, more controllable results.
Safety First: Before You Drain
Safety should drive every drain maintenance project. Start by turning off the water supply to the affected fixture and placing a bucket and towels within easy reach. Wear sturdy gloves and eye protection, especially if you anticipate splashing or if metal parts are rough or corroded. Ensure the area is well lit; a headlamp or flashlight helps you see inside the trap and pipes. Disconnect any electrical appliances nearby if they might contact water, and keep children and pets away from the workspace.
Ventilation matters if you’re dealing with odors or stagnant sewer gas; open a window if possible and avoid leaning over the drain to prevent slip hazards. Drain backwash can cause wet floors, so have a dry path and non-slip mats in place. If you must use tools that create torque, use a rubber grip to reduce the chance of slipping. Finally, know when to stop: if you see significant corrosion, a crack in the pipe, or any sign of sewage backup, stop and call a licensed plumber. Drain Guide’s guidelines emphasize caution and containment to protect you and your home.
Accessing the JP Drain: Prep Work and Safety Checks
Before you pry or twist any fittings, locate all access points for the JP drain containing the trap and any cleanouts. Remove the drain cover or strainer carefully to avoid dropping screws or small parts into the pipe. Have a bucket ready and place towels around the work area to catch spills. Check the connections for corrosion or wear and take a quick photo of each connection so you can reassemble accurately. If there is a sealed cap on a cleanout, loosen it slowly to prevent a sudden gush of water.
With the area exposed, you’ll be able to determine whether the blockage is in the trap itself, in the trap arm, or further down the line. This step reduces guesswork and minimizes the risk of accidentally loosening a joint that could leak later.
Preparing for Mechanical Clearing: Tools and Setup
Now is the time to assemble your clearing tools and protective gear. A drain snake or hand auger is ideal for JP drains, but a flexible bore with pliers can work for minor clogs. Keep a bucket, towels, and a flashlight handy. If you’re using a snake, extend it gently and avoid forcing it through bends; rotating slowly helps the blade or corkscrew cut through debris. Have replacement washers or gaskets on hand in case you need to reseal the trap after clearing.
This phase is about creating a controlled, cleanable workspace. A dry bench, clear tabletop, and properly positioned tools reduce the chance of slips and make the job safer and more efficient.
Step-by-Step Clearing: Debris Removal and Blockage Breakthrough
Use the drain snake to probe the trap and trap arm, feeding it slowly toward the blockage. When you encounter resistance, rotate the snake to break up the clog. Continue feeding and withdrawing the snake until you feel a smooth, consistent resistance without sticking. If you see a buildup of grease or hair on the blade, wipe it clean before continuing. Avoid using excessive force, which can damage seals or crack pipes.
After you’ve cleared the immediate blockage, flush the system with water to confirm flow. If water still backs up, repeat the process more gradually, and consider focusing on the trap arm and cleanout area where clogs often accumulate.
Cautionary Cleaning: P-Trap Inspection and Seal Check
While the trap is exposed, inspect the P-trap for damage or cracks. Leaks in the seal can cause slow drainage or odors even after clearing the clog. Clean the washer surfaces and reseal with plumber’s tape or appropriate sealant if needed. If the trap shows significant wear, it’s wise to replace the entire unit rather than patching leaks. Keep the trap free of mineral buildup by wiping it with a cloth and applying a light spray of mineral-safe cleaner, then rinse thoroughly.
Correct reassembly is critical to prevent future leaks. Take photos of your original setup to verify orientation, especially if you have multiple outlets connected to the same trap.
Reassembly, Testing, and Cleanup: Verification of Results
With the trap and trap arm clean and dry, reassemble the JP drain components in the reverse order of disassembly. Tighten fittings firmly but avoid over-tightening, which can strip threads or crack rubber gaskets. Once reassembled, slowly run water to test for leaks and confirm that drainage returns to normal flow. Check underneath for any signs of leakage after a few minutes of operation. Wipe up any spills promptly to avoid slips and water damage.
Finish by cleaning the work area, returning tools to their proper spots, and noting any parts that may require replacement in the near future. Regular maintenance now can prevent more complex problems later.
Maintenance and Preventive Tips: Keeping JP Drains Clear
To minimize future clogs, adopt a few simple routines: run hot water down the drain after heavy use (like washing cookware or processing fatty foods), periodically inspect the trap for buildup, and use a drain screen to catch hair and food particles. Consider enzymatic or bacteria-based cleaners designed for septic-safe drains as a maintenance aid rather than powerful chemical cleaners. If odors persist, re-check the trap seal and the outlet venting in your home. Drain Guide recommends scheduling a quick check every 6–12 months to keep JP drains in good working order.
Troubleshooting Common Scenarios and When to Call a Pro
If you’ve drained the JP drain but still see slow drainage, backflow, or gurgling sounds, the issue may be deeper in the plumbing stack or sewer line. In this case, the blockage could be more severe or located further down the line, requiring professional equipment such as a motorized auger or camera inspection. If you notice sewage backup or persistent foul odors after a home drain attempt, stop and contact a licensed plumber immediately. Prolonged exposure to sewer gases can be hazardous, and DIY fixes at this stage risk property damage.
The Drain Guide Verdict: Practical, Safe, and Reproducible
Drain Guide’s analysis shows that careful mechanical clearing, proper sealing, and thorough testing yield reliable results for JP drains when done in a controlled, safe manner. The key is to avoid aggressive chemical cleaners and to reassemble with attention to gasket seating. The most valuable practice is documenting your setup and keeping up with routine maintenance to reduce future clogs and leaks. A methodical, patient approach pays off with fewer headaches and faster restoration of full drainage.
Appendix: Quick Reference for JP Drain Drainage
- Always shut off water before starting.
- Use a drain snake or auger for blockages; rotate gradually rather than forcing.
- Inspect and replace worn seals or gaskets.
- Test drainage with water before declaring victory.
- Consider professional help for stubborn clogs or signs of damage.
Tools & Materials
- bucket (2-3 gallon minimum)(Place under the drain to catch spills)
- rubber gloves(Protect hands from grime and sharp edges)
- flashlight or headlamp(Illuminates dark corners inside the trap)
- adjustable wrench(Loosen nuts on trap connections)
- channel-lock pliers(Extra grip for stubborn fittings)
- drain snake / hand auger(Clear blockages in trap arm)
- old towels or rags(Contain spills and wipe surfaces)
- screwdriver set(Remove screws on drain cover or plates)
- replacement washers or gaskets(Have on hand in case seals wear out)
- plumber’s tape (Teflon tape)(Seal threaded connections after reassembly)
- enzymaic/bacterial drain cleaner (optional)(Maintenance aid; avoid strong chemical cleaners)
Steps
Estimated time: 45-75 minutes
- 1
Shut off water and prepare workspace
Turn off the shutoff valve for the JP drain fixture to prevent further water flow. Clear the area, lay towels, and place a bucket ready to catch any liquid. This prevents spills and keeps the area dry as you work.
Tip: Have a flashlight handy to see into the trap immediately. - 2
Expose the trap and access the drain
Remove the drain cover or strainer and inspect the trap area. If there’s a screw-on cap or cleanout, unscrew it slowly to avoid a sudden splash of water. Position a bucket beneath the trap to catch released water.
Tip: Take a photo of connections before disassembly to help reassemble correctly. - 3
Inspect the trap for wear
Check the P-trap for cracks, corrosion, or worn washers. If you notice damage, plan to replace the trap rather than trying to patch it up. Replace any worn gaskets to ensure a tight seal.
Tip: Replace worn washers even if no leaks are visible. - 4
Insert and operate the drain snake
Insert the snake into the trap arm and gently advance toward the blockage, rotating as you push. When you meet resistance, withdraw slightly and rotate to break the clog. Repeat until you feel a clear path.
Tip: Work slowly to avoid kinking the snake or injuring the pipe. - 5
Flush the line and check flow
Run warm water through the drain to push debris out and verify that water drains smoothly. If water backs up, repeat the snake procedure or target the next segment of pipe.
Tip: Keep the bucket nearby; you may need to catch residual water from the trap. - 6
Tighten connections and replace the trap
Tighten all fittings to the manufacturer’s torque and reinstall the trap. Ensure the gasket seats evenly and there are no cross-threaded connections. Recheck for leaks after a brief test run.
Tip: Avoid overtightening; rubber gaskets can wear or crack if crushed. - 7
Test for leaks and function
Run water for several minutes, checking beneath the sink for leaks and listening for gurgles or backups. If leaks appear, reseat or replace gaskets as needed. Confirm the drainage continues to flow without odor.
Tip: If you hear gurgling, air may be trapped; take a moment to recheck the seals. - 8
Clean up and restore space
Wipe all surfaces, store tools, and replace the drain cover. Drain the bucket and dispose of debris properly. Leave the area dry to prevent slips and moisture damage.
Tip: Keep a few spare towels handy for future quick cleanups. - 9
Prevent future clogs
Adopt routine maintenance: use a screen to catch hair and debris, flush with hot water periodically, and consider enzymatic cleaners for organic buildup. Schedule a quick check every 6–12 months to prevent major clogs.
Tip: Document maintenance steps for future reference.
Got Questions?
What is a JP drain and when should I drain it?
A JP drain typically includes a J-shaped trap and adjacent piping that can collect grease, hair, and debris. Drain it when water drains slowly, smells, or you notice backups. Regular maintenance helps prevent problems.
A JP drain is a J-shaped trap with pipes beyond it. Drain it when drainage slows or there are odors to prevent backups.
Do I need to shut off the water supply before draining JP drain?
Yes. Turn off the water supply to the fixture before starting. This minimizes spills and reduces the risk of accidental flooding while you work.
Yes. Shut off the water supply before you start to avoid spills.
What tools are essential for draining a JP drain?
A drain snake or hand auger, a bucket, gloves, adjustable wrench, screwdrivers, flashlight, and towels are essential. Additional items like replacement washers can help if seals wear.
You’ll want a drain snake, bucket, gloves, and basic hand tools for most JP drain tasks.
What should I do if water backs up after draining?
If backups persist, re-check the trap and trap arm for remaining blockage, or consider a deeper cleaning with a longer snake. If problems continue, the blockage might be further down the line.
If water backs up, recheck the trap and try clearing again or call a pro if it persists.
Can I use chemical drain cleaners after draining JP drain?
Avoid using strong chemical cleaners after draining; they can damage seals and pipes and may react with debris. Use mechanical clearing and enzymatic cleaners for maintenance instead.
Avoid harsh chemical cleaners after draining; they can harm seals. Use mechanical methods or enzymes for maintenance.
When should I call a professional?
If you experience repeated clogs, persistent leaks, or sewage odors after DIY attempts, it’s time to call a licensed plumber. They can assess deeper blockages and ensure code-compliant piping.
Call a pro if clogs persist, leaks continue, or you smell sewage after DIY work.
Watch Video
The Essentials
- Shut off water and prepare the workspace before starting.
- Use a drain snake to clear blockages; avoid forcing through bends.
- Inspect and replace worn gaskets and seals to prevent leaks.
- Test drainage thoroughly after reassembly and maintain regularly.