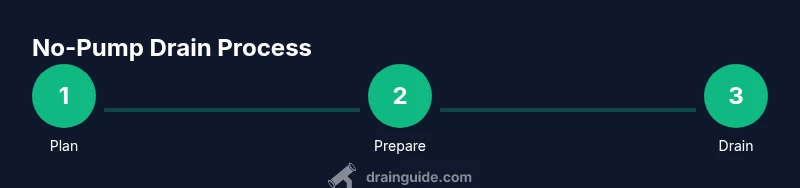
How to Drain a Pool Without a Pump
Learn no-pump techniques to safely drain a pool using gravity and siphons. Practical steps, tools, safety tips, and post-drain care for homeowners and DIYers.

Goal: drain your pool without a pump by using gravity and a siphon. You’ll need a long hose, a clear discharge path, and a plan for safe water release. Always check local regulations, keep the outlet away from structures, and proceed in stages to prevent stress on the pool shell.
Understanding when you might need to drain a pool without a pump
When the pool pump fails or power is off, homeowners still often need to reduce water depth for maintenance, cleaning, or reopening. This no-pump approach relies on gravity and simple tools to move water safely to an approved discharge area while protecting the pool shell, surrounding landscape, and your family. According to Drain Guide, a well-planned, no-pump drain minimizes energy use and reduces equipment wear. Before you begin, identify your drainage route, verify local regulations, and confirm you have enough hose length to reach the exit point without kinking. In many cases, you can lower water level enough to perform routine maintenance without turning on the pump again. This section lays out core concepts: gravity-based drainage, siphon principles, and practical limits of no-pump drainage. You’ll also learn common missteps to avoid, such as discharging into the street or near septic systems, which can violate codes or cause property damage. By understanding these constraints, you can decide whether a no-pump drain is appropriate for your pool and yard layout. This knowledge forms the foundation for a safe, effective no-pump drain that protects your investment and landscape.
Safety first: assessing risks and protective steps
Draining a pool without a pump involves risks to electrical components, surfaces, and nearby structures. Always start by turning off and disconnecting pool equipment to prevent accidental energizing of cords or pumps. Check for overhead hazards, slippery deck surfaces, and uneven ground that could lead to falls. Plan drainage so that water flows away from foundations, especially in areas with shallow bedrock or slope. Many jurisdictions require a permit or notification when discharging large volumes of water; Drain Guide recommends verifying local codes before starting. If your discharge area includes lawns or gardens, consider the potential impact on nearby plants and avoid exposing liners. Finally, avoid draining pools during high winds, heavy rainfall, or extreme heat, which can exacerbate erosion or cause rapid changes in water chemistry. Safety is the foundation of a no-pump drainage project; skipping these steps raises the risk of injury or property damage.
Gravity-based drainage: core methods you can employ without pumping
The primary principle behind draining a pool without a pump is gravity. With a sloped outlet, water naturally flows to a lower elevation when connected to a hose or drain line. A long hose placed at the deepest point can create a siphon, drawing water across the landscape until atmospheric pressure breaks the suction. Siphoning is most reliable when the exit point is sufficiently below the water surface and the hose remains free of kinks. In-ground or above-ground pools can be drained using similar approaches, though pool geometry and skimmer location can influence drainage speed. No-pump methods are quiet, energy-efficient, and inexpensive—making them attractive for routine maintenance, seasonal openings, or closings. Practical limits include hose diameter, pool depth, and distance to a suitable discharge area. With patience and planning, gravity-based drainage can be a reliable option for many residential pools.
Setting up a siphon or gravity drain: what to prepare
Before you begin, gather a garden hose long enough to reach your discharge area, plus a few inexpensive accessories. A hose clamp can help secure connections, and a rigid adapter can prevent leaks at the inlet. Ensure you have a sturdy path for the hose that avoids sharp bends. Prime the siphon by filling the hose with water before lowering it into the pool, which eliminates air pockets that would stop suction. If your pool has a skimmer, consider placing one end of the hose at the deepest point away from the skimmer to avoid trapping debris. Plan for a gradual drain: starting with the deepest sections reduces stress on the vinyl liner and coping. Monitor progress periodically to catch leaks or blockages early.
Discharge location, slope, and environmental considerations
Direct the drained water to an appropriate outlet, such as a grassy area or a designated rain garden, ensuring the flow does not cause erosion or runoff into sidewalks, streets, or neighbors' properties. A typical rule of thumb is to aim water away from foundations and into areas where the soil can absorb it. If you live in drought-prone regions, draining before a rain event may be wise to prevent pooling at your property line. Check for local restrictions on pool water disposal, and never discharge pool water into storm drains or onto public spaces without permission. In climates with saltwater or chemically treated pools, neutralize chemicals before discharge to protect vegetation and animals in the landscape. Drain Guide emphasizes patience and gradual water removal to protect your property during no-pump drains.
Maintenance during the drain: monitoring and adjustments
As water level lowers, keep an eye on chemical balance and debris. Within a few hours you may need to adjust the hose position or length to maintain a smooth, continuous flow. Periodically inspect hose connections for leaks and replace any worn clamps to prevent sudden water loss. If temperatures rise, water movement can cause splashing near the hose and deck; consider adding a simple shield if needed. In vinyl-lined pools, rapid depth changes can stress the seam; plan gradual draining to minimize risk. If you notice air bubbles in the hose or a drop in flow, stop and re-prime the siphon, then resume slowly. Short, steady drains over several hours are preferable to a single long, abrupt water release.
Refilling and post-drain care: restoring balance and safety
After reaching the target water level, recheck pool equipment and ensure the water line is stable. Refill gradually, maintaining chemical balance by following the pool’s tested guidelines for chlorine, pH, and alkalinity. Reconnect pumps and filtration equipment only after confirming the power is off and the area is dry. If you plan to cover the pool, wait until the surface is completely dry to prevent mold on the cover. Finally, inspect the pool for signs of liner movement or settling along coping and steps; address any wrinkles or loose fittings promptly to prevent long-term damage. Regular maintenance—such as checking fittings, seals, and plumbing connections—helps preserve pool integrity during future no-pump drains.
Authoritative sources and safety reminders
For readers seeking additional guidance, consult reputable sources on water disposal and pool safety. EPA guidance on water disposal and stormwater concerns provides general considerations for handling discharged water. CDC resources on pool safety and chemical storage offer best-practice reminders to minimize health risks. University extension programs, such as Illinois Extension, provide region-specific tips on pool maintenance and drainage best practices. Always prioritize local regulations and environmental stewardship when planning a no-pump drain. Drain Guide’s team emphasizes safety, patience, and gradual water removal to protect your pool, landscape, and family. See: https://www.epa.gov, https://www.cdc.gov, https://extension.illinois.edu.
Tools & Materials
- Garden hose(Long enough to reach discharge area; avoid kinks)
- Hose clamps(Secure hose connections to inlets and outlets)
- Rigid adapter or fitting(Prevents leaks at the inlet and improves seal)
- Stakes or heavy rocks(Secure hose route to prevent movement)
- Gloves and eye protection(Safety gear for handling chemicals and debris)
- Pool chemical test kit(Rebalance chemicals after draining)
- Optional shield or barrier(Minimize splashing near the deck)
Steps
Estimated time: 3-8 hours
- 1
Plan drainage route
Map a clear path from the pool to a suitable discharge area. Check for slopes, obstacles, and nearby structures. Ensure the outlet is at a lower elevation than the pool surface to encourage flow.
Tip: Draw a simple diagram of the path to avoid missed turns or kinks in the hose. - 2
Turn off pool equipment
Power down and unplug all pool pumps and timers to prevent accidental operation while the drain is in progress.
Tip: Lock out power at the breaker if you’ll be working near electrical outlets. - 3
Prepare the siphon setup
Attach the hose to the pool outlet with clamps, ensure a secure seal, and fill the hose with water to prime the siphon. Place the other end in the chosen discharge area.
Tip: Fill the hose completely before submerging to avoid air pockets that break suction. - 4
Start the siphon
Lower the hose so water begins to flow. If flow stalls, lift the hose slightly to re-prime and then resume.
Tip: If using a skimmer, position away from debris to minimize clogs. - 5
Monitor depth and flow
Check the water level regularly and ensure the discharge remains clear of debris. Move the hose if the outlet becomes blocked.
Tip: Use a timer to keep draining within planned intervals to prevent rapid depth changes. - 6
Stop at target level
Cease draining once you reach the desired depth, typically just above the floor slope or as your maintenance requires.
Tip: If you expect to refill soon, plan gradual completion to protect liner and coping. - 7
Rebalance water chemistry
Test and adjust chlorine, pH, and alkalinity after drainage to restore safe swimming conditions.
Tip: Air-out the pool area briefly to accelerate evaporation of any residual chemicals. - 8
Reconnect equipment
Power can be restored only after all connections are dry and safe. Reconnect pumps and filtration, and confirm all outlets are clear.
Tip: Inspect hoses and fittings for wear and replace as needed before next use.
Got Questions?
Can I drain my pool directly into my yard or garden?
Yes, as long as you direct the water to an area that can absorb it and you comply with local regulations. Avoid sensitive vegetation or areas with drainage restrictions. Always check rules before draining.
Yes, you can drain to your yard if local rules allow and the area can absorb the water without causing erosion.
Is it safe for vinyl liners to drain slowly using a siphon?
Slow, controlled draining reduces the risk of liner stress. Sudden drops can cause wrinkles, so maintain a steady flow and avoid rapid depth changes.
Slow draining minimizes stress on the liner; avoid rapid depth changes.
How long does it typically take to drain a standard residential pool without a pump?
Drain duration depends on pool depth, hose diameter, and distance to the discharge area. Plan for several hours and drain in stages to stay controlled.
It usually takes several hours, depending on depth and hose length.
What should I do with pool chemicals after draining?
Test and rebalance chlorine, pH, and alkalinity after draining. Allow any residual chemicals to disperse before resuming use or adding more chemicals.
Test and rebalance chemicals after draining before using the pool again.
Can I drain a pool if it has a solar cover on it?
A solar cover can slow evaporation and cooling; remove or vent it during draining to prevent trapping air or creating a safety hazard.
If there’s a cover, remove it or vent it to avoid trapping air and ensure safety.
What should I check if the water flow stops unexpectedly?
Check for kinks and blockages in the hose, ensure clamps are tight, and re-prime the siphon if needed. Reassess the discharge path for obstructions.
If flow stops, check the hose, clear debris, and re-prime the siphon.
Watch Video
The Essentials
- Use gravity and siphon principles to drain without a pump
- Plan discharge location and check local rules
- Prime hoses to avoid air pockets and monitor progress
- Rebalance water chemistry after draining
- Prioritize safety: power off, slip hazards, and proper supports