How to Drain a Sink When the Garbage Disposal Is Broken
A comprehensive, step-by-step guide for homeowners to drain a kitchen sink when the garbage disposal is malfunctioning, with safety checks, tools, hands-on instructions, and prevention tips.

If the garbage disposal is broken, you can still drain the sink by removing standing water, clearing the trap, and using a plunger or drain snake to clear the blockage. Start by cutting power to the disposal, then empty the sink, remove the P-trap, and run hot water through the drain to flush debris.
Understanding the Scenario: When the Garbage Disposal is Broken
A kitchen sink can back up or drain slowly for several reasons, and a broken garbage disposal is one of the most frustrating. Common failures include a jammed impeller, a burned-out motor, or an electrical fault that prevents the unit from running. Even if the disposal won’t turn on, you can still manage the water in the sink and clear the lines beneath the basin. This guide covers how to drain the sink safely and effectively when the disposal is broken, using mechanical methods you can perform without specialized tools. The goal is to prevent overflow, reduce mess, and buy time until you can arrange a repair or replacement. By following these steps, you’ll understand how to drain the sink when the garbage disposal is broken and keep your kitchen usable while you plan next steps.
Safety First: Power Down, Tools, and Prep
Before touching any plumbing under the sink, you must ensure the disposal is not powered. Flip the wall switch to off and, if possible, switch off the circuit breaker dedicated to the disposal. This is essential to avoid accidental starts that could injure hands or wrists. Gather a few basic tools and materials so you don’t have to leave the work area mid-task. Wear sturdy gloves to protect your hands from sharp edges, and keep a towel nearby for spills. A flashlight helps you see deep under the sink where grime, water, and metal fittings live. Having a plan and the right gear reduces the risk of a messy, prolonged job.
Before You Start: Quick Diagnostics
Assess the current drainage behavior to determine your best approach. Run water into the sink from the faucet and observe whether the water sits, drains slowly, or begins to back up into the other basin (if you have a double sink). If the disposal is clearly non-operational and the water is backing up, the blockage is likely in the drain line or trap rather than the unit. If only one side drains slowly, focus on the corresponding drain path. Document what you see so you can choose the most effective method.
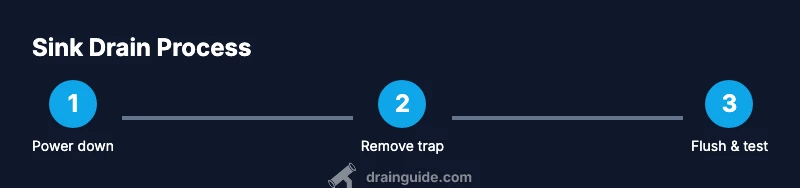
Step-by-Step Plan to Drain the Sink Without a Working Disposal
This section maps out a practical plan you can follow end-to-end. It emphasizes mechanical clearing and trap maintenance rather than chemical solutions, which helps preserve pipe integrity. You’ll start by removing water and then addressing the trap, followed by optional snaking for stubborn clogs. Remember to re-check drainage after each major action to avoid rework.
Disassembly: Clearing the P-Trap and Debris Removal
The P-trap is the curved pipe beneath the sink that catches debris to prevent sewer gases from entering living spaces. If water drains slowly or not at all, the trap is a common culprit. Place a bucket under the trap to catch water, then loosen the nuts with an adjustable wrench or pliers. Keep the trap level to prevent spills and keep any gasket washers intact when you reassemble. Inspect the interior of the trap for hair, food scraps, or mineral buildup, and clean thoroughly with a brush or cloth.
Alternative Methods: Plunger, Drain Snake, and Enzymatic Cleaners
If the trap appears clear but drainage remains slow, try other non-chemical methods first. A cup plunger designed for sinks can dislodge clogs if you seal the drain and push in a controlled rhythm. A hand-crank drain snake or auger can reach deeper into the drain line. Enzymatic cleaners can help with organic buildup, but avoid strong chemical cleaners that could damage pipes or interact with a damaged disposal. Use these methods step by step to avoid pushing a clog farther into the system.
Flush, Reassemble, and Test the Drainage
After clearing the trap and addressing the blockage, reassemble the P-trap and snug both nuts. Run hot water for several minutes to rinse debris and confirm the drain flows freely. Check for leaks at the joints and tighten if necessary. If drainage remains slow, you may need to repeat the trap cleaning or proceed to snake the line. Finally, re-check the sink’s drainage over the next several hours to ensure the issue doesn’t recur.
When to Call a Professional and How to Prevent Future Clogs
If you cannot clear the clog with the above methods or observe persistent backups, contact a licensed plumber. Replacing a faulty garbage disposal may also be necessary if it interferes with the plumbing system. To prevent future clogs, avoid dumping fibrous or starchy foods into the sink, run plenty of water while using the disposal when it is operable, and perform periodic trap cleaning. Regular maintenance reduces the likelihood of future drain problems.
Tools & Materials
- Rubber plunger (sink style)(Flat-bottom design for a good seal on the kitchen sink)
- Bucket (2–3 gallons)(Catch water and debris during trap removal)
- Adjustable wrench(Loosen P-trap nuts without slipping)
- Channel-lock pliers(Helpful if fittings are tight)
- Dish soap(A few drops can help slick the trap for removal)
- Handheld flashlight(Inspect dark under-sink areas)
- Drain snake / auger(Use if plunger fails to clear deeper clogs)
- Old towels or rags(Mop up spills and protect floors)
- Replacement P-trap washers(Keep replacements on hand in case of leaks)
- Sturdy utility gloves(Protect hands from sharp edges and grime)
Steps
Estimated time: 45-75 minutes
- 1
Power down and prep
Turn off the disposal at the wall switch and, if safe, switch off the circuit breaker. Gather all tools and lay towels to catch any drips. This initial step prevents accidental starts and keeps the workspace clean.
Tip: Double-check the switch location and, if possible, unplug the disposal outlet for extra safety. - 2
Empty the sink and set up the work area
Stop the water flow by closing the faucet and remove standing water with a cup or small container. Place a bucket under the trap area and keep a towel handy for spills. Clearing water reduces splashing during trap removal.
Tip: Have extra towels ready in case water leaks from fittings when the trap is loosened. - 3
Locate and prepare the P-trap
Slide a bucket under the P-trap and inspect the area for corrosion or damage. Loosen the trap nuts with the adjustable wrench so you can remove the trap without releasing a flood.
Tip: Hold the trap steady as you loosen nuts to prevent the pipe from moving and spilling more water. - 4
Remove the P-trap and inspect
Carefully detach the P-trap and clear its interior of hair, grease, and debris. Rinse the parts with water and check the washers for signs of wear. If the trap is cracked, replace it before reassembly.
Tip: Keep the trap pieces organized so you can reassemble them quickly. - 5
Clean and reassemble the trap
Reassemble with new or good-condition washers. Hand-tighten first, then snug with the wrench—avoid overtightening, which can crack fittings. Wipe the area clean and remove any stray debris.
Tip: Apply a small amount of plumber’s tape to threaded joints if leaks persist after tightening. - 6
Flush the drain and test
Run hot water through the drain for several minutes to flush debris. Observe for any slow drainage or leaks at joints. If the water drains slowly, repeat trap cleaning or try a hand auger.
Tip: Do not mix hot water with cold water aggressively as it can loosen grease unexpectedly. - 7
Use a drain snake if needed
If the trap area is clear but the line remains blocked, insert a drain snake into the drain and rotate to break up the clog. Retract slowly to pull out material and reduce the chance of pushing the clog deeper.
Tip: Work in short twists and pull back frequently to avoid tangling hair or fibers. - 8
Final cleanup and monitoring
Wipe surfaces, store tools, and monitor drainage over the next several uses. If odors persist, consider flushing with a mild cleaner or repeating steps as needed. Keep a maintenance schedule to prevent future clogs.
Tip: Document any recurring drainage issues so you can discuss with a plumber if needed.
Got Questions?
Can I drain the sink without using the disposal?
Yes. You can drain the sink by removing the P-trap and clearing the trap and drain line with a plunger or drain snake, then flushing with hot water.
Yes. You can drain the sink by removing the P-trap and clearing the line with a plunger or snake, then flushing with hot water.
What tools are essential for this task?
Key tools include a rubber plunger, adjustable wrench, bucket, flashlight, drain snake (optional), and gloves. Having towels on hand helps keep the area clean.
Key tools include a plunger, adjustable wrench, bucket, flashlight, and gloves. A drain snake is optional but helpful.
What if the P-trap is cracked?
If the P-trap is cracked, replace it with a new one of the same size and material. Leaks can lead to water damage and sewer odors.
If the trap is cracked, replace it with a new one to prevent leaks and odors.
How can I prevent future clogs in a kitchen sink with disposal?
Avoid feeding fibrous or starchy materials into the disposal and run plenty of cold water while grinding. Regular trap cleaning also helps.
Avoid fibrous or starchy waste and run water while using the disposal. Clean the trap periodically.
Can I use baking soda and vinegar to clean the drain?
You can use baking soda and vinegar for routine cleaning, but do not rely on them to clear a serious clog behind a broken disposal. Mechanical clearing is often necessary.
Baking soda and vinegar can help with minor buildup, but for a real clog, mechanical clearing is usually required.
When should I call a professional?
If you cannot clear the clog after trying basic methods, or you suspect a damaged disposal or sewer line, contact a licensed plumber for a safe, permanent fix.
If you can't clear the clog or suspect deeper damage, call a licensed plumber.
Watch Video
The Essentials
- Power down the unit before starting any work.
- Remove and clean the P-trap to clear most kitchen clogs.
- A plunger or drain snake can unblock stubborn lines.
- Reassemble carefully and test drainage before finishing.
- Call a professional for persistent backups or damaged disposal.