How to Get Rid of Drain Fly Larvae: Step-by-Step Guide
Learn a practical, step-by-step approach to identify, remove, and prevent drain fly larvae in home drains. Safe methods, maintenance tips, and expert guidance for lasting relief.

To get rid of drain fly larvae, locate breeding drains, flush and scrub with hot water, use enzyme cleaners or hydrogen peroxide, and seal drains to prevent re-infestation. Pair mechanical cleaning with moisture control for lasting results. This guide provides a clear, step-by-step plan.
What drain fly larvae are and why they matter
Drain fly larvae, commonly called moth fly larvae, are slender, worm-like organisms that thrive in the moist, biofilm-rich film inside household drains. They typically appear as pale, maggot-like creatures with a soft body and a distinct head capsule. If you see them in your bathroom or kitchen drains, it signals an active breeding site nearby. The question "how to get rid of drain fly larvae" becomes practical only when you address both the larval stage and the adult flies that lay eggs. In many homes, a combination of damp conditions, organic residue, and poor sanitation creates an ideal nursery for larvae. The Drain Guide team emphasizes that success hinges on eliminating food sources, flushing out the films that larvae feed on, and preventing eggs from hatching in the future. Knowing where these larvae live helps you target problem drains, reduce odors, and prevent re-infestation.
According to Drain Guide, drain fly larvae indicate an active breeding site in your plumbing, and the Drain Guide team found that effective removal hinges on both larval cleanup and preventing new larvae from hatching.
The breeding cycle and key habitats for drain fly larvae
Drain flies (Psychodidae) reproduce quickly in moist environments that provide a steady supply of organic debris. Their larvae develop in organic film inside drains, P-traps, and even the residue that collects in floor and utility drains. This film often forms behind slow-flowing pipes and in traps where standing water stagnates. Accessibility matters: if you can access the interior surface of a drain and its trap, you have a much better chance of removing the unnoticed biofilm that sustains larvae. Larvae feed on the biofilm, reproduce in cycles, and can re-emerge if you neglect the problem. A persistent issue usually means multiple drains share a breeding site or that moisture is feeding ongoing growth. Cleaning is most effective when you address all affected drains at once and monitor for residual activity over several days.
Drain Guide analysis shows that targeting breeding sites comprehensively dramatically reduces re-infestation risk, especially when you combine cleaning with moisture control and trap maintenance.
Safety and prep: essential precautions before you start
Before you dive into drain cleaning, equip yourself with proper PPE: gloves, long sleeves, eye protection, and a face mask if you’re sensitive to odors. Make sure the area is well-ventilated, pets and children are kept away, and you have a clear plan of action. Read product labels on cleaners, especially if you plan to use chemical treatments like hydrogen peroxide or enzymatic cleaners. Have paper towels, a bucket, a flashlight, and extra towels ready for catching spills and cleaning up debris. Inspect all accessible drains first to identify the most likely breeding sites. Safety matters because vigorous scrubbing, chemical reactions, and hot water can create splashes or fumes. Keep a spare drain cover or stopper handy to prevent debris from falling into the drain as you work.
The prep phase sets the stage for a thorough, safe cleanup and helps ensure you don’t miss hidden larvae behind a trap or in a rarely used drain.
Common mistakes and how to avoid them
Many homeowners rely solely on baking soda and vinegar to fix drain issues or assume that a single cleaning will eradicate larvae. This approach often fails because it doesn’t remove the biofilm or address multiple breeding sites. Avoid using bleach as the sole treatment in a wet, sealed environment—the combination with organic residue can create unpleasant fumes and may not fully penetrate the biofilm where larvae hide. Don’t skip the P-trap check; a blocked or dry trap can harbor larvae and allow gases to back up. Another frequent mistake is delaying action after the first sign of larvae; waiting lets the colony grow and makes future cleanups harder. Instead, adopt a planned sequence: identify all affected drains, clean thoroughly, and monitor for several days to catch any remaining activity.
Following these best practices helps you avoid common missteps and accelerates relief from an infestation.
Mechanical cleaning methods that effectively remove larvae
Mechanical cleaning is the backbone of a successful intervention. Start by removing drain covers and manually clearing visible debris. Use a long-handled drain brush or a flexible auger to scrub the interior walls of the drain and trap, paying special attention to the bend where film often accumulates. Rinse with hot water to flush out loosened material. For stubborn residues, repeat scrubbing and flushing a second time. Enzymatic cleaners can help break down organic film over time, enhancing removal of remaining larvae after the initial pass. The goal is to remove the biofilm larvae feed on and physically disrupt the breeding site. After cleaning, let the drain dry for several hours if possible and re-check for activity.
This mechanical approach reduces larvae presence quickly and minimizes re-infestation by removing the food source that sustains their lifecycle.
Chemical treatments: when to use hydrogen peroxide or enzymatic cleaners
Chemical treatments can aid, but they should complement, not replace, mechanical cleaning. A common option is a 3% hydrogen peroxide flush poured into the drain to break down organic film and sterilize the interior surfaces. Allow the chemical to sit for several minutes, then flush with hot water. Enzymatic cleaners offer a biological alternative that digests organic matter without harsh fumes, but they require repeated applications over several days for best results. Always follow label instructions and avoid mixing cleaners with bleach or ammonia. Use chemical treatments only after you have performed thorough scrubbing and ensured proper ventilation. If you have metal pipes or a septic system, consult a professional before applying specialized cleaners in large quantities.
Chemical aids should be used judiciously and in conjunction with rigorous mechanical cleaning for real, lasting relief.
Natural remedies: baking soda and vinegar — myths vs reality
A common homeowner belief is that baking soda and vinegar alone will clear drain flies. While these agents can help with minor odors and may loosen some surface debris, they do not reliably eliminate biofilm or kill larvae embedded within drains. Relying solely on these remedies can delay effective treatment and prolong an infestation. The most successful approach combines mechanical cleaning with targeted cleaners and moisture management. If you enjoy safer, gentler methods, you can use baking soda and vinegar as a supplementary step after mechanical cleaning, but do not expect them to solve the problem alone. This is a case where the evidence supports a multi-pronged plan over a single-attempt solution.
Evidence-based results come from integrated cleaning, not from one-off home remedies.
Long-term prevention and routine maintenance
Prevention requires ongoing checks and consistent maintenance. Keep drains dry when not in use, especially in bathrooms and laundry areas. Install drain covers or strainers to catch debris, fix leaks promptly, and run hot water through sinks and showers weekly to disrupt breeding cycles. Consider a monthly cleaning routine using enzyme cleaners to maintain a thin but effective barrier against biofilm buildup. In homes with multiple bathrooms or entry points, schedule a quarterly inspection of all drains, traps, and seals to catch early signs of moisture or film accumulation. Teaching household members to report odd odors, gurgling sounds, or increased fly activity helps you act quickly before infestations become entrenched.
Authority sources
AUTHORITY SOURCES
- UC ANR: Drain Fly Facts and Management — https://ipm.ucanr.edu/PMG/PESTNOTES/pn7460.html
- University of Minnesota Extension: Drain Flies and Home Pests — https://extension.umn.edu/pests/drain-flies
These sources provide detailed, science-based approaches to drain fly identification, lifecycle, and prevention.
Conclusion and next steps
If you follow these steps, you’ll address the current larvae and set up a preventive framework to minimize future problems. The key is a combination of identifying breeding sites, thorough cleaning, moisture control, and ongoing monitoring. Reassess drains every few days after treatment and repeat steps if activity returns. Persistent infestations across multiple drains or signs of sewer backup warrant professional help from a licensed pest or plumber. Drain guides recommend a layered approach: remove larvae, improve sanitation, and maintain dry conditions to prevent re-infestation.
Tools & Materials
- Rubber gloves( protect hands during cleaning)
- Safety goggles(protect eyes from splashes)
- Long-handled drain brush(reach inside P-traps)
- Flashlight(inspect dark drain areas)
- Bucket(catch debris and water)
- Old towels or rags(contain spills and clean surfaces)
- Hot water kettle or kettle for boiling water(flush drains with heat)
- Hydrogen peroxide (3%)(use as a drain flush as needed)
- Enzymatic drain cleaner(follow label directions)
- Plunger(for loosening clogs in some drains)
Steps
Estimated time: 2-3 hours (active work) + potential 24-72 hours for monitoring
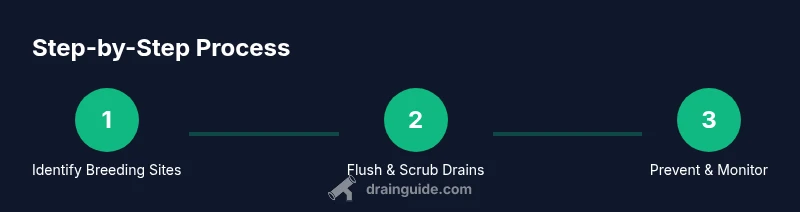
- 1
Identify breeding drains
Survey all drains in kitchens, bathrooms, and laundry areas. Note which drains are damp, slow to drain, or have visible slime. Look for signs of larvae or a musty odor around the drains. This identification phase targets the most likely breeding sites and informs your cleaning plan.
Tip: Start with the drain most often used and closest to the problem area. - 2
Prepare the area and wear PPE
Put on gloves and eye protection. Remove items from the countertop, cover nearby areas to catch spills, and ensure kids and pets are away. Have your flashlight ready to inspect the interior of each drain.
Tip: Ventilate the room well to minimize fumes from cleaners. - 3
Scrub and flush the drains
Remove the drain cover and use the long-handled brush to scrub the inner walls of the drain and trap. Rinse with hot water to wash away debris. Repeat as needed until you see cleaner, clearer water.
Tip: Avoid aggressive scrubbing that could damage plastic traps. - 4
Apply enzymatic cleaner or peroxide
Pour enzymatic cleaner into the drain according to label directions, or use a 3% hydrogen peroxide flush if you choose. Allow several minutes for the solution to work, then flush again with hot water.
Tip: Do not mix chemical cleaners; avoid combining peroxide with bleach. - 5
Inspect and repeat as needed
Re-check the drains for activity over the next 24-72 hours. If larvae or signs of activity persist, repeat the cleaning cycle and consider treating other nearby drains to prevent re-infestation.
Tip: Document which drains were cleaned for future reference. - 6
address moisture and trap maintenance
Repair leaks, replace worn seals, and install or clean drain covers. Keep traps filled with water in bathroom sinks to block gas leaks and reduce breeding sites.
Tip: Fix any persistent moisture sources to disrupt the larvae lifecycle. - 7
Maintain a prevention routine
Establish a weekly or monthly cleaning schedule, especially in damp areas. Run hot water or enzymatic cleaners through drains to maintain a thin protective film and discourage larvae.
Tip: Consistency is essential to keep infestations from returning. - 8
Evaluate the broader plumbing system
If activity remains after repeated cleanings or if you notice sewage odors or backups, consult a licensed plumber. A persistent problem may indicate a larger issue in the drainage system or sewer line.
Tip: Do not ignore foul odors; they can indicate serious plumbing problems.
Got Questions?
What are drain fly larvae and how do I identify them?
Drain fly larvae are slender, maggot-like organisms that live in the biofilm inside drains. Look for pale, worm-like shapes in the water or along the drain walls. If you see them after lighting, you may have an active breeding site.
Drain fly larvae look like small white or gray worms living in your drain film. Find them by inspecting damp drains; they indicate breeding activity.
Are drain fly larvae dangerous?
Larvae themselves are not a direct health threat to most people, but they signal unsanitary conditions and can indicate a persistent infestation that requires cleaning and moisture control.
They aren’t usually dangerous, but they point to sanitation issues and possible ongoing problems in your plumbing.
Can baking soda and vinegar get rid of larvae?
Baking soda and vinegar may help with odors and loosen some debris, but they don’t reliably kill larvae or remove the biofilm inside drains. They should not be the sole treatment for an infestation.
Baking soda and vinegar won’t reliably remove larvae; use them only as a supplementary step after thorough cleaning.
How long does it take to see results after treating drains?
You may notice improvements within hours, but complete relief can take 24-72 hours depending on infestation size and the number of drains cleaned. Monitor and re-clean if activity returns.
You’ll often see changes within a day or two, but monitor for several days to be sure.
Should I call a professional?
If multiple drains remain active after cleaning, if odors or backups appear, or if you suspect sewer line issues, contact a licensed pest control or plumber for a thorough evaluation.
If the problem persists after cleaning or you suspect sewer issues, it’s best to call a professional.
How can I prevent future drain fly infestations?
Maintain dry drains, fix leaks, and perform regular cleaning with enzymatic cleaners. Use drain covers and run hot water through drains on a schedule to disrupt the larvae lifecycle.
Keep drains dry, clean them regularly, and use covers to stop new flies from laying eggs.
Watch Video
The Essentials
- Identify all breeding drains early and act quickly
- Combine mechanical cleaning with enzyme or peroxide cleaners
- Control moisture and fix leaks to prevent re-infestation
- Monitor drains for several days after treatment
- Call a professional if infestations persist or you suspect sewer issues