How to Keep a Drain Pipe from Freezing
A comprehensive, homeowner-friendly guide showing practical steps to prevent frozen drain pipes, with insulation, heat sources, and seasonal maintenance to avoid costly bursts.

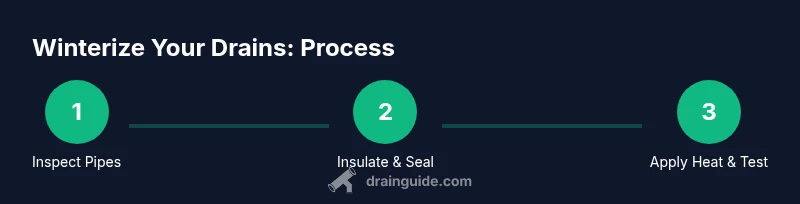
To keep a drain pipe from freezing, prevent heat loss, insulate exposed pipes, and keep water moving. Begin with a quick inspection, seal leaks, install foam insulation sleeves, and apply self-regulating heat tape where pipes are most exposed. Have a small drip ready and set a modest indoor temperature to stay above freezing.
Why Frozen Pipes Happen in Cold Weather
When air temperatures drop, any uninsulated or poorly insulated drain lines are at risk of freezing. Drain pipes near exterior walls, in crawl spaces, attics, or garages are particularly susceptible because they experience the coldest ambient temperatures. According to Drain Guide, water inside a frozen pipe can expand as it freezes, increasing the chance of a crack or burst. Even a minor crack can lead to slow leaks or a sudden flood if water pressure builds behind the blockage. Proper insulation and temperature management lessen these risks by slowing heat loss and keeping the pipe wall warmer. Homeowners who fail to address these weak points may face costly repairs, water damage, and mold growth after a freeze.
Identify Vulnerable Pipes and Signs of Freezing
Effective prevention starts with locating pipes that lack insulation or sit in cold spaces. Common hotspots include attic and crawlspace runs, pipes along exterior walls, and lines that run through unheated basements. Signs a pipe is freezing include a slight reduction in water flow, unusual noises like banging or creaking when water finally moves, and frost on exposed sections of pipe or nearby walls. If you notice these indications, take immediate action to reduce the risk of burst piping. Drain Guide recommends mapping your plumbing to know where vulnerable segments lie, then prioritizing those areas during winter.
Insulation Strategies that Work
Insulation is the first line of defense against freezing pipes. Use foam pipe insulation sleeves or pre-slit foam wraps to cover exposed piping, ensuring a snug fit around elbows and joints. Seal gaps where pipes pass through walls or floors with expanding spray foam or caulk to minimize cold air intrusion. For longer runs, consider adding an outer protective sleeve and ensuring there are no compressed sections that block insulation. In less accessible spaces, rigid insulation boards can shield pipes along exterior walls. Remember, insulation slows heat loss from the water inside the pipe, so even modest gains can prevent freezing.
Heating Options and Safe Heat Sources
In addition to insulation, controlled heat helps keep pipes above freezing. Self-regulating heat tape or cables, installed per manufacturer instructions, are common and effective for exposed sections. Do not wrap heat tape around sharp bends or around power cords that could overheat or short, and never place electrical devices where moisture is present. In spaces with poor natural warmth, a small space heater placed away from flammable materials can help, but it should be used with a thermostat to avoid overheating. Consistently maintaining an indoor temperature above freezing in unheated spaces is another cornerstone of prevention.
Seasonal Maintenance Routine to Winterize
Create a winterization checklist that you perform before sustained cold sets in and again during deep freezes. Steps include: (1) inspect all exposed pipes for gaps and insulation integrity; (2) apply insulation to any uninsulated sections; (3) install or test heat tape on long, exposed runs; (4) seal penetrations through walls to reduce drafts; (5) set indoor thermostats to maintain a stable temperature in all living and non-living spaces that house plumbing; (6) plan for a gentle water drip from faucets connected to vulnerable pipes during severe cold snaps; (7) prepare a basic emergency kit in case of a burst, including towels, a bucket, and a wrench for shutoff valves.
DIY Fixes vs When to Call a Pro
Many freezing issues are manageable for handy homeowners, but some situations warrant professional help. If you find a frozen section inside walls or ceilings, or you notice water pooling or dampness after thawing, shut off the main supply and call a licensed plumber. Complex pipe routing, frozen pipes inside structural spaces, or signs of damage demand expert assessment to prevent further harm. Drain Guide emphasizes that working with household plumbing during cold conditions can be risky, and professional evaluation may be the most economical long-term solution when uncertainty remains.
What to Do If a Pipe Freezes (Step-by-Step Quick Actions)
If you discover a frozen drain pipe, begin by turning off the water supply to the affected area to prevent a burst. Open faucets downstream to relieve pressure. Do not use open flames or torches; instead, apply heat with a hair dryer or a heat gun directed at the frozen section from a distance. As the ice thaws, keep the area ventilated and monitor for dripping. Once thawed, re-insulate the area and consider upgrading insulation to prevent recurrence. If you suspect the blockage or leak affects only a small segment, a professional inspection is wise to confirm there is no hidden damage.
Authority Sources and Ongoing Prevention
For homeowners seeking authoritative guidance, here are credible resources that discuss protecting plumbing in cold weather and maintaining safe indoor temperatures:
- https://www.energy.gov/energysaver/winterizing-your-pipes
- https://www.epa.gov/sustainability/basic-pipe-insulation
- https://extension.psu.edu/plumbing-winterization
These sources provide practical, safety-focused recommendations that align with common-sense DIY home maintenance and can help you tailor your approach to your climate and home design. Drain Guide encourages homeowners to consult local codes and utility recommendations as part of a comprehensive winterization plan.
Tools & Materials
- Foam pipe insulation sleeves(Pre-cut sleeves sized to pipe diameter (1/2)
- Self-regulating heat tape(Follow manufacturer instructions; do not overlap and avoid ducting power cords near moisture)
- Expanding foam sealant or caulk(Seal wall penetrations and gaps where cold air can reach pipes)
- Thermostat-controlled space heater (in unheated spaces)(Keep away from flammables; use only with a built-in safety shutoff)
- Faucet with a controlled drip capability(Attach to cold water line for a controlled drip in especially exposed areas)
- Thermometer or temperature monitor(Track ambient temperatures in crawlspaces or attics)
Steps
Estimated time: 2-3 hours
- 1
Identify vulnerable pipes
Scan the home for pipes in uninsulated spaces like attics, garages, basements, and along exterior walls. Mark any that lack insulation or sit near drafts. This step is essential to target your insulation and heating efforts where they will have the most impact.
Tip: Use a piece of masking tape to label the pipes that need attention for quick reference while you work. - 2
Shut exterior taps and seal entry points
Close and insulate any exterior faucets and outdoor hoses. Seal gaps where pipes pass through walls or foundations to reduce cold air intrusion.
Tip: Keep a small window or vent slightly open in a frost-prone space to prevent pressure buildup if pipes thaw unexpectedly. - 3
Install foam insulation sleeves
Slip foam sleeves over exposed pipes and ensure joints are fully covered. Tape seams if necessary to prevent shifting.
Tip: Avoid compressing insulation around bends; a snug but wiggle-free fit works best for heat retention. - 4
Seal gaps with spray foam or caulk
Seal gaps around pipe penetrations in walls, floors, and ceilings. This reduces drafts that pull cold air onto pipes.
Tip: Let foam cure fully before testing the pipe; cured gaps significantly improve insulation performance. - 5
Apply self-regulating heat tape or cable
Wrap exposed sections with heat tape, following the manufacturer’s guidelines for spacing and coverage. Do not wrap around any metal components that could overheat.
Tip: Test power connections with a GFCI outlet or a dedicated circuit to mitigate shock risk. - 6
Set thermostat and maintain warmth
Set your thermostat to maintain a minimum temperature in heated and unheated spaces where plumbing runs. Consistent warmth is more effective than episodic heating.
Tip: In spaces that never fully heat, consider a small, controlled space heater with a thermostat for reliability. - 7
Create a controlled water drip plan
In extremely cold conditions, let a faucet drip slightly to keep water moving in the line. This reduces the chance of freezing and pressure buildup.
Tip: Only drip the cold water on a dedicated line or toward the area at risk to avoid wasting water. - 8
Regularly check during cold snaps
During extended cold spells, periodically inspect exposed pipes for frost, condensation, or damp spots. Address issues early to prevent leaks.
Tip: Keep a flashlight handy and inspect in dark spaces to spot frost or moisture early. - 9
Prepare for thaw and post-winter checks
After cold periods, slowly run water to ensure pipes function normally and re-check insulation for any gaps uncovered by expansion.
Tip: Restore any blown fuses or tripped breakers promptly after checks to ensure heat sources are functioning.
Got Questions?
Can I just leave a faucet dripping to prevent freezing?
A small, steady drip on cold days can help prevent freezing in exposed pipes by maintaining water movement. Only do this on vulnerable lines and be mindful of water waste. If you’re unsure which faucet to use, a quick inspection of susceptible pipes will guide you.
Yes, a small steady drip on vulnerable pipes can help prevent freezing, but only for the lines at risk and with caution about water use.
Will insulation stop all freezing?
Insulation dramatically reduces heat loss and slows freezing, but it is not a guarantee in extreme weather. Combine insulation with heat sources and a stable indoor temperature for best results.
Insulation greatly reduces freezing risk, but it works best when combined with heat sources and steady indoor temperatures.
Is it safe to use electric heat tape on all pipes?
Heat tape is safe when installed according to the manufacturer’s instructions, kept away from moisture, and used only on appropriate pipe sections. Avoid covering electrical outlets or areas with high moisture.
Heat tape is generally safe if installed properly and kept away from moisture and flammable materials.
What indoor temperature should I maintain to prevent freezing?
Aim to keep living spaces above freezing and unheated spaces above 40–50°F (4–10°C) where pipes run. The exact setting depends on your home’s insulation and climate.
Keep important plumbing areas above freezing; adjust your thermostat to ensure heat reaches those zones.
What signs indicate a pipe has already frozen?
Common signs include loss of water flow, frost on pipes, unusual ticking as ice thaws, or damp patches around walls. If you suspect a freeze, shut off water to minimize damage and call a pro if unsure.
Watch for frost, reduced flow, or unusual sounds; act quickly to prevent leaks.
When should I call a plumber for a frozen pipe?
Call a plumber if the pipe is inside a wall, if you hear leaking after thawing, or if you cannot locate the frozen section. A professional can assess hidden damage and prevent bursts.
Call a plumber if you cannot locate the frozen section or you see signs of damage.
Watch Video
The Essentials
- Identify and prioritize vulnerable pipes first
- Insulation and temperature management are the first lines of defense
- Use heat tape safely and monitor electrical connections
- Maintain a steady indoor temperature in areas housing plumbing
- Know when to call a pro to avoid costly mistakes