How to Winterize Drains: A Homeowner's Guide
Learn how to winterize drains with a homeowner-friendly, step-by-step approach that protects sinks, showers, and outdoor lines from freezing temperatures, reduces leaks, and keeps your plumbing healthy through the cold season.

Winterizing drains helps prevent frozen pipes, backups, and sewer odors during cold months. This guide provides a practical, step-by-step plan you can follow for sinks, showers, and outdoor lines. Gather insulation, tape, a bucket, and basic tools before you start. Your goal is to seal, insulate, and test each drain so water flows freely when temperatures drop.
Why winterize drains matters
Winter conditions test the resilience of residential plumbing. Freezing nights, rapid temperature swings, and damp spaces in crawl spaces or basements create opportunities for trapped water to freeze, pipes to crack, and slow drainage that becomes a backup when thaw arrives. According to Drain Guide, proactive winterization reduces the risk of costly repairs and long outages by addressing the root causes before cold air moves in. The goal is simple: minimize standing water in vulnerable segments, seal drafts around exposed pipes, and ensure every drain remains functional when temperatures drop. Start by prioritizing drains that consistently show signs of trouble—kitchen and bathroom sinks under cabinets, outdoor hose bibs, washer drains, basement floor drains, and any lines running through unheated spaces. With a clear map in hand, you can apply targeted insulation, seal gaps, and test flows so you stay ahead of winter’s bite.
How freezing temperatures affect drain systems
When outdoor temperatures plunge, water in pipes can freeze, expand, and push against the pipe walls. In unheated spaces, long runs to distant fixtures become vulnerable, and even small leaks can worsen as ice forms. Traps, vents, and cleanouts can dry out or clog if water is stagnant, increasing the risk of sewer gas or backups once the system thaws. Insulation slows heat loss and helps keep water moving, but it’s not a substitute for proper shutoffs and venting. By understanding which components are most at risk—trap seals, exposed copper or PEX runs, floor drains in basements, and outdoor lines—you can prioritize protective steps and reduce the likelihood of costly cold-weather failures.
Key terms explained
To navigate winterization confidently, it helps to know a few terms. A trap is the curved pipe under each fixture that holds water to block sewer gas. A cleanout provides access to clear a clog. A vent allows air in to stop siphoning and keep drainage moving. Insulation wraps around pipes and fixtures to reduce heat loss. A floor drain is a common winter vulnerability in basements or garages. Understanding these parts helps you target the right actions without overspending or overreaching.
Identify vulnerable drains in your home
Begin with a practical survey: list every drain in heated and unheated spaces—kitchen sinks, bathroom sinks, laundry areas, showers, floor drains in basements or garages, utility sinks, and outdoor hose bibs. Check the condition of trap seals by looking for signs of dryness or odors when fixtures are used. Pay attention to drainage runs through crawl spaces, attics, or garages where cold air can circulate. Create a simple map or digital note that marks each drain’s location and whether insulation or sealing is needed. This prep work makes the subsequent steps faster and reduces the chance of missing a critical drain.
Common mistakes that invite trouble
Several easy missteps can undermine winterization efforts. Sealing vents or exhaust openings can trap moisture and create dangerous pressure build-up. Skipping outdoor shutoffs or neglecting irrigation lines leaves a source of residual water that can freeze. Overusing sealant near critical joints can trap moisture inside walls, potentially causing mold. Inadequate insulation for pipes in crawl spaces or garages lets cold air reach the warmth of your home’s interior. Lastly, attempting to winterize without a plan or without measuring insulation needs often results in gaps that defeat the purpose.
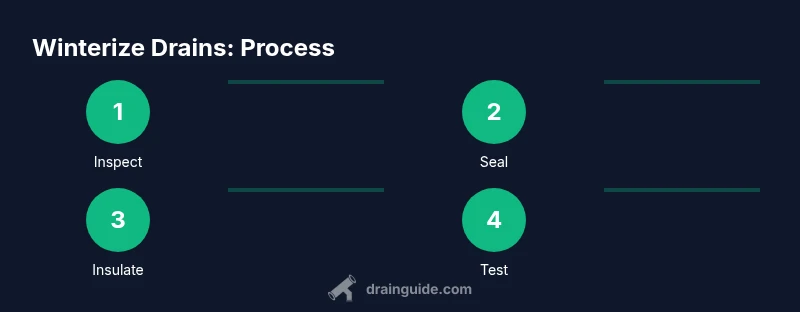
Step-by-step overview of the winterization approach
The approach is straightforward: identify, protect, insulate, seal, test, and document. You’ll focus on outdoor lines first, then indoor fixtures that live in unheated spaces. Use purpose-built insulation materials and weatherproof sealing to minimize cold drafts. Finally, test each drain by running water and observing for leaks or slow drainage, and keep a simple log for next year’s routine.
Indoor drains vs outdoor drains: special considerations
Indoor drains in kitchens and bathrooms often have accessible traps and relatively short runs, making insulation and sealant easy to apply. Outdoor lines, hose bibs, and irrigation taps often lack protection and are most vulnerable to freezing. In unheated spaces like basements or crawl spaces, ensure pipes are wrapped and any gaps closed. If you have a sump pump, confirm its discharge line remains clear and protected from freezing. For floor drains in garages or laundry rooms, consider adding a small, temperature-stable cover to reduce drafts while still allowing drainage when needed.
Safety notes and best practices
Always shut off outdoor water supplies before freezing weather arrives and drain lines to remove standing water. Use eye protection and gloves when cutting insulation or sealing joints. Do not seal or obstruct ventilation pipes or any exhaust openings. Keep a flashlight handy to inspect dark spaces and verify that insulation is snug without compressing the pipe, which can reduce its effectiveness.
Seasonal maintenance rhythm and long-term care
Treat winter drain protection as an annual habit. Before the first serious cold snap, revisit the vulnerable areas, inspect insulation for wear, replace worn weatherstripping around doors near plumbing penetrations, and note any signs of wear in your plumbing. Keeping a simple checklist (drain locations, shutoffs, insulation status, and test results) makes next year’s winterization faster and more reliable. Regular minor maintenance pays off by preventing major disruptions when temperatures dip again.
Tools & Materials
- Insulation wrap or foam pipe insulation sleeves(Choose sizes that fit typical 1/2)
- Foam pipe insulation tape or heat tape(For wrapping exposed pipes and securing insulation around joints)
- Weatherproof tape or duct tape(Temporary sealant for minor gaps; remove if signs of moisture appear)
- Vacuum or handheld flashlight(To inspect traps, cleanouts, and dark corners)
- Bucket(To collect water when draining lines and testing)
- Gloves and safety glasses(Protection while handling insulation and tools)
- Rags or towels(For quick cleanups and catching spills)
- Backer rod or foam sealant(For larger gaps around open plumbing penetrations)
- Vent covers or sill plates(Optional protection for outdoor vents)
Steps
Estimated time: 1-2 hours
- 1
Identify vulnerable drains and map them
Survey all drains in heated and unheated spaces. Note trap locations, outdoor lines, and any fixtures in crawl spaces or garages. Create a simple map or photo log to reference during insulation and sealing.
Tip: Label each drain with a color-coded tag so you can quickly locate it during future winters. - 2
Shut off outdoor water and irrigation lines
Turn off exterior hose bibs and irrigation valves. Drain residual water from outdoor lines by opening taps to ensure no standing water remains that could freeze and crack lines.
Tip: Check irrigation valves month-by-month; plan shutoffs before a predicted cold spell. - 3
Seal and insulate exposed pipes in unheated spaces
Wrap exposed pipes with foam insulation sleeves and secure with tape. For joint areas, apply insulation tape and ensure there are no gaps that could permit drafts.
Tip: Avoid compressing insulation around bends; it reduces effectiveness. - 4
Protect floor drains and trap access points
Cover or insulate floor drain access where appropriate. If a trap is accessible, ensure it remains filled with water to maintain a seal, unless you’re directed otherwise by local codes.
Tip: Do not block trap access completely; maintain airflow for future maintenance. - 5
Seal gaps around vents and drain penetrations
Seal obvious drafts around penetrations with weatherproof sealant or foam. Do not seal vent openings that are intended to vent sewer gases; improper sealing can cause pressure issues.
Tip: Keep vent paths clear; a blocked vent can cause slow drainage and backups. - 6
Test drainage and check for leaks
Run water through each drain in a controlled sequence. Look for drips, wet spots, or slow drainage and correct insulation or seals as needed.
Tip: Record test results so you can compare year-to-year and catch progressive deterioration early. - 7
Document results and set reminders
Create a simple winterization log and schedule annual checks before the first hard freeze. Include locations, materials used, and any repairs made.
Tip: Set a calendar reminder for next fall so you don’t miss a year.
Got Questions?
Do I need to winterize outdoor drains if I have a well-sealed home?
Even in well-sealed homes, outdoor lines and hose bibs are at risk once temperatures drop. Shutting off exterior supplies and draining lines reduces the chance of freezing and subsequent leaks when temps rebound.
Outdoor lines should be prepared even in well-sealed homes to prevent freezing and costly repairs.
Is it safe to use chemical drain cleaners while winterizing?
Chemical cleaners are not recommended as part of winterization because they can damage pipes and interact poorly with insulation or septic systems. Focus on physical insulation and proper drainage.
Avoid chemical cleaners during winterization; use insulation and preventive sealing instead.
How often should I perform winter drain maintenance?
Plan an annual check before the first hard freeze. Revisit insulation, seals, and outdoor shutoffs, and update your log based on any observed changes from the prior year.
Do this every year before winter starts to stay ahead of problems.
What should I do about a crawl-space or basement drain?
Inspect crawl-space drains for drafts and moisture. Insulate nearby pipes, seal any gaps, and consider a light moisture barrier to prevent dampness that can erode insulation.
Crawl-space drains need extra attention due to exposure to cold air.
Should I hire a plumber for winterizing?
If your system has complex piping, hidden leaks, or signs of damage, consult a licensed plumber. For typical homes with accessible pipes, DIY winterization is usually sufficient.
For complex piping or leaks, a professional can ensure everything is sealed correctly.
Watch Video
The Essentials
- Inspect all vulnerable drains before freezing.
- Insulate exposed pipes in unheated spaces.
- Seal drafts around openings while preserving vents.
- Test flows and log results for annual maintenance.