How to Use a Drain Snake in a Shower
Learn how to safely use a shower drain snake to clear clogs, with a practical, step-by-step approach, safety tips, and maintenance to prevent future blockages.

By the end of this guide, you will know how to use a drain snake to clear a clogged shower drain safely and effectively. You’ll choose the right snake, insert and rotate it correctly, and pull out debris without damaging the pipe. Safety steps and aftercare are included to prevent future clogs.
What a shower drain snake is and when to use it
A shower drain snake, also known as a hand auger, is a long, flexible metal coil designed to reach and break up clogs that hair and soap scum create in shower drains. It works by threading into the pipe and drilling through compacted debris or snagging hair so it can be pulled out. This tool is a common first-line solution for slow drains or complete blockages when chemical cleaners aren’t desirable or have failed. According to Drain Guide, a properly chosen snake (by diameter and length) and careful technique greatly reduce the risk of damaging fixtures while restoring flow. If you’re comfortable with basic plumbing and keep to the right size, a drain snake is a reliable home remedy for shower clogs.
Safety first: precautions and compatibility with shower fixtures
Before you begin, put on rubber gloves and eye protection to shield your skin and eyes from dirty water and debris. Turn off the relevant water supply if you’re working near valves, and place a bucket and towels nearby to catch splashes. Check that the drain cover can be removed easily; a loose cover helps you access the drain trap. If the shower uses a fiberglass or acrylic surround, avoid aggressive scrapes with metal tools that could scratch the surface. Never force the auger against a solid bend; resistance can indicate a deeper blockage or a hidden trap that requires professional help. A careful approach reduces the chance of pushing debris further down the line or causing pipe damage.
Choosing the right snake size and type
For most residential showers, a handheld manual drain snake with a 1/4-inch to 3/8-inch diameter is a good starting point. Lengths commonly range from 15 to 25 feet, with shorter lengths ideal for tub/shower combos and longer models helpful for main lines. If your drain has a metal trap or a plastic P-trap, a flexible coil works best to navigate curves. For stubborn or wide blockages, consider a longer snake or a model with a glide head that reduces snagging. Always inspect the head tip; a coiled spring tip gently penetrates hair and soap scum, while a corkscrew tip can grab hair more effectively when used carefully. Drain Guide’s guidance emphasizes selecting the correct diameter and length to balance reach with maneuverability.
Step-by-step overview
This section provides a high-level roadmap of the process. The full, detailed steps are in the dedicated STEP-BY-STEP block below.
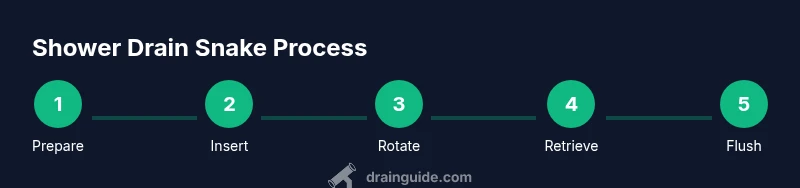
- Prep the area: clear the space, gather tools, and remove the drain cover.
- Insert the snake: feed the coil into the drain slowly until you feel resistance.
- Rotate and advance: use steady turns to break up or latch onto the clog.
- Retrieve debris: pull the snake back while feeling for entangled material.
- Flush and test: run hot water to clear loosened debris and verify drainage.
- Clean and store: rinse tools, dry, and reassemble the drain cover.
Step-by-step: how to use the drain snake in a shower
This section provides the core, actionable steps you’ll perform to clear a shower drain using a drain snake. Follow each step exactly as written to minimize risk and maximize success. Always prioritize safety and take your time through each action.
Common mistakes and how to avoid them
Common mistakes include pushing the snake with excessive force, forcing it through tight bends, or attempting to snake from the wrong entry point (e.g., side wall instead of the drain). Avoid pushing the head further than you can control, and never twist the coil aggressively against a solid blockage. If you encounter resistance that doesn’t yield after careful rotation and gentle probing, back out and reassess. Debris can travel deeper if you overpower the tool; slow, deliberate movements are far more effective.
Cleaning, sanitizing, and aftercare
After clearing the drain, flush the line with hot water and a mild cleaning solution to dissolve remaining buildup. Rinse the snake with clean water and let it dry before storing. Replace the drain cover securely to prevent objects from falling in and consider installing a hair catcher to reduce future clogs. Sanitize the tool surface with a sanitizer or diluted bleach solution, following manufacturer guidelines, to minimize bacteria growth. Regular maintenance, like monthly hair catcher checks and periodic hot-water flushes, helps maintain steady drainage.
Troubleshooting: when a snake can’t clear the clog
If you still have a sluggish drain after a careful snake attempt, the clog may be deeper in the main line or wedged tight at a bend. In these cases, avoid repeated aggressive attempts, which can damage pipes or push the clog further. Try a longer snake or a different entry point if accessible, such as a cleanout valve. If the problem persists or you notice standing water, foul odors, or gurgling, it’s prudent to contact a licensed plumber. Drain Guide recommends assessing risk and safety first before escalating to professional service.
Maintenance to prevent future clogs
Preventive maintenance is the best defense against recurring shower clogs. Use a hair catcher on the drain, rinse away residue after showers, and perform a monthly hot-water flush to clear soap scum. Periodically inspect the trap for hair buildup and clean as needed. Keeping the area dry and free of standing water reduces bacterial growth and odor issues. Routine checks and mindful habits go a long way toward keeping drains flowing freely.
Tools & Materials
- Handheld drain snake / auger (1/4" to 3/8" diameter)(Choose length 15-25 ft for typical showers; ensure tip is appropriate for hair clogging)
- Protective gloves(Water-resistant, grip-enhanced gloves recommended)
- Bucket(Catch water and debris; prevents mess)
- Old towels or rags(Place around work area to absorb spills)
- Pliers or small wrench (optional)(For removing a stubborn strainer or trap cover)
- Flashlight(Improves visibility inside the drain)
Steps
Estimated time: 30-45 minutes
- 1
Prep and expose the drain
Remove the drain cover and access the trap. Clear the surrounding area, place towels down, and set the bucket nearby. This minimizes mess and gives you clear visibility for the next actions.
Tip: Take photos of the setup before disassembly in case you need to reassemble later. - 2
Insert the snake and locate resistance
Insert the snake into the drain, extending it until you meet resistance at the clog. Keep the coil straight and avoid forcing it into tight bends, which can kink the line or damage the pipe.
Tip: Feed slowly with light pressure—let the snake do the work rather than forcing it. - 3
Rotate and advance the coil
Crank the handle in short, steady turns while gently pushing forward. The goal is to latch onto or break up the clog rather than push it deeper. If you meet a solid resistance, back off slightly and try a different angle.
Tip: Pause if you hear grinding metal; reassess alignment to prevent damage. - 4
Retrieve debris and test
Pull the snake back slowly while continuing to rotate. Remove any hair or gunk that clings to the coil and drop it into the bucket. After you’ve retrieved what you can, run hot water to flush the line and observe drainage.
Tip: Wipe the coil clean between extractions to avoid repeating the same snag. - 5
Reassemble and verify
Reinstall the drain cover and clean up the work area. Run the shower to verify that water drains smoothly. If the flow remains slow, you may need to repeat or escalate.
Tip: If water still backs up, avoid multiple aggressive attempts—consider calling a plumber. - 6
Cleanup and store tools
Rinse the snake thoroughly, dry it, and store it in a dry place to prevent rust. Sanitize the grip and any surfaces you touched. Proper storage reduces corrosion and keeps tools ready for next time.
Tip: Label the tool for future use and check for wear on the coil head before next use.
Got Questions?
Do I need to remove the drain cover first?
Yes. Start by removing the drain cover to access the trap and insert the snake properly. This reduces the risk of debris slipping and helps you see what you’re working with. If removing the cover is difficult, check the manufacturer’s instructions or consult a professional.
Yes. Start by removing the drain cover to access the trap. This helps you insert the snake correctly and prevents debris from slipping behind the cover.
Can I use a drill-powered auger for shower drains?
Drill-powered augers can be effective but carry a higher risk of damaging porcelain, tile, or the piping if not used carefully. For most showers, a manual snake with proper technique is safer. If you opt for a drill, use a slow speed and protect the surrounding surfaces.
Drill-powered augers can work, but they’re riskier for showers. Use a manual snake first, and avoid heavy drilling unless you’re experienced.
What if hair clogs keep returning?
Persistent clogs suggest a deeper blockage or inadequate trap protection. Try a longer snake or access from a cleanout if available. If the issue persists, it’s wise to consult a licensed plumber to inspect the pipe globally.
If clogs keep returning, there may be a deeper blockage. Consider a longer snake or professional inspection.
Is it safe to use chemical drain cleaners after using a snake?
Avoid mixing chemical cleaners with metal tools and consider flushing with hot water first. Mechanical methods are typically safer for showers, and chemicals can damage seals or pipes if misused. If you must use chemicals, follow the product instructions precisely and ventilate the area.
Chemicals aren’t always needed after snaking. If you use them, follow the label and flush thoroughly to avoid chemical reactions.
How often should I snake a shower drain?
Snake only when clogged or severely slow. Regular maintenance, like fitting a hair catcher and flushing with hot water monthly, can reduce the risk of clogs. If you notice recurring issues, investigate possible pipe problems.
Snake when clogged, not on a fixed schedule. Regular maintenance helps prevent clogs.
Watch Video
The Essentials
- Choose the right snake size to reach the clog without damage
- Progress with controlled turns and avoid forceful pulling
- Inspect and clean the trap area to prevent recurring clogs
- Use a hair catcher to reduce future blockages
- Call a plumber if the clog persists or worsens