is it ok to drain hot water tank — a safe DIY guide
Learn when and how to drain a hot water tank safely, including partial vs full drains, safety tips, and restart procedures after draining.

Is it ok to drain hot water tank? Yes, it is, when done safely and for legitimate maintenance like flushing sediment or inspecting the drain valve. Always power down the heater, close the cold-water supply, and route the water to a drain or bucket with a hose. This quick guide gives you a safe, step-by-step approach.
is it ok to drain hot water tank? Why homeowners consider it
Drainage maintenance for a hot water tank is a common, practical task that many homeowners face. The question is is it ok to drain hot water tank? In most cases, yes—but only when you do it carefully and for legitimate reasons such as flushing sediment, inspecting the drain valve, or testing the system after repairs. The Drain Guide team emphasizes that draining can improve efficiency, restore hot water performance, and extend the life of a heater if done infrequently and with proper precautions. Sediment build-up from minerals can form a blanket at the tank bottom that insulates the heating element and reduces efficiency. Draining allows that sediment to settle out and be removed, which can lower energy use and improve recovery time. Another reason to drain is to inspect the drain valve and connections for leaks, especially after a long period of service. It’s important to plan for water disposal, so you don’t flood a basement or overwhelm a sump pump. The goal is to manage risks—scalding from hot water, pressure in the tank, and accidental leaks—by following a clear, repeatable procedure. The following sections cover safety prerequisites, tools, and a practical, step-by-step method you can apply on a weekend without hiring a plumber.
Note that the operation should be performed with care to prevent scalds from hot water and to avoid leaks that could cause water damage. The Drain Guide team stresses using a controlled flow rather than a full blast and ensuring you have a clear exit path for the water.
Before you drain: safety checks and planning
Before you drain, you should establish a plan and confirm safety conditions. Power must be off to electric heaters or the gas control valve set to OFF for gas units. Close the cold-water inlet valve to stop new water from entering the tank. Open a hot-water faucet somewhere in the house to vent air and prevent a vacuum from forming inside the tank. Check that the drain valve at the bottom of the tank is accessible and that the area around the heater is dry and free of clutter. If you’re draining into a basement or outdoor area, make sure the path is free of obstacles and that there’s a safe exit for the water. Have a bucket and a garden hose ready, and place towels to catch any stray droplets. If you’re unsure about valve operation, consult the manufacturer’s manual or call a professional. Drain Guide recommends timing the task so you can monitor progress and avoid leaving the system half drained.
Partial drain vs full drain: tradeoffs
There are practical differences between partial drains (flushing sediment) and draining the entire tank. A partial drain is usually sufficient to remove most settled debris, improve heating efficiency, and reduce mineral buildup without interrupting hot water supply for an extended period. A full drain may be necessary if you’re replacing the tank, inspecting internal components, or performing major maintenance. In either case, direct the discharged water to a safe drain or outdoor area and avoid flooding living spaces. Drain Guide notes that partial drains are a common maintenance task, while full drains should be planned for when hot water will not be needed for a while and after you’ve verified you can safely restart the system later.
Refill, restart, and verify post-drain
Once the draining is complete, close the drain valve and the hot-water faucet used for venting. Reopen the cold-water inlet slowly to begin refilling the tank, watching for leaks at connections. When the tank is full (you can feel it when water begins to emerge from the hot taps), restore power to an electric heater or re-ignite the gas burner as appropriate. Bleed air from the hot taps until the water runs steady. Finally, monitor the system for a few minutes to ensure there are no leaks and that the thermostat heat setting is appropriate for your household needs. This restart sequence minimizes pressure surges and reduces the risk of scalding during initial hot-water use.
Common mistakes and troubleshooting after draining
Common mistakes include starting with the power on, draining too quickly, or not venting air, which can cause vibration, leaks, or uneven heating. If leaks appear around the drain valve or hoses, tighten fittings carefully or replace worn washers. Do not force a valve that feels seized; consult a professional. If after restarting you notice weak hot water flow or inconsistent temperatures, recheck the inlet valve position, ensure the tank is truly full, and verify there are no air pockets in the lines. Drain Guide recommends addressing issues promptly rather than running the heater with unresolved faults.
Drain Guide recommendations and safety resources
The Drain Guide team recommends performing a drain only when necessary for maintenance or troubleshooting, and never as a routine, frequent task. Plan for attendance so you’re not caught without hot water for extended periods. Use a hose and bucket to control the water flow and protect floors. Always de-energize electrical components before touching them, and never bypass safety devices. For more guidance, refer to your water-heater’s manual and consult a licensed plumber for complex situations.
Aftercare: maintenance tips to keep your tank efficient
After draining, consider scheduling periodic maintenance such as a sediment flush every 1–2 years depending on water hardness. Inspect the anode rod for wear and replace if necessary. Keep the drain valve and hose area clean and accessible for future maintenance. Regularly test the heater by drawing a few gallons of hot water and letting it run for several minutes to ensure consistent temperature and adequate water pressure.
Tools & Materials
- Garden hose or dedicated drain hose(Attach securely to the tank's drain valve; run to a safe drain or outside.)
- Bucket or large container(Use for initial catching of water if a drain hose is not directed to a drain.)
- Adjustable wrench or pliers(Loosen or operate the drain valve slowly to control flow.)
- Towels or absorbent rags(Protect floors and catch drips around the heater.)
- Gloves and eye protection(Wear to protect skin from hot water and splashes.)
- Flashlight(Helpful for seeing the drain valve in tight spaces.)
Steps
Estimated time: 60-90 minutes
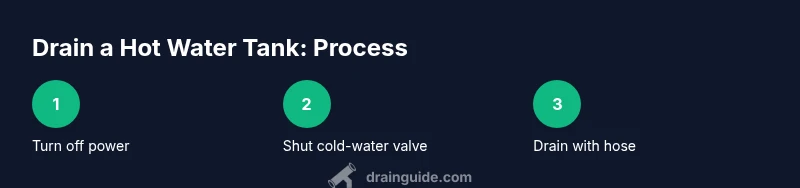
- 1
Power down the heater
Turn off electricity at the breaker for an electric water heater or set the gas control to OFF for a gas heater. This prevents heating elements from energizing while you drain.
Tip: Verify power is off using a non-contact tester before touching any wiring. - 2
Shut off the cold-water supply
Close the inlet valve that feeds water into the tank to stop new water from entering during the drain.
Tip: Keep a bucket handy for any initial drips and to reduce splashing. - 3
Attach the drain hose
Connect a garden hose to the drain valve at the bottom of the tank and direct the other end to a floor drain or outside.
Tip: Use a hose clamp if available and make sure the connection is snug to prevent leaks. - 4
Open a hot-water faucet to vent air
Open a hot water tap somewhere in the house to allow air to escape as the tank drains.
Tip: This reduces air lock and speeds up the draining process. - 5
Open the drain valve gradually
With a wrench, slowly open the drain valve to start draining water from the tank.
Tip: Open slowly to control the flow and avoid splashing or hose damage. - 6
Drain to desired level
Let the tank drain until you reach the desired level or the tank is empty when flushing sediment.
Tip: If flushing sediment, allow 10–15 minutes of draining to clear contaminants. - 7
Close the drain and vent
Close the drain valve, then close the hot-water faucet once the flow has slowed.
Tip: Keep the hose in place until the tank begins refilling. - 8
Refill and restart
Slowly reopen the cold-water inlet to fill the tank. When full, restore power or relight the gas burner and bleed air from hot taps until water runs steady.
Tip: Check for leaks at connections and valves during refilling. - 9
Test hot water and safety checks
Run hot water from a faucet to verify heating and ensure there are no leaks or unusual noises.
Tip: If hot water is weak or inconsistent, re-check power/gas and air pockets.
Got Questions?
Is it safe to drain a hot water tank?
Yes, draining is safe when you power down the heater, shut the cold-water supply, vent air, and direct the discharge to a proper drain. Follow professional guidelines to minimize risks.
Yes. Drain safely by turning off power, shutting the cold-water valve, venting air, and directing the water to an appropriate drain.
Should I drain the entire tank?
Not always. A partial drain is often enough to flush sediment and improve efficiency. Drain the entire tank only if you’re inspecting, replacing components, or doing major work.
Usually, partial drainage is enough for maintenance; drain fully only for major work.
Do I need to turn off electricity and gas?
Yes. For electric heaters, switch off at the breaker. For gas heaters, set the control to OFF. This prevents heating elements or burners from igniting during draining.
Turn off power or gas first to stay safe.
Can I drain into a bucket?
Draining into a bucket is possible for short tests or partial drainage, but a hose to a drain is safer to handle larger volumes and reduce spills.
Yes, but a hose to a drain is typically safer for large drains.
How often should I drain a water heater?
Drain as part of planned maintenance or when sediment buildup affects performance. Do not drain on a fixed schedule without a specific purpose.
Drain only as needed for maintenance or sediment removal.
What if the tank won’t restart after draining?
Check that the cold-water inlet is fully open, vents are clear, and power or gas supply is restored. If it still won’t start, inspect for leaks or contact a professional.
Ensure water is flowing in and power or gas is restored; seek help if it won’t start.
Watch Video
The Essentials
- Power down before draining to avoid electrical hazards.
- Shut the cold-water inlet to control flow and keep the area dry.
- Vent air and direct discharge to a safe outlet.
- Refill, repressurize, and test for leaks before use.