How to Drain and Clean a Hot Water Heater
Learn how to drain and clean your hot water heater safely. This step-by-step guide covers safety checks, draining, flushing, re-filling, and testing for leaks to improve efficiency and extend heater life.

By the end, you'll be able to drain and clean your hot water heater safely, remove sediment buildup, and restore efficiency. This quick guide covers safety checks, draining steps, flushing the tank, reassembling components, and testing for leaks. You’ll need basic tools, a garden hose, a bucket, and about 45–60 minutes.
Why Drain and Clean a Hot Water Heater
If you're wondering how to drain and clean hot water heater, you're addressing the sediment that gradually settles at the tank bottom. Minerals from hard water accumulate over time, forming a crust that insulates the water and reduces heating efficiency. According to Drain Guide, regular flushing helps restore performance and extend the unit's lifespan. The Drain Guide team emphasizes that this is not a one-off chore; it’s part of routine maintenance that saves energy and prevents premature repairs. Sediment can also cause uneven hot water, strange noises, and longer heat-up times. By flushing the tank, you remove loose minerals and re-center the heating dynamics. Approach this as a planned maintenance task, not a one-time emergency fix. Over the years, homeowners who adopt a seasonal flush notice steadier water temperatures and fewer fluctuations in hot water delivery. In short, a well-timed flush is a small effort with meaningful long-term benefits for comfort and energy efficiency.
Safety First: Prepare and Protect Yourself
Safety is the foundation of a successful flush. Before touching any components, disable the power supply or shut off the gas to the heater. Electric models require you to switch off the dedicated breaker, while gas models demand shutting off the gas valve. Wear gloves and safety glasses, and ensure the working area is dry to avoid slips or shocks. Clear the area of pets and children, and keep a sturdy bucket and hose ready. If you smell gas at any point, exit the area immediately and call a professional. Drain lines can move hot water and steam, so avoid reaching into the drain valve while the system is pressurized. Drainage can also produce a strong plume of hot water, so proceed slowly and test the valve with the hose only after you confirm everything is safe.
Understanding Sediment and Its Impact on Efficiency
Sediment is a natural byproduct of water heating, especially in areas with hard water or mineral-rich supply. When sediment builds up, the heater must work harder to reach the same temperature, consuming more energy and shortening the tank's life expectancy. Flushing eliminates the top layer of accumulated minerals, which helps the burner or heating element operate more efficiently and reduces the risk of overheating the tank. The process also improves flow in older homes, reducing the likelihood of noisy operation and hot spots in the hot water supply. For homeowners, this means better comfort, lower energy bills, and a longer-lasting appliance. Regular flushes become part of an effective maintenance routine similar to changing filters on other household systems.
The Right Time to Flush and What to Expect
A typical home with hard water should plan to flush the water heater annually. If you notice reduced hot water, cloudy water, or banging sounds in the tank, it’s a good sign that a flush is overdue. A flush is most effective when the water is still relatively cool, so plan the task after the heater has cooled down for several hours. Expect to drain a portion of the tank, flush with fresh water, and then refill before restoring power or gas. A full flush may take 30–60 minutes, depending on your tank size, line length, and valve accessibility. Be prepared for some splashing and pipe condensation, and use the bucket to catch any residual drips during the process. After re-pressurizing the system, run hot water from a nearby faucet to confirm consistent temperature and check for leaks at the drain valve and connections.
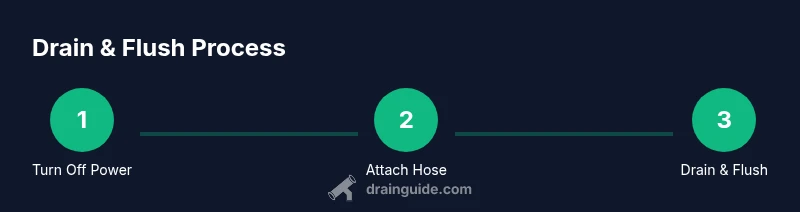
Step-by-Step Overview You’ll Do Next
This section provides a high-level map of the critical actions you’ll perform when draining and cleaning the hot water heater. The detailed, numbered steps follow in the next block, and they include explicit actions, timing, and cautions to help you stay safe. The process begins with safety shutdowns, proceeds through hose attachment and drainage, includes flushing and refilling, and ends with power restoration and leak checks. If your unit has a particularly stubborn valve or you detect corrosion, plan for extra time and consider professional service. The goal is to remove mineral buildup without damaging fittings or safety devices. Take your time with each stage, verify connections, and re-check after you re-energize the system to ensure there are no leaks or abnormal sounds.
Additional Maintenance Tips to Extend Heater Life
Beyond a single flush, establishing a simple maintenance routine helps keep your heater performing optimally year after year. Consider scheduling a session in the spring or fall, especially if you rely on hard water. Use a water-softening system if feasible to reduce mineral content. Keep the area around the heater clean and free of clutter so you can quickly inspect for signs of rust, leaks, or dampness. Periodically check the temperature-pressure relief (TPR) valve for smooth operation, and ensure the insulation around the tank is intact to minimize heat loss. If you notice persistent issues—reduced hot water supply, frequent leaks, or unusual noises—contact a licensed plumber. A proactive approach reduces the chance of unexpected outages and repairs.
Authoritative Sources and Further Reading
For more in-depth guidance, refer to these reputable sources:
- https://www.energy.gov/energysaver/water-heaters
- https://www.familyhandyman.com/article/how-to-flush-a-hot-water-heater/
- https://www.bobvila.com/articles/how-to-flush-a-water-heater/
Tools & Materials
- Garden hose(1/2 inch or 3/4 inch fittings; long enough to reach the drain valve)
- Bucket or container(To catch drips and prevent floor damage)
- Adjustable wrench(If you need to loosen a stubborn drain valve)
- Gloves(Protect hands from hot surfaces and sharp edges)
- Flashlight(Inspect valve area and connections for corrosion)
- Towels or absorbent rags(Clean up spills and drips)
- Power off switch or circuit breaker(Shut off electric power to an electric heater; for gas, shut off gas valve)
Steps
Estimated time: 45-60 minutes
- 1
Turn off power or gas and prep the area
Identify your water heater type (electric or gas). For electric models, switch off the dedicated circuit at the breaker panel; for gas models, close the gas valve. Let the tank cool for several hours if it’s hot. Put on gloves and clear the surrounding area. Place a bucket and hose near the drain valve.
Tip: If you’re unsure of the electrical panel, use a non-contact voltage tester before touching any wiring. - 2
Attach the drain hose and place the bucket
Connect the garden hose to the drain valve at the bottom of the tank. Run the hose to a floor drain or outside, ensuring it won’t kink or trap air. Open the drain valve slowly to begin the flow. Keep your face away from the valve to avoid splashes.
Tip: Open the valve just a crack at first to gauge the flow and prevent a water hammer effect. - 3
Open the drain valve and drain the tank
Allow the tank to drain completely. If drainage slows, you can relieve some pressure by slightly opening the TPR valve while keeping hands clear of hot water. Do not force the drain valve if it feels stuck; stop and reassess or call a professional.
Tip: If you see sediment choked at the valve, a brief gentle wiggle with a wrench can help; avoid forcing it. - 4
Flush the tank
With the drain valve closed, briefly turn the cold water supply back on to flush the interior. Let water flow through the tank until the discharge water runs clear. This step helps remove fine sediment that the initial drain may have missed. Collect any residual drips in your bucket.
Tip: If the water remains discolored after a few flushes, consider performing additional short flushes to remove stubborn sediment. - 5
Refill and re-pressurize
Close the drain valve and slowly open the cold water inlet to begin refilling. Once full, bleed any air from hot taps near the heater by opening a hot water faucet until a steady flow of water is achieved. Check for leaks around the drain valve and connections.
Tip: Never slam the valve shut; a slow, controlled close reduces the risk of leaks. - 6
Restore power or gas and test
Turn the power back on at the breaker for electric models, or re-open the gas valve and relight the pilot if applicable. Allow the heater to reheat and recover. Run hot water from a faucet to confirm temperature consistency and listen for abnormal sounds that might indicate an issue.
Tip: Keep an eye on the pressure relief valve during the first few cycles after a flush.
Got Questions?
Is it safe to flush a hot water heater yourself?
Yes, with proper precautions. Always shut off power or gas, use protective gear, and follow the steps slowly. If you have a gas heater or suspect a leak, consider hiring a professional.
Yes, you can flush your water heater yourself if you follow safety steps and take your time. If you smell gas or feel uncertain, seek professional help.
How often should I flush my water heater?
Most homes with hard water benefit from an annual flush. If you notice reduced hot water or unusual noises, consider flushing sooner.
A yearly flush is typical, but hard water may require more frequent maintenance.
What should I do if water doesn't drain from the tank?
First verify the drain valve is fully open and the hose is not kinked. If the valve feels stuck, don’t force it—shut everything down and call a plumber.
If water won’t drain, check the valve and hose for blockages, and avoid forcing a stuck valve. Call a pro if needed.
Can I flush a gas water heater?
Yes, but be extra cautious with ignition safety. Ensure the area is well-ventilated and the gas is shut off during the flush. Reline the system per the manufacturer’s instructions after refilling.
Flushing a gas heater is possible with safety precautions; follow the manual and keep gas off until refilled.
Do I need to replace the anode rod during a flush?
Flushing does not automatically require replacing the anode rod, but inspect it during maintenance. Replace if it’s heavily corroded or spent to protect the tank.
Inspect the anode rod while you’re at it; replace if corroded to protect the tank.
What are warning signs that I should call a professional?
Persistent leaks, a tank that won’t refill, persistent banging or popping sounds, or rusty water are signals to bring in a licensed plumber.
If you notice leaks or odd behavior after a flush, it’s wise to contact a pro.
Watch Video
The Essentials
- Shut off power or gas before starting
- Flush until water runs clear for best sediment removal
- Refill slowly and check for leaks after restoration
- Test hot water delivery and valve operation post-flush
- Schedule annual maintenance to extend heater life