Drain or Flush a Water Heater: A Practical Guide
A homeowner-friendly, step-by-step guide to drain or flush a water heater, remove sediment, improve efficiency, and extend service life. Includes safety tips, tools, and maintenance guidance.

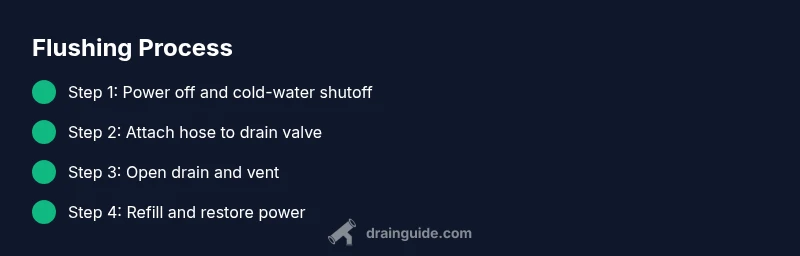
Drain or flush your water heater to remove sediment, boost efficiency, and extend its life. Start by turning off power or gas, closing the cold-water supply, and attaching a garden hose to the drain valve. Open the valve to drain, briefly flush with fresh water, then refill and restore power.
Why Drain or Flush Water Heater Matters
Sediment buildup in storage tanks is common, especially in areas with hard water. Over time, mineral deposits settle at the bottom of the tank, reducing heating efficiency, increasing energy use, and potentially shortening the unit’s lifespan. Draining and flushing your heater helps remove this sediment, improving heat transfer and overall performance. According to Drain Guide, regular maintenance like flushing is a practical way to extend the life of your home’s hot water system while maintaining consistent water temperature and reducing fan or burner strain. Homeowners who commit to periodic flushing often notice fewer temperature fluctuations and a more reliable hot water supply. This process is straightforward but must be done safely and methodically to avoid burns and water damage.
When to Flush Your Water Heater
The ideal timing for flushing depends on water quality and usage. If you have hard water or see a gritty sediment in the tank, flush more frequently. Most manufacturers recommend a maintenance flush once a year, but higher mineral content or frequent heavy use may justify more frequent sessions. Seasonal maintenance (before heavy-use periods) can help ensure optimal performance. Drain Guide emphasizes that consistency matters: a predictable maintenance schedule reduces the chance of unexpected breakdowns and helps you monitor aquifer-related mineral content that could affect heat exchange efficiency. If you notice rusty water, excessive noise, or longer heating times, plan a flush sooner rather than later.
Safety First: Key Precautions
Working with a hot water system can be dangerous. Always ensure the unit is safe to drain before starting. Turn off electrical power at the breaker (electric units) or set the gas valve to the pilot/off position on gas units. Use rubber gloves and eye protection, and keep children and pets away from the work area. Ensure you have a clear exit path for the hose and a safe drainage location. If you smell gas or hear unusual equipment noises during the process, stop immediately and consult a professional. Safety gear and careful handling reduce the risk of burns, scalds, and water damage.
Prep Work: Tools, Materials, and Setup
Before you begin, gather essential tools and supplies. A garden hose long enough to reach a floor drain or outside, a sturdy bucket, a wrench to loosen the drain valve if needed, and towels for spills are core items. A flashlight helps you inspect the drain valve and connections in dim utility rooms. Clear the area around the heater to avoid tripping hazards. Double-check the location of the cold-water shutoff valve and make sure the drainage path will not cause water damage. Preparedness minimizes downtime and ensures you can complete the flush in one session.
Sediment in Water Heaters: What It Looks Like
Sediment consists of mineral particles that settle to the tank bottom. When you drain, you may notice cloudy water or a layer of gritty, sand-like material. Heavier minerals can accumulate more quickly in areas with hard water or high mineral content. Sediment reduces heat transfer efficiency, requiring the heater to work harder and consume more energy. Over time, this can cause temperature inconsistencies and increased wear on the heating elements and burner. Regular flushing helps keep the tank clear, preserving output quality and unit longevity.
Flushing Methods: Partial Drain vs Full Flush
There are two common approaches: a partial flush to remove the top layer of sediment with a short drain, and a full flush that empties the entire tank. A partial flush can improve hot water recovery and reduce sediment buildup gradually, while a full flush is more thorough, especially after long periods without maintenance. The choice depends on tank size, sediment amount, and water quality. Drain Guide recommends a systematic approach: start with a full drain if feasible, then re-fill and observe performance before deciding on periodic partial flushes.
Step-by-Step Flushing Overview (High-Level)
The flushing sequence typically involves turning off power or gas, shutting the cold-water inlet, attaching a discharge hose to the drain, opening the valve to drain, venting with a hot-water tap, flushing with a controlled cold-water inlet, draining again if needed, and then refilling and restoring power. Throughout, monitor for leaks and ensure a safe drainage path. This overview prepares you for the detailed steps that follow in the dedicated Step-by-Step section.
Step-by-Step Flushing Process (Partial Overview of Actions)
A thorough flush generally includes: (1) powering down the system, (2) shutting the cold-water supply, (3) connecting the hose, (4) opening the drain valve, (5) venting, (6) flushing with cold water, (7) draining once more if needed, (8) refilling slowly, and (9) restoring power or gas. Time estimates vary; plan for about 60-90 minutes for a complete session and initial testing.
Refill, Reconnect, and Reignite
Once the tank is filled, bleed air by opening a hot-water tap nearby until steady water flows. Reconnect power for electric heaters or re-enable the gas supply and burner as per the manual. Validate that the upper and lower heating elements are functioning and that the pressure relief valve remains in proper working order. Run a short test to confirm water temperature stabilizes within the expected range and there are no leaks at the drain valve or connections.
Common Mistakes and How to Avoid Them
Rushing the process can cause burns or water damage. Avoid opening the drain valve too quickly, which can lead to a pressure surge. Do not operate the unit while it is still hot, and never bypass safety devices. If you see signs of leaks, ruptures, or weak flow, stop and reassess. Keeping a steady pace, using proper safety gear, and following the manufacturer's guidance helps prevent errors and prolongs the heater’s life.
Maintenance Schedule and Frequency
Regular maintenance is a cornerstone of responsible plumbing. A yearly flush is a solid baseline for many homes, with adjustments based on water hardness and usage. Tracking when you flushed most recently and setting reminders helps ensure you don’t skip maintenance. Drain Guide encourages homeowners to pair flushing with other simple upkeep: inspect T&P valves, check for leaks around fittings, and monitor water temperature settings to optimize efficiency and comfort.
Troubleshooting Post-Flush Problems
If the system seems abnormal after flushing—unusual noises, reduced hot water, or leaks—recheck all connections and the drain valve. Verify the cold-water inlet is fully closed during the drain stage and confirm that the valve and hose are secure. If issues persist, you may have internal corrosion, a failing valve, or mineral buildup beyond a simple flush. Consult a plumbing professional when in doubt to avoid further damage.
Authority Sources
- Energy.gov — U.S. Department of Energy: Water Heaters maintenance and efficiency guidance.
- Energy Star: Water heaters and efficiency considerations.
These sources provide foundations for best practices in routine maintenance and safe operation. For more detailed, authoritative guidance, refer to the linked pages.
Tools & Materials
- Garden hose(Long enough to reach a drainage location)
- Bucket(To collect water if needed and prevent spills)
- Adjustable wrench(Loosen valve if it’s stubborn)
- Rubber gloves(Protection from hot surfaces and water)
- Flashlight(Inspect valve area in dim spaces)
- Towels/Rags(Clean up drips and spills)
Steps
Estimated time: 60-90 minutes
- 1
Power off and prepare
For electric heaters, switch off the circuit breaker; for gas, set the thermostat to the pilot or off position per the manual. This prevents shock and scalding while draining.
Tip: Double-check the power source is disconnected before touching any heating elements. - 2
Close the cold-water supply
Shut the cold-water inlet valve to stop new water from entering the tank during the drain and flush.
Tip: If the valve is stiff, apply a small amount of penetrating oil and wait a minute before turning. - 3
Attach the discharge hose
Connect a garden hose to the drain valve and route the other end to a floor drain, outside, or a utility sink.
Tip: Make sure the hose is secure to prevent dislodging during draining. - 4
Open the drain valve slowly
Open the drain valve gradually to start water flow, avoiding a sudden pressure surge.
Tip: Opening slowly helps control the initial burst and reduces splashing. - 5
Vent and flush the tank
Open a hot-water tap somewhere higher in the house to vent air. Briefly re-open the cold-water inlet to flush sediments out through the hose.
Tip: Run the inlet for 1–3 minutes until the water runs clear. - 6
Close and drain again
Close the drain valve, drain the remaining water if needed, then reopen to ensure the tank is empty.
Tip: Check the valve for leaks after closing; a slow drip can indicate a valve issue. - 7
Refill the tank
Close any hot-water taps, then open the cold-water supply to begin refilling. Allow a full tank to fill without forcing pressure.
Tip: Bleed air by opening a hot-water faucet once water starts flowing. - 8
Restore power or gas
For electric units, switch the breaker back on. For gas, re-light the pilot or turn on the burner per the manual.
Tip: Wait until the tank is fully heated and pressurized before using hot water.
Got Questions?
How often should you drain a water heater?
A general guideline is to flush annually or as recommended by your manufacturer, especially in areas with hard water. Frequency depends on water quality and sediment buildup.
Most homeowners flush annually, depending on hard water and buildup.
Can I flush a tankless water heater myself?
Tankless units require a descaling procedure that is typically best done by a professional. Do not attempt a full tank flush.
Tankless systems usually need professional descaling.
What if the water remains rusty after flushing?
If water remains discolored, there may be corrosion inside the tank or pipes. Stop using hot water and consult a plumber if symptoms persist.
Rusty water after flushing could mean corrosion; consult a pro.
Is it necessary to drain the tank completely every time?
Not always. A partial flush can remove most sediment, but heavy buildup may require a full flush or professional service.
A partial flush often removes most sediment, but full flush may be needed for heavy buildup.
What safety gear should I use?
Wear gloves and eye protection. Ensure the area is well-ventilated and never work alone around hot equipment.
Wear gloves and eye protection, and keep the area ventilated.
Watch Video
The Essentials
- Flush regularly to reduce sediment
- Shut off power and cold inlet before draining
- Vent air during flushing for safety
- Refill slowly and bleed air before powering on
- Keep a maintenance log