Will Draining a Water Heater Help? A Homeowner's Troubleshooting Guide
Explore whether draining a water heater will help; learn when flushing is beneficial, safety steps, a practical diagnostic flow, and professional thresholds for action.

Draining a water heater can help remove sediment that reduces heat transfer and efficiency. It's not a cure for every issue, but regular flushing often improves hot-water recovery, lowers noise, and can extend the tank's life. If your heater is leaking, corroded, or the thermostat is failing, draining won't fix those problems, and you should seek professional help. For safety, shut power or gas first.
Why will draining a water heater help
If you're asking will draining a water heater help, the simple answer is yes for sediment-related performance. According to Drain Guide, regular flushing can improve heat transfer, restore hot-water recovery, and reduce noises caused by mineral buildup. Sediment acts like an insulation layer; by flushing it out, the heater can reach target temperatures more efficiently. This is a maintenance task, not a cure-all—if the unit is leaking, the thermostat has failed, or the tank is corroded beyond repair, draining won't fix these problems. For most households, a routine flush each 1-3 years (depending on water hardness and usage) yields noticeable improvements in performance and longevity. Implementing this now helps you avoid bigger problems down the road and aligns with Drain Guide's recommended maintenance practices.
When draining isn't the fix: other issues to check
Draining may not solve every issue. If your hot water is discolored or smells, sediment removal helps but corrosion at the anode rod or contaminated water supply can cause color or odor. If hot water depletes quickly even after flushing, your problem could be the thermostat, heating element, or a faulty dip tube. If the tank is leaking or the pressure relief valve is weeping, draining won't repair the leak and you should replace the heater or consult a pro. Drain Guide Analysis, 2026 notes that many homeowners blame flushing when true culprits are wear, improper installation, or gas/electric supply problems. Distinguishing between these scenarios saves time and money.
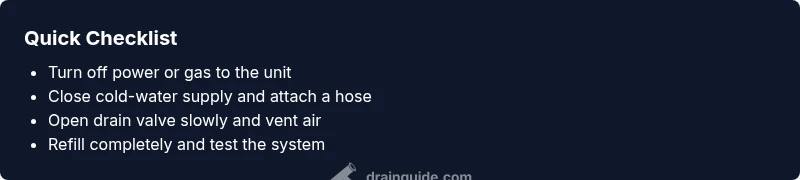
Before you drain: safety and setup
Safety first: never work on a hot heater. Turn off power at the breaker for electric heaters or shut off gas supply for gas heaters, then set the thermostat to lowest setting. Close the cold-water supply valve to the tank and open a nearby hot-water tap to vent air. Gather a hose, a bucket, and adjustable wrenches. Check the T&P valve for dripping; if it leaks, address that before you drain. Confirm you have a plan to re-fill and test the system safely. This preparation reduces the risk of scalding, pressure buildup, or electrical hazards during the flush.
Tools and safety gear you’ll need
A sturdy garden hose, a bucket, adjustable wrench, nitrile gloves, and safety goggles are essential. You’ll also need a stable ladder if your heater is in a raised area, plus a way to monitor water temperature as you refill. Keep a towel handy for spills and have a plan to shut down the power or gas supply completely before starting. This phase is where many DIYers skip steps and regret it later, so take the time to prepare properly.
Diagnostic context: how sediment affects performance
Sediment in the tank acts as an insulating layer, forcing the heater to work harder and longer to reach target temperatures. Over time, mineral buildup can trap heat at the bottom, reduce hot-water recovery, and cause noisy operation. Flushing removes much of this sediment, enabling more efficient heat transfer and longer element life. Not every symptom points to sediment—odor, brown water, and leaks require different diagnoses. Using a systematic approach helps isolate the root cause and avoids unnecessary parts replacement.
The drain process overview (high-level)
A flush involves draining some or all of the tank, removing sediment through a hose, and refilling with cold water. While flushing, you may notice a cloudy discharge and a sudden drop in temperature as mineral-rich water exits. If you’re unsure, pause and reassess safety steps. A high-level drill-down is provided in the STEP-BY-STEP block below so you understand the core sequence before you begin.
Common mistakes and how to avoid them
Avoid draining a hot tank or raising the outlet above the tank—this can cause scalding or air locks. Don’t drain more water than you can safely handle, and never ignore a leaking valve. Refrain from using harsh cleaners or chemical additives. Finally, don’t skip re-filling and testing the system after the flush; incomplete drawdown can leave debris in the lines and reduce efficiency until you address the root cause.
Maintenance tips to prevent sediment buildup
Install a water-softening system if your water is hard; schedule annual or biannual flushes depending on usage and hardness; replace the anode rod every 3-5 years or as recommended; inspect the drain valve for wear and replace if needed. These routine checks extend heater life and stabilize performance, reducing the frequency and intensity of future flushes.
The Drain Guide approach and final thoughts
The Drain Guide Team emphasizes safety first and recommends documenting the process so you can reference steps later. Regular maintenance, paired with a careful diagnostic flow, helps homeowners avoid costly surprises. In many cases, flushing is a simple, effective step you can perform to improve efficiency, but not a substitute for necessary repairs or professional assessment when symptoms persist. The Drain Guide Team recommends starting with the basics and knowing when to call a pro.
Steps
Estimated time: 60-90 minutes
- 1
Power down and isolate the heater
Turn off the circuit breaker for electric models or shut off the gas supply for gas models. Set the thermostat to the lowest setting to minimize risk of scalding when water begins to circulate. Allow the unit to cool for a few minutes if it’s hot.
Tip: Label the power switch so others don’t re-energize the unit while you work. - 2
Shut off water and relieve pressure
Close the cold-water supply to the tank. Open a hot water faucet somewhere in the house to help vent air and relieve pressure, which makes the flush smoother.
Tip: Relieving pressure prevents water from spurting out and reduces force on the valve. - 3
Attach the drain hose
Connect a standard garden hose to the drain valve and place the other end in a bucket or suitable drain. Make sure the connection is secure to avoid leaks during draining.
Tip: Use a hose with a male-threaded end compatible with the valve. - 4
Begin draining and flush
Open the drain valve slowly to start the flow. After a few gallons, open a hot water tap to vent air and help flush out the sediments. Stop draining when clear water flows.
Tip: Open valves gradually to avoid a surge that could whip water out of the bucket. - 5
Refill and test the system
Close the drain valve, remove the hose, and turn the cold-water supply back on. Allow the tank to fill completely, then restore power or gas and set the thermostat back to a safe temperature.
Tip: Check for leaks at the valve and hoses before turning equipment back on. - 6
Verify performance
Run hot water from a faucet to ensure steady temperature and pressure. If problems persist, repeat the flush or schedule a professional inspection for deeper issues such as a failing element or thermostat.
Tip: Document outcomes so you can compare future flush results.
Diagnosis: Hot water runs out quickly and you notice sediment or cloudy water from taps
Possible Causes
- highExcess sediment buildup at the bottom of the tank
- mediumOld or corroded anode rod causing mineral buildup
- lowMisadjusted thermostat or failed heating element
Fixes
- easyDrain and flush the tank to remove sediment; refill and re-test
- mediumInspect/replace the anode rod if corrosion is evident
- hardTest and, if needed, replace the thermostat or heating element; seek professional help
Got Questions?
Will draining a water heater fix leaks or a failing thermostat?
No. Draining removes sediment and may improve performance, but it won’t repair leaks or a faulty thermostat. If you notice leaks or continuous temperature problems, seek professional evaluation.
No—draining helps with sediment, but leaks or thermostat issues need a pro.
How often should a typical residential water heater be drained?
Most households flush every 1-3 years, depending on water hardness and usage. Hard water and heavy use may require more frequent flushing.
Flushing every 1-3 years is common, adjust for your hardness and usage.
Is it safe to drain a gas water heater?
Yes, with proper safety: shut off gas, turn off power if applicable, drain slowly, and ventilate the area. If unsure, consult a pro.
Yes, but follow safety steps and consider a pro if you’re unsure.
Do I need to turn off the power or gas before draining?
Absolutely. Turn off electrical power or shut off gas to prevent risk of shock or fire. Verify the unit has cooled before starting.
Yes—disconnect power or gas before draining.
What should I do if the water remains dirty after draining?
If water is still discolored, the problem may be corroded components or continued mineral buildup. Consider a second flush and check the anode rod.
If it stays dirty, another flush and possibly component replacement may be needed.
When should I call a professional?
Call a professional if you encounter persistent leaks, rotten odor, dangerously high pressure, or if you’re uncomfortable performing the procedure.
Call a pro if you’re unsure or the problem persists.
Watch Video
The Essentials
- Flush sediment to restore efficiency
- Don't bypass safety steps; call a pro if needed
- Power down before draining and test after refill
- Regular maintenance prevents future buildup