Repair Drainage Pipe: A Step-by-Step DIY Guide for Homeowners
Learn how to repair a drainage pipe with a safe, stepwise approach. This guide covers diagnosis, tools, patching, couplings, replacement options, and testing for leaks for homeowners.

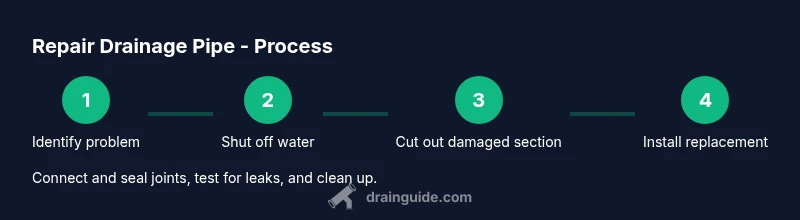
To repair a drainage pipe, locate the leak or blockage, shut off the water supply, and choose a repair method: patch, coupling, or full replacement. Install the chosen fix securely, reseal joints, and slowly restore water to test for leaks. Always follow local codes and use compatible fittings.
Why repairing a drainage pipe matters
According to Drain Guide, repairing a drainage pipe promptly helps prevent water damage, mold growth, and costly secondary problems. Small cracks or leaks can escalate quickly under pressure from flushing, temperature changes, or heavy rain. By addressing the issue early, homeowners protect floors, walls, and foundations and avoid intrusive emergency repairs. Prevention matters: the faster you identify a compromised joint or corroded section, the easier and cheaper the fix. In this article, we cover how to diagnose common symptoms, choose a repair method that matches your pipe material, and complete the repair safely and effectively. The goal is a durable seal, restored flow, and a dry, safe living environment.
Common causes of drainage pipe damage
Pipes fail for reasons including age and material degradation, tree roots invading joints, improper slope or alignment during installation, freezing and thawing, and sediment buildup that raises pressure. External damage from heavy loads or ground movement also occurs. Practical signs to watch for: gurgling noises, slow drainage, damp patches, musty odors, or frequent backups. Identify the material first: PVC/CPVC, ABS, copper, cast iron, or rubber couplings. Each material has different vulnerabilities and repair options, so tailor your approach accordingly. Regular inspections and early repairs save time and money by preventing full pipe replacement and extensive excavation.
Safety and planning before you repair
Before touching any drainage line, gather PPE: safety glasses, gloves, and a mask if mold or dust is present. Shut off water to the affected line and drain residual water. Ventilate the area and ensure you have adequate lighting. Check local codes for permitted methods and materials, especially for exterior pipes or lead-containing materials. Confirm access points (cleanouts, under-sink access, or exterior access) and plan your repair path. Having a clear plan reduces the risk of mistakes and makes the repair more efficient. Also gather the right tools and replacement sections to minimize trips to the hardware store.
Repair methods explained: patching, couplings, and replacement
There are three common approaches:
-
Patching: temporary epoxy or putty can seal small cracks in non-pressurized sections, but this is not a permanent fix for flowing lines.
-
Couplings: slip-on, rubber, or push-to-connect couplings can join a replacement segment or seal a small leak. Use compatible fittings for PVC, ABS, copper, or cast iron; follow solvent cement or soldering instructions.
-
Replacement: replacing a damaged segment is the most reliable long-term solution for large cracks, corrosion, or root intrusion. Steps include measuring the damaged length, cutting cleanly, deburring, and rejoining with new fittings and sealants.
Assessing pipe materials and fittings
Different pipe types require different repair methods: PVC and CPVC use solvent cement and primer; copper uses flux and solder; cast iron often requires mechanical couplings and maintenance. Determine diameter, wall thickness, and the presence of any coatings. Decide whether to patch the area, replace a short section, or redo the entire run. Always ensure you have the correct size of replacement pipe and fittings; mismatched components fail and leak.
When to call a professional
If you discover persistent leaks, damaged joints beyond simple patching, suspected main line issues, or if you encounter complex access constraints, seek professional help. Urgent concerns like sewage backups or strong sewage odors require immediate attention. A licensed plumber can assess the scope, obtain necessary permits, and ensure the repair meets local building codes and warranty requirements. DIY repairs are viable for small, clearly accessible problems with the right materials and safety practices.
Maintenance to prevent future damage
Preventive maintenance extends pipe life: inspect regularly, tighten fittings, caulk exterior penetrations, avoid chemical drain cleaners that damage pipes, keep trees away from the line, and clean traps and screens often. Use strainers to reduce hair and debris entry. Record repairs and note the pipe material and location of joints for future reference. Schedule periodic inspections, especially if you rent or own an older home.
Tools & Materials
- Safety goggles(Impact-resistant, ANSI Z87.1)
- Cutting tool (pipe cutter or hacksaw)(Appropriate for pipe material (PVC/ABS or copper))
- Slip-joint pliers or adjustable wrench(For fittings and clamps)
- Measuring tape(Accurate length for replacement segment)
- Replacement pipe segment (same material and diameter)(Typically 6-12 inches for small repairs)
- PVC cement/primer or copper flux and solder(Material-specific joining method)
- Teflon tape or pipe thread sealant(For threaded joints where applicable)
- Deburring tool or sandpaper(Smooth cut edges to prevent leaks)
- Bucket and towels(Contain spills and keep work area clean)
- Gloves and respirator mask (optional)(For dusty or mold-prone areas)
- Marker or pencil(Mark cut lines and alignment)
Steps
Estimated time: 60-120 minutes
- 1
Identify problem and shut off water
Locate the affected line, switch off the main water supply if needed, and drain residual water. Document signs of damage (cracks, leaks, or root intrusion) before disassembly. This prevents unexpected water discharge during work and reduces mess.
Tip: Know the location of the main shutoff before you start. - 2
Locate damaged section and plan cut
Trace the damaged area from accessible points (under sink, cleanout, or exterior access). Measure the length to be removed and mark with a marker so you can cut cleanly and squarely.
Tip: Double-check measurements to avoid removing more than necessary. - 3
Cut out damaged segment
Use the appropriate cutter for your pipe material to remove the damaged section. Deburr edges to prevent binding and ensure a smooth path for the replacement.
Tip: Keep the cut square for a better seal. - 4
Prepare replacement and dry-fit
Cut a replacement piece to match the removed length and dry-fit with existing pipes and fittings to confirm alignment. Make any small adjustments before final joining.
Tip: Dry-fit first to avoid wasted material. - 5
Join and seal joints
Apply the correct joining method (PVC cement, copper solder, or mechanical couplings) and tighten fittings. Wipe excess sealant and allow curing time per manufacturer instructions.
Tip: Do not rush curing; a poorly cured joint leaks later. - 6
Test for leaks and cleanup
Slowly turn water back on and inspect all joints for leaks. If leaks appear, reseal or tighten as needed and re-test. Clean the area and store tools properly.
Tip: Check for leaks over 15-30 minutes; some leaks appear slowly.
Got Questions?
What is the first step to repair a drainage pipe?
Shut off the water supply to the affected line and drain residual water to reduce mess and avoid spray during disassembly.
First, shut off the water and drain the line to prevent splashes while you work.
Can I patch a small crack instead of replacing the pipe?
For small, non-pressurized cracks, patching with epoxy can be a temporary fix, but a lasting repair usually requires a proper coupling or replacement.
Patching works temporarily for tiny cracks, but a proper joint or replacement is best for lasting results.
Is epoxy putty suitable for PVC or copper pipes?
Epoxy putty is generally a temporary solution and not recommended as a permanent fix for pressurized lines or finished joints.
Epoxy is usually temporary for pressurized pipes; you’ll want proper fittings for a lasting fix.
How do I know when to call a professional?
Call a professional if the leak is extensive, you suspect main line issues, or you cannot access the damaged area safely.
If leaks are widespread or you can’t access the area safely, a licensed plumber is the safer choice.
What safety gear should I wear during repairs?
Wear safety glasses, gloves, and a mask if mold or dust is present. Ensure good ventilation when using solvents.
Wear eye protection, gloves, and a mask; work in a well-ventilated area.
Watch Video
The Essentials
- Identify leak early to minimize damage
- Shut off water before any repair
- Choose patch, coupling, or replacement based on pipe type
- Test thoroughly for leaks after repair