Roto-Rooter Drain Cleaning: A Homeowner's Step-by-Step Guide
A comprehensive, safety-first guide to using a roto-rooter drain cleaning machine for clogged drains. Learn prep, step-by-step technique, maintenance tips, and when to call a pro.

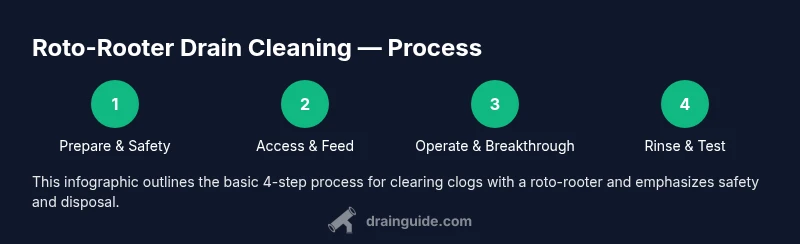
Using a roto-rooter can clear many clogs when done safely and correctly. This direct answer covers prep, the essential steps, and when to stop. See our full step-by-step guide for detailed instructions and safety tips.
What is roto-rooter drain cleaning and when should you consider it?
Roto-rooter drain cleaning uses a powered cable with a rotating head to clear blockages in drain lines. It’s particularly effective for solid clogs, mineral buildup, and minor root intrusion in older pipes. For homeowners, this method can save time and prevent water damage when a plunger or chemical cleaner fails to clear the obstruction. The Drain Guide team notes that not every clog requires aggressive equipment; misusing the tool can damage pipes or fixtures. If your main line backs up or multiple drains slow, plan carefully and consider professional help to avoid costly mistakes. Brand-wise, this technique is commonly associated with specialized drain-cleaning machines, and understanding your pipe material is essential before proceeding.
Why this method matters in modern home maintenance
A roto-rooter offers a mechanical solution when liquids and household plungers aren’t enough. It works by feeding a flexible cable with a cutting head into the drain, breaking apart material and pulling debris back out. For homeowners, knowing the difference between hair, grease, mineral deposits, and tree root intrusion helps set realistic expectations. Drain Guide analysis, 2026, shows growing interest in DIY drain maintenance, but it also highlights the importance of proper technique and safety when using heavy equipment. Proper use reduces the risk of pipe damage and minimizes the chance of creating a bigger clog deeper in the line.
How to assess if you should DIY or call a pro
Begin with a quick inspection: identify where the clog occurs (sink, tub, shower, or main line) and check if other drains are affected. If you’re on a septic system, or if you smell foul odors or see sewage backups, avoid aggressive tools and contact a licensed plumber. For PVC and other plastics, you must adjust technique to prevent gouging or cracking the material. If you’re uncertain about pipe material or access points, err on the side of caution and seek professional guidance to prevent expensive damage.
Safety-first approach to prepping your workspace
Before you begin, clear the area, protect floors with drop cloths, and place towels and a bucket to catch water. PPE is non-negotiable: wear goggles, gloves, and sturdy clothing. Make sure you have an unobstructed access point to the drain, and shut off the water supply to the affected line to reduce mess and avoid backflow. Keep a dedicated waste bag for debris and plan for proper disposal of waste after the job. The Drain Guide team emphasizes that safety gear and a clean workspace dramatically reduce risk when operating heavy equipment like a roto-rooter.
Common myths vs. realities about roto-rooter use
Myth: It’s a universal fix for all clogs. Reality: It’s highly effective for hair and mineral buildup, but not always the best choice for grease or soft plastics. Myth: It will damage any pipe. Reality: When used with care and proper settings, the risk is minimized; however, forceful use on brittle pipes can cause damage. Myth: It’s a one-person job. Reality: Most operations benefit from a helper, especially when handling water, debris, and equipment.
How to manage post-cleanup disposal and cleanup
After you remove the cable, wipe down the machine, inspect the head for residue, and dispose of waste following local regulations. Rinse the access point with clean water to verify drainage flow and prevent any residue from hardening inside the pipe. Finally, recheck all affected drains to ensure steady flow and no standing water. Drain Guide recommends documenting the process for future reference, especially if you notice recurring clogs.
Troubleshooting common hiccups during operation
If the cable stalls, stop feeding, back out slowly, and check for snags or pipe damage. If water backs up during operation, pause and assess the access point for blockages beyond the immediate area. If you cannot clear the clog within 15–20 minutes of active operation, it’s prudent to stop and reassess the situation or call a professional. Keeping a log of steps and outcomes helps with future maintenance.
Maintenance tips to prevent future clogs after roto-rooter use
Run hot water after the cleaning to help flush any residual debris. Periodically schedule preventative maintenance with enzyme-based cleaners or mild cleaners that are safe for your pipe material. Inspect trap joints (P-traps) for leaks and ensure proper venting. Regularly monitor drainage flow and address signs of slow drainage early to reduce the chance of needing another roto-rooter soon.
Tools & Materials
- Roto-Rooter machine or professional drain-cleaning equivalent(Ensure operator is trained or follows manufacturer instructions)
- Cable or auger attachment(Appropriate length for your line; confirm compatibility)
- Work gloves(Waterproof, cut-resistant)
- Safety goggles or face shield(Protect eyes from splash and debris)
- Bucket or large container(Catch water and debris)
- Towels or rags(Keep area tidy and absorb spills)
- Plunger (optional)(For initial loosening of minor clogs)
- Work surface protection (plastic sheeting or drop cloth)(Protect floors during cleanup)
- Disposable waste bags(Contain debris for disposal)
- Access to water source and drainage receptacle(Have nearby water supply and a drain for runoff)
Steps
Estimated time: 60-90 minutes
- 1
Shut off water and prepare area
Turn off the water supply to the affected line and place a bucket and towels to catch drips. Clear the area and put on PPE before handling any tools. This reduces the chance of splashback and keeps debris contained.
Tip: Always verify the valve is fully closed before starting. - 2
Identify access point and inspect
Locate the cleanout or drain access point appropriate for the clog (sink, tub, shower, or main line). Check for visible leaks or damage and remove any obvious obstructions around the access opening.
Tip: Label the access point to avoid confusion if you have multiple lines. - 3
Feed the cable carefully
Gradually feed the roto-rooter cable into the drain while maintaining gentle pressure. Avoid forcing the head through tight bends. If you meet resistance, back out slightly and re-align before continuing.
Tip: Keep steady, controlled advancement to reduce pipe stress. - 4
Operate the machine and break the clog
Power on the machine and maintain a slow feed. Let the cutting head work for a few minutes; pause if you hear grinding or excessive resistance. If the clog yields, pull the cable back slowly to remove debris.
Tip: Do not run the motor at full speed in stationary contact with a blockage. - 5
Pull out and rinse
Retract the cable slowly while turning it to avoid whipping. Rinse the drain with water to flush debris out and observe flow. Repeat if necessary until water clears.
Tip: Have a helper assist with feeding and retracting to avoid kinking. - 6
Test the drain
Run water through the drain to confirm proper flow. Check for leaks at joints and cleanouts. If discharge remains slow, consider repeating or moving to a different access point.
Tip: Document results for future reference. - 7
Clean up and dispose
Turn off and unplug the machine, wipe down components, and dispose of waste in a bag per local regulations. Restore any removed items and ensure the area is dry and safe for use.
Tip: Dispose of any contaminated rags as soon as possible.
Got Questions?
Is it safe to use a roto-rooter on PVC pipes?
Roto-rooters can be used on PVC, but excessive force can damage the material. Use light pressure, avoid deep gouges, and consult a professional if you’re unsure about your pipe type.
Roto-rooters can be used on PVC, but avoid heavy force. If unsure, consult a professional.
Can a roto-rooter damage sewer lines?
Damage is possible if the tool is forced through bends or used improperly. Operators should use appropriate cable length and technique and avoid forcing the head through stubborn sections.
Damage is possible if used improperly or forced through tight bends.
How long does a typical roto-rooter drain cleaning take?
Most DIY sessions take about 60 to 90 minutes, depending on clog location, pipe material, and access point. More complex main-line issues may take longer or require professional service.
Most jobs take about one to one and a half hours, depending on the clog and location.
Should I rent or buy a roto-rooter for occasional clogs?
For infrequent clogs, rental is often cost-effective. For frequent use, purchasing a model with a compatible cable set and safe operation features may provide long-term value.
Rent if you rarely need it; buy if you’ll use it often.
What maintenance after cleaning helps prevent future clogs?
Flush lines with hot water, consider enzyme-based cleaners safe for your pipes, and inspect traps for leaks. Regular flow checks reduce the likelihood of recurring clogs.
Flush with hot water and perform periodic checks to prevent future clogs.
What’s the difference between a drain snake and a roto-rooter?
A drain snake is a manual auger for minor clogs, while a roto-rooter is a powered tool that can clear tougher blockages, including tree roots. For severe or hard-to-reach clogs, a professional solution is recommended.
A snake is manual, roto-rooter is powered and stronger.
Watch Video
The Essentials
- Identify the clog type and access point before starting
- Prioritize safety with PPE and workspace prep
- Feed and retract the cable with controlled, gentle movements
- Test flow after cleanup and monitor for recurring issues
- Know when to escalate to professional help