Should I Drain a Blister? Safe DIY Guide
Learn when to drain a blister, how to do it safely, and aftercare tips. Drain Guide explains when drainage is appropriate, sterile technique, and infection warning signs.

Most blisters should not be drained. Leave a blister intact to reduce infection risk. If the blister is large, painful, or limiting movement, you may drain as a last resort using sterile supplies: wash hands, sterilize a fine-gauge needle, puncture at the edge, drain gently without tearing skin, apply antiseptic, and cover with a sterile dressing. Seek medical help if signs of infection appear.
Understanding why blisters form and when drainage is ever considered
Blisters form when the skin surface is rubbed or exposed to heat, causing the outer layer to separate from deeper tissues. Fluid collects in the space to cushion nerves and allow healing. For most people, the best current practice is to leave the blister intact to protect the wound and minimize infection risk. According to Drain Guide, conservative blister care often leads to quicker, cleaner healing than premature drainage. However, in some situations a blister can become extremely large, painful, or fixated on a joint, where drainage might be considered as a last resort. If you choose to drain, you should adhere to strict sterile technique and monitor closely for signs of infection. The goal is to reduce pain and enable movement without introducing bacteria or debris into the wound. Keeping the area clean, dry, and protected will support natural healing. If the blister roof remains intact, it acts as a natural bandage and reduces the risk of further injury.
Risks of draining and why many clinicians advise against it
Draining a blister can introduce bacteria into the underlying tissue if done with non-sterile tools or through torn skin. The roof of the blister also protects underlying tissue; puncturing it can increase the chance of infection or cause the blister to reopen after initial healing. Clinicians generally advise against drainage unless the blister is large, painful, or at risk of rupture. Drain Guide analysis underscores that complications rise when drainage is performed without sterile technique or proper aftercare. When left intact, the blister acts as a natural barrier, reducing exposure of raw tissue to bacteria and supporting faster healing. Always consider alternatives like keeping the blister clean and covered if possible.
When drainage might be appropriate and how to do it safely
Drainage might be appropriate for a blister on a weight-bearing area or one that is at risk of rupture and causing severe pain or restriction of movement. If drainage is chosen, use sterile supplies, sterilize the area, and puncture only at the edge to minimize tearing of the roof. Let the fluid drain completely without squeezing, then apply antiseptic and cover with a sterile dressing. Do not remove the overlying skin; preserve as much of the blister roof as possible to protect underlying tissue. Aftercare includes keeping the area clean, changing the dressing daily, and watching for signs of infection. Drain Guide emphasizes following sterile steps and stopping if pain worsens or redness expands.
Care after drainage and prevention of infection
After drainage, wash hands, cleanse the area with mild soap and water, apply antiseptic, and cover with a sterile dressing. Change dressings daily or whenever damp. Monitor for redness, warmth, fever, or spreading swelling—these warrant prompt medical evaluation. Avoid adhesives that irritate the surrounding skin and keep the area dry while it heals. If you notice pus or increasing pain, seek medical advice promptly. Protect the healing skin from friction and avoid re-injury by using a breathable bandage or protective tape.
Alternatives to drainage and home care for minor blisters
For many minor blisters, the best course is to leave them intact and use protective padding to minimize friction. Use blister cushions or hydrogel dressings to reduce pain and promote healing. Change footwear or adjust activities to prevent repeated rubbing. Keep skin clean and dry, and use antiseptic when the blister roof is compromised. If you have diabetes, poor circulation, or immune suppression, seek medical guidance before attempting any drainage at home.
Tools & Materials
- Sterile needle or lancet(fine-gauge, pre-sterilized if possible)
- Alcohol pads or isopropyl alcohol 70%(for surface sterilization before puncture)
- Antiseptic solution(chlorhexidine or iodine-based prep)
- Sterile adhesive bandage or sterile gauze and medical tape(to cover after drainage)
- Disposable gloves(optional but recommended for hygiene)
- Clean water or saline(for gentle cleaning if soap irritates skin)
Steps
Estimated time: 15-25 minutes
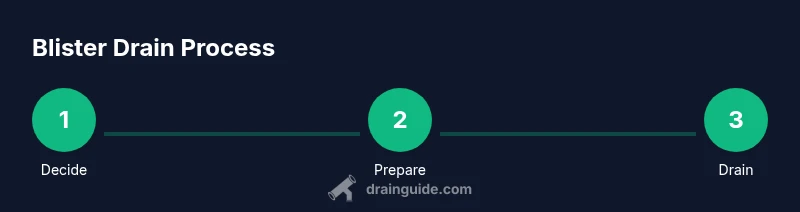
- 1
Decide if drainage is necessary
Assess the blister: if it is small, painless, and not in a high-friction area, leave it intact. If it is very large, extremely painful, or obstructs movement, drainage may be considered as a last resort with sterile technique.
Tip: If you’re unsure, err on the side of leaving it intact. - 2
Wash hands and prepare supplies
Wash hands thoroughly with soap and water. Gather sterile supplies and set them on a clean surface to minimize contamination.
Tip: Use gloves if available to reduce direct contact with the blister. - 3
Sterilize the drainage area
Wipe the surrounding skin with an alcohol pad. Do not touch the blister roof; this minimizes introducing bacteria.
Tip: Avoid touching the inside of the blister roof. - 4
Puncture at the edge of the blister
Using a sterilized needle, make a small puncture at the edge of the blister to allow fluid to exit without tearing the roof.
Tip: Do not puncture the center of the blister or tear the roof. - 5
Drain and dry
Let clear fluid drain without squeezing. Gently pat the area dry with sterile gauze.
Tip: Do not force fluid; over-draining can damage tissue. - 6
Apply antiseptic and cover
Apply antiseptic to the area and cover with a sterile dressing or bandage.
Tip: Keep dressing clean and dry; change daily. - 7
Monitor and follow up
Watch for signs of infection (increasing redness, warmth, swelling, pus, fever). Seek medical care if symptoms develop.
Tip: If pain worsens after drainage, stop and seek help.
Got Questions?
Should I drain a blister if it’s small and painless?
No—small, painless blisters are best left intact to protect the underlying tissue and reduce infection risk.
No—the best approach is to leave small blisters intact and protect the area.
What supplies do I need for safe drainage at home?
Sterile needle, alcohol pads, antiseptic solution, sterile dressing, and disposable gloves.
You’ll want sterile tools and antiseptics to keep things clean.
What are warning signs of infection after drainage?
Increased redness, warmth, swelling, pus, fever, or spreading pain require medical evaluation.
Watch for redness, warmth, or fever after drainage.
Can I drain a blister on a finger or toe?
The same sterile principles apply; avoid tearing skin and seek help if you’re unsure.
The same precautions apply to fingers and toes, but don’t force drainage.
Is it safe to drain a blister if I have diabetes?
At-home drainage is riskier with diabetes; consult a clinician if you’re unsure.
Diabetes increases infection risk; seek professional advice if in doubt.
When should I seek medical care instead of DIY drainage?
If the blister covers a large area, is from a burn, shows signs of infection, or you have underlying conditions, seek medical care.
If there’s any concern about infection or healing, see a clinician.
Watch Video
The Essentials
- Avoid draining a blister unless necessary
- Use sterile technique if drainage is required
- Protect and monitor the area for infection
- Seek medical advice if infection signs appear
- Cover and change dressing daily for best healing