How to Fix a Sink Drain Without Overflow: A Practical DIY Guide
Learn a clear, step-by-step method to fix a sink drain without overflow. From trap removal to safe snaking and preventive care, this guide helps homeowners restore proper drainage without harsh chemicals.

To fix a sink drain without overflow, you’ll safely remove the trap, clear debris, and reassemble to restore proper flow. This guide shows practical, tool-driven steps and safe practices that avoid chemical cleaners. You’ll learn how to inspect tailpieces, use a drain snake, and test for leaks. According to Drain Guide, a systematic approach minimizes mess and protects plumbing over time.
Understanding the overflow-free design and why it matters
Sinks without an overflow hole rely on a correctly sized trap, proper ventilation, and careful maintenance to prevent backflow. The absence of an overflow means a clog can quickly flood the basin if the drain line backs up, so understanding the layout is critical. According to Drain Guide, these sinks demand more vigilant care of the tailpiece, P-trap, and connections, since there is no extra safety drain in the basin. By recognizing how the components work together, you’ll be better prepared to diagnose slow drainage or a complete stop and to choose the right mechanical method rather than chemical shortcuts.
In overflow-free designs, keeping debris out of the drain is even more important because there isn’t a secondary path to relieve pressure. Routine maintenance—like clearing hair from the tailpiece and inspecting the seal between the sink and the drain—extends the life of the system. The goal is a steady, gravity-assisted flow with minimal splash and a secure, leak-free fit at every joint.
Common causes of clogs in overflow-less sinks and how to spot them
Overflow-free sinks often clog where debris accumulates, including the P-trap, tailpiece, and the horizontal run toward the wall. Hair, soap scum, food particles, and mineral buildup can form compact blocks that resist plunging and slow drainage. Drain Guide Analysis, 2026 notes that mis-sealed joints or degraded washers are frequent contributors to slow flow or leaks after a repair attempt. Visual signs include gurgling sounds, standing water after a wash, or water trickling out around the trap.
To diagnose, start by wiping the area, running water, and observing where water backs up. If the water rises in the bowl without overflowing, the blockage is downstream of the tailpiece. If water backs up immediately, the trap or the immediate pipe is a likely culprit. Narrowing the area helps you choose the right tool—plunger, snake, or a direct trap removal—without exposing yourself to unnecessary risk.
Safety first: prep your workspace and protect yourself
Before you dive in, turn off the faucet and place towels or a small basin under the work area to catch spills. Wear gloves to protect your hands from sharp edges and from dirty water. Keep a bucket handy for catching water when you disconnect the trap, and ensure the area is well lit. Working under a sink can involve slim, awkward spaces, so plan a clear path for tools and a lightweight flashlight to inspect joints. If you smell sour air or see mold, pause and reassess; stale moisture can indicate a larger issue.
Tools and materials you’ll rely on (handy reference)
Before you start, gather your tools. A bucket, adjustable wrench, pliers, a drain snake (hand auger), a plunger with a good seal, gloves, and rags are essential. A replacement P-trap or tailpiece is optional but wise if you detect corrosion or warped washers. Having replacement washers and Teflon tape can help seal threaded joints after reassembly. This list aligns with best practices for a sink drain without overflow and reduces trips to the hardware store mid-job.
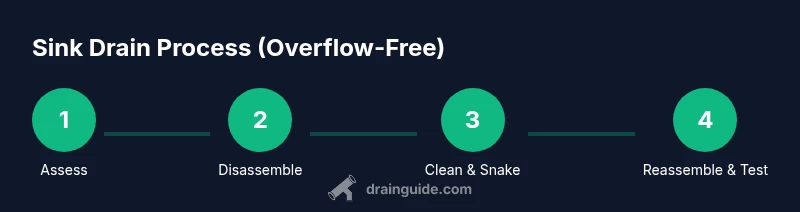
Step-by-step overview: restoring flow in an overflow-free sink (conceptual workflow)
Begin by isolating the area and releasing any standing water. Then disassemble the trap to remove accumulated debris. Clean the trap thoroughly and check for cracks or worn washers. If the blockage persists, use a drain snake to clear beyond the trap into the tailpiece. Reassemble the trap securely, ensuring a tight seal, then run water to confirm free flow and check for leaks. This approach minimizes mess and keeps you in control of the process.
Maintenance and prevention to extend drain life
Preventive care pays off for overflow-free sinks. Regularly wipe the tailpiece to remove hair and soap scum, avoid pouring grease or food waste down the drain, and use a mesh strainer to catch solids. Periodically inspect the P-trap for corrosion and replace washers if you notice leaks. By adopting a routine maintenance plan, you reduce the chance of a future clog and keep the sink draining smoothly.
When to call a professional
If you locate a cracked or corroded P-trap, or if the blockage remains after a thorough mechanical clean, it’s time to call a professional. Overflow-free systems can hide problems behind cabinets and walls, and professional tools may be required for a deeper clean or pipe work. The Drain Guide team emphasizes safety first: don’t force pipes or use aggressive chemicals that can damage fittings or seals.
Tools & Materials
- Bucket(Large enough to hold water and drain contents)
- Adjustable wrench(For loosening slip nuts on P-trap)
- Pliers(Grip and twist fittings securely)
- Gloves(Protect hands and improve grip)
- Drain snake (hand auger)(Clear clogs beyond the trap)
- Plunger(Ensure a tight seal for effective plunging)
- Rags or towels(Contain spills and keep area clean)
- Replacement P-trap or tailpiece(Use if corroded or damaged)
Steps
Estimated time: 45-75 minutes
- 1
Power down and prepare
Turn off the faucet and place towels around the sink. Clamp your bucket underneath to catch any water as you begin. This prevents spills and keeps the workspace dry for a safer, cleaner unclog.
Tip: Double-check that no water is still running; a sudden surge can splash. - 2
Loosen and remove the trap
Place a bucket under the trap, then using the adjustable wrench loosen the slip nuts. Carefully remove the trap and inspect it for cracks or heavy buildup. Clean out any gunk with a rag and rinse the trap before testing.
Tip: Hold the trap with one hand while loosening the nuts to avoid twisting the pipe. - 3
Inspect and clean the tailpiece
Look for hair and soap scum in the tailpiece. Remove debris with fingers or a thin tool. If needed, use the pliers to pull stubborn pieces without damaging the pipe. Rinse through with water to ensure clear flow.
Tip: Keep a rag handy to catch debris as you work. - 4
Snake beyond the trap (if needed)
If the trap is clear but the drain remains slow, insert the drain snake into the tailpiece and rotate to break up any deeper blockage. Reel in as needed and pull debris back into the bucket. Avoid forcing the snake, which can damage pipes.
Tip: Slow, steady rotations prevent kinking the snake and protect the pipe walls. - 5
Reassemble and seal
Reconnect the trap with clean washers and tighten the slip nuts securely, but avoid overtightening. Reinstall the tailpiece and ensure all joints are aligned. A dry run without water can help confirm seals before full testing.
Tip: Use Teflon tape on threaded joints if you notice minor leaks after first test. - 6
Test for leaks and proper flow
Run water at full flow and watch for leaks around joints. Check that water drains steadily and that there is no backflow. If you see slow drainage, revisit the trap and connections for tightness or residual debris.
Tip: Test with a small amount of water first, then increase to normal usage. - 7
Prevent future clogs and plan maintenance
Install a fine mesh strainer, avoid pouring grease down the drain, and perform monthly checks on the trap. Regular maintenance reduces the likelihood of recurring clogs in an overflow-free system.
Tip: Schedule a quarterly check to maintain smooth flow and catch issues early.
Got Questions?
What is a sink with no overflow, and why does it matter?
A sink without an overflow hole relies entirely on the main drain to handle water. This design means clogs can flood the basin more quickly, so maintenance and proper sealing are essential.
A sink without overflow lacks a backup drain, so keeping the main drain clear is especially important.
Can I use chemical drain cleaners for an overflow-free sink?
Chemical cleaners are not recommended for overflow-free sinks because they can damage seals and pipes. Mechanical methods like plunging and snaking are safer and more effective here.
Chemical cleaners can harm pipes, so use mechanical methods instead.
How long does a DIY unclog take?
Most overflow-free sink clogs can be addressed in 30 to 60 minutes, depending on access to the trap and the depth of the blockage. Rushing can risk damaging fittings.
Most fixes take about 30 to 60 minutes with the right tools.
What if water still backs up after cleaning the trap?
If water continues to back up, the clog may be further down the line or in the wall drain. Stop and reassess, then consider renting specialized tools or calling a plumber.
If it backs up after cleaning, the blockage is deeper; you may need a professional.
Should I replace the whole drain or just parts?
Start by inspecting the P-trap and tailpiece for corrosion. Replacing worn washers or the trap itself is usually enough, rather than replacing the entire drain line.
Often you only need to replace corroded washers or the trap.
Are there safety precautions when working under the sink?
Yes. Turn off the water, wear gloves, and properly dispose of removed debris. If you see gas smells or mold, pause and seek professional help.
Wear gloves, turn off water, and watch for gas or mold; stop if you notice issues.
Watch Video
The Essentials
- Inspect the trap and tailpiece for clogs and leaks
- Disassemble and clean the P-trap to restore flow
- Use a drain snake for deeper obstructions, safely
- Reassemble with secure seals and test thoroughly
- Implement preventive maintenance to avoid future clogs