Tips for Drain Snake: DIY Clog Clearing Guide for Homes
Learn practical, safe methods to clear drains with a drain snake. This Drain Guide tutorial covers tool selection, a step-by-step approach, safety tips, and simple maintenance to prevent future clogs.

You’ll learn how to safely use a drain snake to clear clogs in sinks, showers, or tubs. This quick guide covers selecting the right snake, basic safety, and a proven step‑by‑step method, plus mistakes to avoid and when to stop and call a plumber. It emphasizes common DIY limits, risk awareness, and essential tools.
What a drain snake does and when to use it
Drain snakes, also known as augers, are flexible cables designed to reach into a clogged drain and break up or pull out obstructions. They are effective for hair clogs in bathroom sinks, tub and shower drains, and kitchen sinks where grease and soap buildup accumulate. They are not a chemical cure; instead they mechanically disrupt the clog to restore flow. According to Drain Guide, using a snake correctly reduces the need for harsh chemicals and minimizes the risk of expensive plumbing damage. For many households, a handheld snake is the right starting tool, provided you follow safe handling practices and the manufacturer’s instructions.
A common misconception is that all clogs are the same. In reality, the clog’s location, material, and depth influence your approach. Hair and soap scum tend to form flexible, stringy blockages that respond well to a snake, while solid objects or a long grease buildup may require different angles or multiple passes. Start with patient, controlled motions and always monitor the line for resistance or snagging, which can indicate you’ve reached the trap or bend in the pipe.
From a DIY perspective, the goal is to restore flow without damaging pipes. Drain snakes provide mechanical action rather than chemicals, which makes them a safer first option for many homeowners. Drain Guide’s guidelines emphasize following the tool’s instructions and using the appropriate size and length for your drain. This approach minimizes risk while maximizing chances of clearing the clog.
Types of drain snakes and choosing the right one
There are several types of drain snakes, and choosing the right one is crucial for success and safety. Manual handheld snakes are ideal for most household drains and are simple to control. Toilet augers are specifically designed for toilets and should be reserved for that purpose, as other drains can be damaged by their geometry. Power augers, while effective, require more care and better protective measures for beginners.
Length and diameter matter. For standard bathroom and kitchen drains, a 3–6 foot snake with a 1/4–3/8 inch cable is often sufficient. For deeper or wider pipes, a longer cable (up to 25 feet) may be necessary. Consider the drain’s trap access, as some setups require you to remove the trap or access cap to feed the cable properly. Drain Guide Analysis, 2026 notes that proper tool selection increases success rates and reduces user fatigue, especially for first-time users.
Choosing between rigid and flexible snakes affects the feel and control. Flexible cables reach bends, but can kink if forced. A rigid cable provides more direct force but may not navigate curves well. Always start with the least aggressive tool that can reach the blockage and only increase length if you encounter resistance.
Safety and setup before you begin
Safety comes first when snaking drains. Put on protective gloves and eye protection to guard against splashes. Ensure the area is well-lit and place towels or rags around the drain to absorb moisture. If your drain has a cleanout plug, loosen it gently with the appropriate tool (often a plier or adjustable wrench) before inserting the snake. Disconnect or shut off the water supply if you anticipate significant backflow, and never work alone in a potentially hazardous setup.
Before you insert the snake, make sure you understand the path the cable will take. If you encounter a trap or angled pipe, proceed slowly and avoid forcing the cable. Keep a bucket handy to catch any dirty water and keep the work area clean. This preparation reduces splatter and helps you assess progress more clearly as you work.
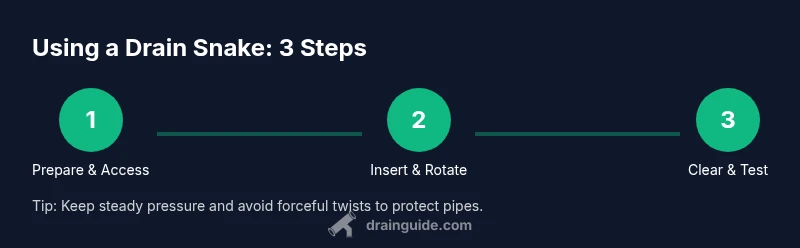
Step-by-step guide to using a drain snake
-
Inspect and prep the area: Clear the counter, remove visible debris, and place towels around the area. Ensure you have good lighting and access to the cleanout if present. This initial prep reduces mess and sets you up for a smoother process.
-
Access the drain: If there is a cleanout, remove the cap with a wrench or pliers. If there is a trap, carefully remove it to gain direct access to the pipe. Remember to place a bucket beneath to capture any water that escapes.
-
Feed the snake: Start feeding the cable into the drain slowly while turning the handle clockwise. Let the snake advance until you feel resistance; that indicates you’re near the clog or a bend.
-
Break and retrieve the clog: When you encounter resistance, rotate and push gently to break up the obstruction. If you meet a stubborn snag, back the cable out a few inches and reinsert, repeating the process.
-
Withdraw and inspect: Carefully pull the snake back, wiping off debris as it comes. Remove any material from the cable as you retract to prevent re-clogging the drain.
-
Test the drain: Run water briefly to confirm flow improved. If water still drains slowly, repeat the process once more, using a shorter segment of cable or a different approach if necessary.
-
Finish and clean up: Reinstall any traps or cleanouts you removed, wash and store the snake properly, and sanitize the surrounding area. Leave the drain ready for regular use and schedule routine maintenance to prevent future clogs.
Common mistakes and how to avoid them
• Forcing the cable through the pipe is a common mistake. Forcing can nick the pipe or push the clog deeper. Rotate slowly and apply gentle pressure instead.
• Not protecting the area. Skipping towels and PPE leads to a messy cleanup and potential skin or eye irritation. Always wear gloves and keep towels handy.
• Overlooking cleanouts. If you skip a cleanout, you might think the clog is further down than it actually is. Seek the cleanout location and access it if present.
• Ignoring safety warnings. If you sense unusual odors, sewage backflow, or if water backs up regardless of attempts, stop and call a professional. Drain Guide emphasizes knowing your limits to prevent costly damage.
Maintenance and prevention after a use
After snaking a drain, it’s wise to run hot water through the line for a minute or two to help flush remaining debris. Consider installing hair screens or strainers on bathroom drains to reduce hair buildup. A weekly rinse with hot water, or a monthly flush with a mixture of baking soda and hot water, can help prevent future clogs. Remember to avoid pouring grease or fatty liquids down kitchen sinks, as they can solidify and accumulate with time. Keeping a simple maintenance routine reduces the need for more aggressive interventions later.
When to call a professional
If snaking doesn’t improve drainage after one or two passes, or if you hear gurgling or sewage odors, it’s time to consult a licensed plumber. Structural issues like cracked pipes, misaligned joints, or blocked main lines require professional equipment and expertise. Drain Guide recommends seeking help sooner rather than later when you encounter persistent clogs, unusual water color, or recurring drainage problems, to prevent long-term damage and potential health hazards.
DIY troubleshooting beyond the snake
Beyond the drain snake, you can try a few safe, non-chemical techniques. A plunger can sometimes clear a shallow clog near the drain opening. For kitchen sinks, avoid mixing chemical cleaners with a snake. Enzyme-based cleaners are a gentler option that can break down organic matter over time, but they should be used according to the product directions and not relied on for immediate results.
If you suspect a broader system issue (shared drainage with other fixtures, strong sewer odors, or backups across multiple drains), contact a licensed plumber. Handling complex drainage problems without proper equipment or training can lead to property damage or health risks. Drain Guide’s approach centers on safety, gradual progression, and knowing when to escalate care.
Cleaning up and disposal
After you finish, thoroughly rinse the snake with clean water and let it dry before storage. Wipe down any surfaces that came into contact with the clog material and sanitize the work area. Store the snake in a dry, clean place to prevent rust and corrosion. Dispose of any rags or towels used during the process in a sealed bag to minimize odor and contamination risk.
Tools & Materials
- Drain snake (manual)(6–25 ft depending on the drain)
- Plier or adjustable wrench(To loosen cleanout caps)
- Rubber gloves(Grip and hygiene)
- Bucket, towels(Catch water and keep area clean)
- Flashlight(Better visibility)
Steps
Estimated time: 20-40 minutes
- 1
Prepare the area and safety gear
Clear the work area, remove any standing water, and lay towels around the drain. Put on rubber gloves and eye protection to minimize splash exposure. This step sets you up to work cleanly and safely.
Tip: Have a bucket ready to catch any backflow. - 2
Access the drain
If there is a cleanout plug, loosen it with the correct tool to expose the drain. For traps, carefully remove them to gain direct access. Keep the work area contained and be prepared for a splash of water.
Tip: Work slowly to avoid damaging the drain components. - 3
Feed the snake into the drain
Insert the snake into the drain and begin turning the handle clockwise to feed the cable. Feed gently until you meet resistance, which likely indicates the clog or a bend.
Tip: Maintain steady pressure and avoid forcing the cable. - 4
Break up the clog
Continue rotating and advancing the cable to disrupt the clog. If you hit a knot or it won’t advance, retract a few inches and try again from a different angle.
Tip: Patience pays off—forcing can cause damage. - 5
Retrieve and inspect
Slowly pull the cable back while cleaning off any debris. Inspect the tip for stuck material and wipe it clean before the next pass.
Tip: Keep towels handy to manage debris. - 6
Test the drain
Run hot water to check flow. If drainage is still slow, repeat the process once more with a shorter insertion length.
Tip: Don’t overdo repetitions; excessive snaking can damage pipes. - 7
Finish and clean up
Reinstall any traps or cleanouts you removed. Store the snake in a dry place and sanitize the area.
Tip: Dry the tool completely to prevent rust.
Got Questions?
Can a drain snake damage pipes?
Yes, if used improperly. Do not force the cable, especially around bends. Start gently and back out if you meet resistance. For most residential pipes, a properly used manual snake is safe.
A drain snake is generally safe when used gently and correctly; avoid forcing it.
Should I remove the P-trap before snaking a sink drain?
In many cases you don’t need to remove the P-trap, but accessing the drain via a cleanout or loosening the trap cap can help. If you’re unsure, start with the cleanout and avoid removing plumbing you’re not confident handling.
Often you can access the clog through a cleanout; don’t force the trap if you’re unsure.
Are chemical drain cleaners necessary after using a snake?
No. A drain snake is a mechanical solution. Chemical cleaners aren’t required and can be hazardous when mixed with a snake. If you want extra protection, use enzyme-based cleaners after clearing, following the product directions.
Chemicals aren’t needed after snaking; you can use enzymes if you choose, but follow directions.
How often should I snake drains as part of maintenance?
Only when clogs occur or drainage slows noticeably. Regular snaking is not typically necessary and can risk pipe wear. Pair snaking with preventive habits like hair screens and proper disposal.
Snake drains only when needed; combine with prevention.
What should I do if the clog returns after snaking?
If clogs keep returning, the issue may be deeper in the plumbing or involve multiple fixtures. Consider calling a professional to assess trap layout, pipe damage, or a blocked main line.
If it keeps recurring, call a plumber to check for deeper issues.
The Essentials
- Know when to use a drain snake as your first option
- Choose the right length and diameter for your drain
- Work slowly and avoid forcing the cable
- Clean and sanitize after use to prevent odor
- Ask a professional if the clog persists or returns soon after snaking