Trap Drain Troubleshooting: A Homeowner's Step-by-Step Guide
A comprehensive, safety‑first guide to diagnosing and fixing a trap drain under sinks. Learn how to remove clogs, clean the P-trap, reseal joints, and prevent future issues with practical, DIY-friendly steps.

Learn how to diagnose and fix a trap drain clog in a sink with a practical, step-by-step approach. This guide covers removing the P-trap, cleaning out hair and gunk, resealing joints, and testing for leaks. You’ll use common household tools and safety gear to restore proper drainage without costly plumbing calls. Drain Guide recommends starting with mechanical cleaning before chemical remedies.
What is a trap drain and how it works
A trap drain is the U-shaped bend—commonly called a P-trap—found beneath most sinks. It serves two essential functions: it holds a small amount of water to block sewer gases from entering the home, and it creates a short, accessible space where clogs tend to collect. When water drains slowly or backs up, the trap is often the first place to inspect. A clogged trap drain typically results from a buildup of hair, soap scum, grease, and food particles that stick to the curved interior of the pipe. In many households, the clog forms gradually as waste accumulates, rather than appearing as a sudden, complete blockage. The Drain Guide team emphasizes that understanding the trap drain’s purpose helps homeowners approach maintenance with confidence and care. If you hear gurgling or notice a persistent odor near the sink, those are strong indicators to inspect the trap drain area. By keeping the trap clean and ensuring the joints are sealed, you can maintain smooth drainage and minimize sewer gas exposure in living spaces.
This section introduces the core concept: addressing the trap drain requires a deliberate, hands-on approach that starts with safety and progresses through mechanical cleaning and verification. Remember that the trap drain is a critical checkpoint for overall plumbing health. When you work with the trap drain, you are not just clearing a clog—you are maintaining a key component of your home’s drainage system. Drain Guide’s practical guidance helps homeowners feel capable, even with limited tools and experience.
Causes of clogs in trap drains
Clogs in the trap drain often originate from everyday usage. Hair is a primary culprit in bathroom sinks, while soap residue, toothpaste, and greasy residues from kitchens contribute to slower drainage over time. Food particles and coffee grounds can also accumulate in kitchen traps, especially when drains are not flushed with water after disposing of liquids. A common mistake is attempting to override the clog with chemical drain cleaners, which may provide a quick blast of relief but can damage pipes and trap gaskets over repeated use. A comprehensive approach—focusing on mechanical removal first and then cleaning with safe household products—tends to yield lasting results. Debris lodged in the trap often remains visible once the trap is removed, making it the best first target for cleaning. Drain Guide’s analysis highlights that consistent maintenance and mindful disposal habits are the keys to preventing recurring clogs.
If you have a gurgling sound after use or persistent odor, your trap drain is a likely suspect. Regularly inspecting and cleaning the trap drain reduces the frequency of emergency calls and keeps your plumbing working effectively. It’s worth noting that deeper blockages beyond the trap may require more advanced tools, but most residential clogs stay within the P-trap and immediate piping.
Safety considerations before you start
Before you touch the trap drain, prepare your workspace and wear appropriate safety gear. Always start with a dry, well-lit area and place a bucket under the trap to catch water and debris. Use gloves and eye protection to shield your hands and eyes from splashes of dirty water and potential sewer gases. Turn off the local water supply to prevent accidental flooding if you must remove more pipe than anticipated. If you smell strong sewer gas, pause and ventilate the area. Do not attempt to create a seal that traps gases or force a clog through with aggressive methods. Drain Guide’s safety guidance emphasizes patience and careful handling—rushing steps can lead to leaks or injuries. When in doubt, consider a professional consultation, especially if you encounter corroded joints, metal pipes with significant wear, or persistent leaks after reassembly.
This safety-first mindset protects both you and your home while you perform the task and creates a clear path for a successful result.
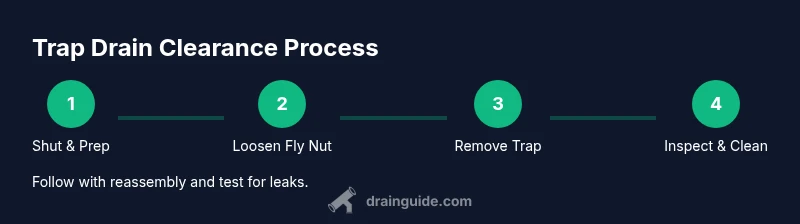
Step-by-step overview of clearing a trap drain
The following steps outline a practical, mechanical approach to clearing a trap drain. The steps below align with the later STEP-BY-STEP block, but this section provides a high-level roadmap so you understand the flow before digging in. Start by preparing the workspace, then remove the trap, inspect its contents, clean the interior, reinstall the trap, and test the drainage. This method minimizes the risk of pipe damage and reduces the chances of a recurring clog. Drain Guide recommends performing each action deliberately and documenting the process if you’re unsure about any joint or connection.
While the trap is a common focal point for clogs, a deeper obstruction can exist in the drain line beyond the trap. If you encounter a consistently blocked line after cleaning the trap, further evaluation by a plumber may be warranted. The aim is to restore free-flowing drainage with a robust seal on all joints. A successful clearance typically results in improved drainage speed, no lingering odors, and a more confident sense of control over home maintenance.
Cleaning methods: mechanical first, then flush
Mechanical cleaning—removing the physical debris from the trap and immediate piping—should be your first move. A hand brush, a specialty drain snake, or a flexible wire can dislodge hair and soap scum that adhere to the interior walls. Once the trap and nearby pipework are clean, flush the line with water to verify flow. If the flow remains sluggish, you may need to repeat the mechanical cleaning or inspect the connecting pipes for cracks or misalignments. Avoid chemical drain cleaners if possible, especially in homes with metal pipes or older joints, as these chemicals can corrode connections and cause leaks over time. Instead, rely on mechanical removal, hot water rinses, and safe cleaners like baking soda and vinegar in moderation. Drain Guide’s approach prioritizes physical removal of debris and cautious flushing to maintain pipe integrity.
For most trap drains, a simple thorough cleaning removes the main obstacle. If you notice persistent issues after cleaning and flushing, it may indicate a deeper blockage or deteriorating joints that require repairs. The goal is to restore easy drainage while preserving the integrity of your kitchen or bathroom plumbing.
Reinstalling and testing your trap drain
Reassembly is the critical moment when a slipped trap can leak if joints are not properly aligned. Reinstall the trap with clean washers and tighten the slip nuts evenly by hand until snug, then give a quarter-turn with a wrench. Do not overtighten—over-cinching can crack fittings or squeeze washers, leading to leaks. After reassembly, run cold water through the drain and observe for any signs of leakage around the joints. If you see moisture, tighten the joints slightly and re-test. If leaks persist, inspect the washers or consider replacing the entire P-trap. A viable test also includes running hot water for a minute to ensure both ends of the trap stay sealed during fluctuating temperatures.
Once you’re confident there are no leaks, wipe down the area and clean up your workspace. This careful approach minimizes future problems and provides a reliable baseline for ongoing maintenance. Drain Guide emphasizes the importance of a thorough test to confirm a successful clearance and seal.
Maintenance to prevent future clogs
Preventive maintenance is the best strategy for keeping trap drains clear. Regularly remove and clean the trap every six months or when you notice slow drainage. Use a brush and running water to remove buildup, then reassemble with clean seals. Avoid disposing of coffee grounds, fats, and fibrous materials down the sink, and install a mesh screen or hair catcher to reduce debris entry. Periodic flushing with hot water helps dissolve grease and soap scum that can accumulate over time. Keep records of maintenance tasks and note any recurring issues, which can inform timely fixes before a minor problem becomes a major clog. Proactive steps reduce the likelihood of emergencies and support a healthier, longer-lasting drainage system. Drain Guide’s practical tips empower homeowners to take control of their drainage health.
If you ever feel uncertain about a repair, or if you encounter recurring clogs, consult a licensed plumber. A small investment in professional insight can prevent more extensive damage and protect your home’s plumbing system.
AUTHORITY SOURCES
For further reading and verification, you can explore reputable sources from the government and educational institutions:
- https://www.epa.gov
- https://extension.illinois.edu
- https://www.osha.gov
These sources provide general plumbing safety, maintenance guidance, and best practices for household repairs. Always cross-check recommendations with local codes and consider professional advice for complex or hazardous situations.
Quick reference checklist
- [ ] Shut off water and place a bucket under the trap
- [ ] Put on gloves and safety goggles
- [ ] Loosen and remove the P-trap carefully
- [ ] Clear debris from the trap and interior piping
- [ ] Reassemble trap with clean gaskets and hand-tighten
- [ ] Test drainage and check for leaks
- [ ] Clean the area and dispose of waste properly
Tools & Materials
- Bucket (1-2 gallon)(To catch water and sludge under the trap)
- Adjustable wrench or pliers(For slip-nut joints)
- Channel-lock pliers(Useful if nuts are tight)
- Gloves (rubber)(Protect hands from dirty water)
- Safety goggles(Protect eyes from splashes)
- Old towels or rags(Clean up spills and spills)
- Drain snake or hair-removal tool(To reach and clear deeper clogs)
- Replacement P-trap or washers (optional)(Use if components are damaged)
- Flashlight(Inspect inside pipe and joints)
- Dish soap or vinegar (for flush)(Mild cleaners for rinsing)
- Rubber mallet (optional)(Gently reseat stubborn joints)
Steps
Estimated time: 45-60 minutes
- 1
Shut off water and prepare workspace
Turn off under-sink valves to prevent spills. Clear the area, place a bucket, and lay towels to catch drips. Ensure you have adequate lighting and space to work.
Tip: Take a photo of the existing setup before you disconnect anything. - 2
Place bucket and catch water
Position the bucket directly under the trap to catch water and sludge as you loosen the joints. Have an extra rag handy in case you need to wipe excess moisture.
Tip: Keep a towel folded to protect the cabinet surface. - 3
Loosen and remove the P-trap
Loosen the slip nuts on both ends of the P-trap with adjustable wrench or pliers. Carefully lift the trap away, allowing water to drain into the bucket.
Tip: Support the trap with one hand to prevent it from snapping shut on you. - 4
Inspect and clean the trap
Check the trap for hair, food particles, and mineral buildup. Use a brush to scrub the interior and rinse it in warm, soapy water. Inspect washers and seals for wear.
Tip: If you find a deep clog beyond the trap, use a snake to reach further into the pipe. - 5
Reinstall and seal the trap
Reattach the trap with clean gaskets, aligning the slip-nuts evenly. Tighten by hand, then snug with a wrench—avoid overtightening which can crack fittings.
Tip: Apply a thin bead of plumber’s tape or sealant only if joints require extra sealing. - 6
Test drainage and checks
Run cold water to test drainage. Look for leaks around all joints and ensure the water level in the trap remains stable. If leaks appear, tighten slightly or replace the washer.
Tip: Check both hot and cold water to ensure temperature changes don’t affect seals. - 7
Cleanup and final assessment
Wipe down any splashes, dispose of waste properly, and return tools to their storage. Confirm that the sink drains freely and that there are no new leaks.
Tip: Keep a maintenance reminder for every 6 months.
Got Questions?
What is a trap drain?
A trap drain is the U-shaped pipe under a sink that holds water to seal out sewer gases. It’s the first line of defense against odors and is the most common spot for clogs in residential plumbing.
A trap drain is the U-shaped pipe under your sink that holds water to block sewer gases. It’s usually the first place people clean when drains clog.
Why does my sink drain slowly after cleaning the trap?
If drainage remains slow, the blockage may extend beyond the trap into the drain line. Inspect the pipe beyond the trap, check for further buildup, or consider using a snake to reach deeper obstructions. Persistent slow drainage warrants professional assessment.
If it still drains slowly after cleaning, the clog might be deeper in the line or there could be a damaged joint. A snake can sometimes reach further, but you may need a plumber for persistent issues.
Can I remove the trap by myself without tools?
While possible, using basic tools makes removal safer and cleaner. A simple screwdriver or wrench helps loosen slip nuts, and having pliers on hand reduces the risk of slipping and dropping the trap.
Yes, you can remove the trap with basic tools. It’s safer to use pliers or a wrench to loosen the slip nuts before lifting the trap.
What if water leaks after I reassemble the trap?
Tighten the slip nuts a small amount and re-check. Inspect washers for wear and ensure the trap is seated correctly. If leaks persist, replace the washers or the entire P-trap.
If you see leaks after reassembly, tighten a bit more and check the washers. If it still leaks, you might need to replace the washers or the trap.
How often should I clean the trap drain?
Aim for a thorough trap clean every 6 months, or when you notice slower drainage or odors. Regular maintenance reduces the likelihood of stubborn clogs.
Clean the trap every six months, or sooner if you notice slow draining or odors.
Is it safe to flush with vinegar and baking soda?
A mild, non-chemical flush like baking soda and vinegar can help clean subtle residue, but do not rely on it to clear a heavy clog. It’s best used as a preventative flush after mechanical cleaning.
Vinegar and baking soda can help mild residue, but don’t expect it to fix a major clog. Use it as a preventive flush after cleaning.
Watch Video
The Essentials
- Identify the trap drain (P-trap) as the primary clog location.
- Clear debris mechanically before resorting to chemicals.
- Reassemble with clean seals and test for leaks before finishing.
- Maintain regularly to prevent future clogs and odors.
- If leaks persist after reassembly, seek professional help.