What is Wrong with a Washer That Won't Drain? A Practical Troubleshooting Guide
Urgent, practical guide to diagnose and fix a washer that won't drain. Follow a step-by-step approach to clear clogs, inspect the pump, and prevent future drainage issues. Drain Guide

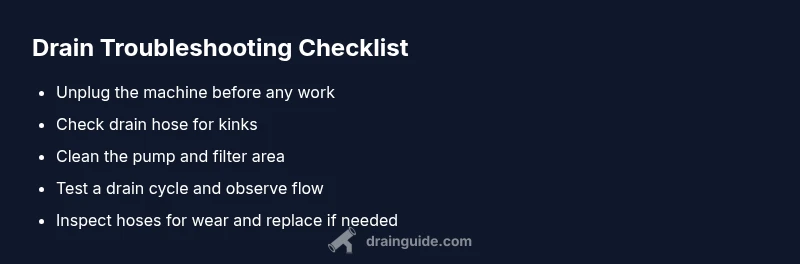
The most common reason a washer won’t drain is a clog in the pump, filter, or drain hose. Start by unplugging the machine, removing the access panel to clear any debris, and inspecting the drain hose for kinks. If the pump or lid switch appears faulty, contact a professional. Use our step-by-step guide to diagnose safely.
Why this issue happens and where to look first
When a washer won t drain, the root cause is almost always a blockage or a failed drain component. The keyword you’re targeting, what is wrong with a washer that won t drain, often points to three culprits: a clogged pump or impeller, a blocked lint/filter assembly, or a twisted/kinked drain hose. In addition, aging washers may have a failing lid switch or control board that prevents the pump from triggering. This block explains the physics of drainage: gravity, pressure, and the pump work in concert to move water out of the tub. If any link in that chain slows or stops, you're left with standing water and a stinky, damp cabinet. Drain Guide emphasizes a calm, methodical approach because most fixes are safe with the machine unplugged and with basic tools on hand.
Quick checks you can do safely
Before you dive into parts, perform a few basics. Unplug the washer and turn off the water supply. Check the drain hose for kinks or blockages—disconnect and run water through it to test flow. Inspect and clean the lint filter or debris screen if your model has one. Accessing the pump area may require removing a toe-kick panel or service panel; follow your model’s manual to avoid damage. If you hear grinding or buzzing from the pump when starting a drain cycle, that could indicate a burned-out impeller or a seized motor. In those cases, professional service is often the safest route, especially for newer high-efficiency models.
Tip: Keep a small bucket handy to catch residual water, and wear eye protection when handling hoses and filters.
Likely causes in order of likelihood
- Clogged pump or impeller: The most frequent culprit in residential laundry rooms. Debris from pockets, coins, or lint can accumulate and stall pump action.
- Blocked filter or debris buildup: Some washing machines include a lint screen or filter near the pump. A clogged filter reduces flow and can back up water.
- Kinked or blocked drain hose: A sharp bend or crushed hose restricts drainage and can back water up into the tub.
- Faulty lid switch or control board: If the machine cannot detect the lid is closed or cannot trigger the drain cycle, the pump won’t run.
- Worn seals or pump failure: Over time, seals may degrade, allowing air to bypass the pump or seize movement.
Understanding these causes helps you pick the right fix and avoid unnecessary part replacements. Drain Guide notes that most households can resolve the majority of drain problems with basic inspection and cleaning.
How to inspect the drain path: pump, hoses, and fittings
Begin by locating the pump access panel (often behind the rear or side panel). Check for visible debris around the impeller and remove any lint or fabric fibers. Inspect the inlet hose for cracks, and the outlet hose for restrictions. If your model uses a debris screen, clean it thoroughly. Reassemble, run a short drain cycle, and observe whether water exits the tub smoothly. If water still remains or the pump doesn’t operate, you may be facing a failed pump or sensor, which usually requires a replacement and professional installation. Drain Guide advises documenting the model number for accurate parts matching.
When to replace components vs call a pro
If the pump is burning or makes a loud grinding sound, replacement is often necessary. A clogged filter or hose is usually a straight cleaning job that homeowners can complete safely with basic tools. If the lid switch or control board seems suspect—especially if the washer fills but won’t drain—professional diagnosis is recommended to prevent further damage. Drain Guide recommends starting with the simplest fixes first and avoiding forced disassembly that could void warranties or cause electrical hazards.
Prevention: keep drainage clear and machines happier longer
Regular maintenance saves big headaches. Run a monthly drain-cycle test on your washer and clean the lint filter if applicable. Use a pipe brush to clear the standpipe and ensure the drain hose remains kink-free. Consider using a suds-reducing detergent and avoid overloading the drum, which increases lint and fabric debris that can clog the pump. A quick quarterly check of hoses, clamps, and fittings helps catch wear before leaks or clogs appear. Drain Guide’s prevention tips focus on small, repeatable steps that reduce the frequency of drainage problems.
Steps
Estimated time: 60-90 minutes
- 1
Power down and prep
Unplug the washer and shut off the water supply. Move the machine to access panels if needed, and place towels to catch any residual water. Safety first to prevent shocks or flooding.
Tip: Have your model number handy for correct parts. - 2
Access the pump and filter
Remove the service panel or toe-kick to reveal the pump housing and lint filter (if present). Remove any screws and gently pull the filter to clear debris. Reassemble loosely to test.
Tip: Use a flashlight to see into tight corners and avoid yo-yoing screws. - 3
Clear debris and inspect impeller
Manually rotate the impeller to check for resistance. Clear hair, threads, and coins or foreign objects from the impeller chamber. Replace the filter if damaged.
Tip: Never force parts; if it won’t move, stop and reassess. - 4
Check the drain hose and standpipe
Disconnect the drain hose, inspect for kinks or clogs, and flush with water. Ensure the hose is positioned to prevent backflow and reinstall with a secure clamp.
Tip: Do not crimp the hose during reattachment. - 5
Test the drain cycle
Plug in the unit, run a short drain cycle, and observe water flow. Listen for pump operation and check for leaks around fittings and clamps.
Tip: If the pump remains silent, the problem may be electrical or the pump itself. - 6
Decide on repair vs replacement
If you hear grinding or the pump won’t energize, consider professional service. If cleaning fixed it, monitor for recurrence and plan preventive maintenance.
Tip: Document parts replaced and keep receipts for warranty purposes.
Diagnosis: Washer won't drain at end of cycle
Possible Causes
- highClogged pump or impeller
- mediumBlocked filter or debris buildup
- mediumKinked or blocked drain hose
- lowFaulty lid switch or control board
Fixes
- easyClean the pump and impeller area to remove debris
- easyClear or replace clogged filter; straighten and flush drain hose
- easyUnkink or replace the drain hose; test drainage after reassembly
- hardReplace lid switch or control module if electrical signaling fails
Got Questions?
Why won't my washing machine drain after a cycle?
Most commonly, a clogged pump, filter, or drain hose stops drainage. Electrical issues like a faulty lid switch can also prevent the pump from triggering. Start with simple checks before replacing parts.
Most washers don’t drain because of a clog or a faulty switch. Start with the filter and hose, then check the pump.
How do I unclog a washer pump and filter safely?
Unplug the machine, access the pump area, and remove debris from the impeller. Clean the filter screen if present, rinse with water, and reassemble. Run a test drain cycle to confirm flow.
Unplug, clear debris from the pump area and filter, and test the drain cycle.
Can a damaged drain hose cause drainage problems?
Yes. A kinked, cracked, or collapsed drain hose restricts drainage and can back up water. Replace the hose if damage is visible and ensure proper routing.
A damaged drain hose can block drainage; replace it if you see cracks or kinks.
When should I call a professional for a washer that won’t drain?
If you hear grinding, the pump won’t engage, or you’re unsure about electrical components, a professional service is recommended to avoid shocks or further damage.
Call a pro if the pump won’t energize or you suspect electrical issues.
How can I prevent future drainage problems?
Regular maintenance, avoid overloading, clean filters, and inspect hoses periodically. Running a monthly drain test helps catch issues early.
Do regular maintenance and keep an eye on hoses and filters to prevent future drains.
Watch Video
The Essentials
- Start with the simplest checks: hose, filter, and pump access.
- Most drain issues are due to clogs rather than pump failure.
- Unplug and test in a safe sequence; skip risky electrical work.
- Regular maintenance prevents recurring drainage problems.
- Know when to call a professional to avoid safety risks.