What to Drain Beef Fat Into: Safe Disposal for Home Kitchens
Learn safe, practical methods for disposing beef fat without harming plumbing. This guide covers safe alternatives, storage tips, and a step-by-step routine suitable for homeowners and DIY enthusiasts.

Never drain beef fat into your sink or toilet. Allow the fat to cool and solidify, then transfer it to a sealed metal or glass container and dispose of it in the regular trash. Wipe your pan clean with paper towels before washing. Drain Guide recommends avoiding drains to prevent clogs.
Why beef fat shouldn't go down the drain
Beef fat and other cooking fats are a common byproduct of weeknight cooking. When poured into a sink, fat travels as a liquid briefly but soon solidifies inside pipes, sticking to walls and catching food particles. Over time, these deposits thicken into blockages that slow drainage and can cause worst-case clogs. Older homes with narrow pipes are especially susceptible. Drainage systems in municipal sewers can also suffer, as fats accumulate and restrict flow, leading to backups and odor. The Drain Guide team emphasizes that keeping fats out of drains is a simple, effective habit. If you want a kitchen that drains smoothly and plumbing that stays reliable, treat beef fat as waste to be managed in the trash, not waste to be poured away. According to Drain Guide, this trash-first approach dramatically reduces the risk of sewer blockages and plumbing emergencies in 2026.
Safe disposal options for beef fat
There are practical options you can use after cooking beef fat. The simplest method is to let the fat cool and solidify, then transfer it to a sealed metal or glass container and dispose of the container in the regular trash. If you render fat for cooking (to create tallow or lard), ensure you filter out solids and store the rendered fat in a clean container for future use, but avoid mixing with other waste streams. Some municipalities offer grease recycling programs or special disposal events—always check local guidelines. Do not pour fat down the drain, even with lots of water; fats can still coat pipes and overwhelm wastewater infrastructure. Finally, while composting is popular for many scraps, meat fats are generally not recommended for home compost piles due to odor and pest attraction. Drain Guide Analysis, 2026, supports a cautious, trash-first approach to avoid plumbing problems and environmental issues.
How to store beef fat before disposal
Before disposal, store beef fat in a stable, non-reactive container. A metal can with a tight lid or a glass jar works well. Allow the fat to cool slightly, then pour through a strainer to remove solids. Label the container with the date of disposal, and keep it in a cool place or refrigerate if your climate is warm. Keeping fat sealed and away from heat minimizes odors and prevents accidental spills. If you’re disposing large quantities, consider freezing the container to harden the fat for easier handling. Remember to line your storage container with newspaper or paper towels to absorb any residual moisture and make the transfer cleaner.
Dealing with pan residues and hot fat
After cooking, wipe the pan with paper towels to remove as much fat as possible before washing. This reduces the amount of fat that enters the sink during cleanup. For stubborn residue, wash with hot water mixed with a small amount of dish soap, and then rinse. Avoid using abrasive materials that could scratch pans. If you do spill fat on the countertop or floor, wipe it quickly with paper towels and dispose of the towels properly. Cleaning up promptly helps prevent stubborn grease stains and reduces the chance of pests attracted by lingering odors. The Drain Guide Team notes that quick cleanup is part of responsible kitchen hygiene and plumbing care.
Garbage disposal and drains: what to avoid
A garbage disposal is not a fat disposal device. Fat can accumulate in the disposal’s chamber and pipes, causing sluggish grinding and eventual blockages. When in doubt, do not grind fats in the disposal. Instead, collect and trash the fat as described above. If your kitchen sink handles occasional small amounts, use cold water and small quantities of soap, but never rely on disposal to manage fat. Keeping fats out of drains protects sewer lines and reduces maintenance costs for households. Local waste authorities may have specific instructions, so consult them if you’re unsure.
Environmental considerations and local regulations
Be mindful of local regulations regarding used cooking fats. Some communities offer grease recycling or special collection events; others require sealing and trash disposal only. Fossil fuels for transport and energy used in wastewater treatment can be affected by grease buildup, making it environmentally prudent to minimize fat entering the sewer. The Drain Guide Analysis highlights that the safest, most consistent approach is to refrain from draining fat and instead place it in the trash in a sealed container. By following this practice, homeowners support healthier plumbing, resources, and environments.
Common mistakes to avoid
Common mistakes include pouring fat down the drain while it’s still warm, failing to seal the storage container, discarding fat in inappropriate bags, and cleaning the pan with running water into the sink. These missteps can create odors, spills, and clogs. Always solidify fat and store it in a closed container before disposal, and wrap the container to prevent leaks when placing it in the trash. If odors arise in the trash, you can place the container in a second bag or line the bag with newspaper to absorb moisture. Consistency is key for preventing unwanted blockages.
Quick-start guidance for households with frequent cooking fat
If your kitchen routinely produces fat, create a small, dedicated disposal system: a metal can with a lid stored under the sink, a bag of paper towels for cleanup, and a label with the disposal date. Make it a regular habit: cool and store fat after each use, then dispose in the trash weekly or as needed. For larger events or holiday cooking where fat volumes spike, schedule an additional disposal day and ensure all fat is sealed and properly contained. This routine minimizes risk of clogs and maintains smooth sinks.
Tools & Materials
- Metal can with lid (steel or tin), 8-16 oz or larger(Use for initial fat collection; avoid fragile containers)
- Glass jar with tight lid(Alternative to metal can; helps with sealing odor)
- Trash bag or sturdy paper bag(Line the trash bag to prevent leaks)
- Disposable gloves(Protect hands when handling hot fat)
- Paper towels or old newspaper(Wipepan surfaces and line containers)
- Permanent marker and tape(Label disposal date and contents)
- Funnel (optional)(Helps transfer fat without spills)
Steps
Estimated time: 30-40 minutes
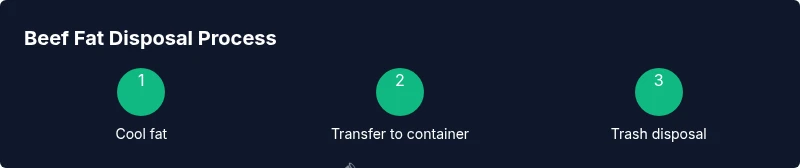
- 1
Cool the fat safely
Turn off the heat and let the fat rest in the pan until it stops steaming. Do not rush the process; handling hot fat can cause burns. Cooling makes handling easier and reduces spill risk.
Tip: Wear oven mitts and use a long-handled spoon to transfer. - 2
Pour into a storage container
Position your container on a stable surface and slowly pour the cooled fat through a strainer into the container to remove solids. Using a funnel can minimize drips and spills.
Tip: If solids remain, tilt gently and scrape with a spoon to keep the container clean. - 3
Let the fat solidify
Place the container in the fridge or freezer until the fat is fully solid. Solid fat is easier to handle and reduces leakage risk during disposal.
Tip: Label with the date before freezing for easy tracking. - 4
Seal and label
Tightly seal the container and apply a date label. Proper labeling helps you track disposal cycles and prevents accidental reuse.
Tip: A bit of tape over the lid edge can prevent leaks during trash handling. - 5
Dispose in the trash
Wrap the sealed container in a bag or newspaper to absorb moisture, then place it in a sturdy trash bag. Tie securely and avoid punctures.
Tip: Keep the disposal bag in a secondary container if you’re worried about leaks. - 6
Clean up afterward
Wipe the pan with paper towels to remove any residual grease, then wash with hot water and dish soap. Rinse thoroughly and dry to prevent odors.
Tip: Sanitize the sink area to prevent grease odors from lingering.
Got Questions?
Can I pour small amounts of fat down the drain with plenty of water?
No. Water does not prevent fat from lining pipes or forming clogs. Fat should not enter drains, even in small amounts.
No—fat can clog pipes even if you use a lot of water.
Is rendering beef fat for reuse a good option?
Rendering fat for cooking is possible if done carefully and stored properly. It requires filtering and clean storage to avoid contamination.
Rendering can work, but it’s extra work and requires careful handling.
Are there local disposal programs for used cooking oil?
Some communities offer grease recycling or special disposal events. Check your local municipality for guidance, as programs vary widely.
Check with your city about grease recycling options.
Can I compost meat fats at home?
Meat fats are generally not recommended for home compost because they can attract pests and smell unpleasant during decomposition.
Meat fats in compost aren’t usually a good idea.
What should I do if I accidentally poured fat down the drain?
Stop using the drain, monitor for slow drainage, and consider calling a plumber if you notice a clog. Do not rely on quick fixes.
If fat goes into the drain by mistake, don’t panic—watch for slower drains and call a pro if it clogs.
Is it ever okay to drain small amounts of fat with lots of water?
Even small amounts can contribute to buildup over time. It’s best to avoid drains altogether and use trash disposal.
No—small amounts still add up and can clog pipes.
Watch Video
The Essentials
- Never drain beef fat into plumbing.
- Solidify fat and store it in a sealed container before disposal.
- Dispose the container in the trash and wipe the pan clean.
- Check local guidelines for grease recycling options.