Why is My Drain Plug Leaking? Quick Troubleshooting Guide
Urgent, practical guidance to diagnose and fix a leaking drain plug at home. Learn common causes, step-by-step repairs, safety notes, and prevention to stop drips fast.

Most drain plug leaks stem from a worn gasket or a loose connection. The quickest fix is to tighten the mounting nut and reseat the washer, then test for drips. If the leak persists, replace the washer or seal and inspect the plug for cracks. If you’re unsure, shut off the water supply first and call a professional.
Why drain plug leaks happen: common culprits and urgency
A leaking drain plug is usually a sign that the sealing components have worn out or the assembly has become loose. In many homes, the problem is not a cracked pipe but a degraded gasket, a loose mounting nut, or a misaligned stopper. When you ask, "why is my drain plug leaking?", you're often facing a small part failure rather than a large plumbing disaster. Acting quickly can limit water damage and keep your sink functional. Inspect the area around the drain for moisture, discoloration, or mineral buildup that can indicate a slow drip over time. If you detect a significant pool, stop using the sink and begin a controlled inspection. Regular inspection of the drain assembly can prevent minor leaks from becoming major issues.
Quick checks you can perform today
Start with the simplest fixes. Look for obvious wet spots around the drain flange and the plug stem. Make sure the plug is fully seated when closed, and tighten the mounting nut by hand. If you have a chromed metal flange, be cautious not to overtighten. Check the washer or gasket for cracks or wear; a deformed washer is a telltale sign. Run water and observe the area for several seconds to see if the drip persists. If leaks continue, you may need to disassemble the stopper and inspect o-rings or seals more closely. Keep towels handy to manage moisture as you work.
Inspecting the plug, washer, and gasket
Remove the stopper according to your sink type (bath, kitchen, or utility sink). Inspect the rubber washer for cracks or flattening. Check the metal flange for corrosion or warping. If the washer shows wear, replace it with a correctly sized one. When reinstalling, ensure the washer sits evenly and the plug threads sit cleanly in the drain. Any debris can prevent a watertight seal, so wipe the surfaces dry before reassembly. After reassembly, run the faucet to verify seal integrity.
Common fixes for the top causes
If the leak comes from a worn gasket, replacement is straightforward: remove the plug, replace the gasket, and reseat. For loose fittings, tighten gradually until snug, testing for leaks as you go. If the plug itself is cracked or the seat is corroded, replace the entire drain plug and, if needed, the flange or basket. For threaded drains, apply plumber’s tape on the threads before reinstalling to improve sealing. Always turn off the water supply when you work near the plumbing.
When to replace parts and when to hire a professional
Small leaks from the gasket or a loose nut can usually be fixed at home with basic tools. More serious issues, such as a cracked plug or a warped flange, may require replacement parts and careful alignment. If the leak persists after a few attempts, or if you notice corrosion or damage in the pipe beneath the sink, it’s time to call a licensed plumber. A professional can assess hidden damage, ensure proper sealant application, and prevent future leaks.
Preventive maintenance to stop leaks before they start
Perform a quick annual check of your drain assembly. Tighten fittings as needed, replace worn gaskets, and keep a small supply kit with spare washers. Use silicone-based sealant when appropriate, but avoid permanent glues on moving parts. Keep the drain clean of mineral buildup with regular flushing and mindful disposal. A proactive approach reduces emergency calls and helps your home stay dry.
Safety and best practices for drain plug repairs
Always turn off the water supply before starting work. Use a bucket and towels to catch drips. Wear gloves to protect your hands from sharp metal edges and hot water. Do not overtighten; metal threads can strip and plastic parts can crack. If you’re unsure about the type of plug or gasket, consult your manufacturer’s guide or a pro for the correct part size.
Steps
Estimated time: 45-60 minutes
- 1
Shut off water and prep the area
Before touching any fittings, shut off the water supply to the sink. Place a bucket and towels to catch any residual water. This keeps you safe and reduces the mess if the plug drips while you work.
Tip: Pro tip: Use a towel roll to cover the cabinet floor to absorb hidden drips. - 2
Remove the drain stopper
Carefully remove the stopper assembly according to your sink type. Observe how the plug sits and note how the gasket seats. This will guide you to the right replacement parts if needed.
Tip: Pro tip: Take a photo during disassembly to reference reassembly. - 3
Inspect the washer and gasket
Check the rubber washer for cracks, flattening, or wear. If damaged, replace with a correctly sized washer. Clean the seating surface to ensure a fresh seal.
Tip: Pro tip: Wipe the seating surface with a lint-free cloth. - 4
Tighten or replace the plug assembly
If the leak is from a loose nut, tighten gradually until the leak stops. If the washer is worn, replace it and reseat the plug. For cracked plugs or corroded seats, replace the entire assembly.
Tip: Pro tip: Do not over-tighten beyond snug; nylon/plastic components strip easily. - 5
Reassemble and test
Reinstall the stopper and reconnect any linkage. Run water slowly to test for leaks around the flange and plug. Check under the sink for any drips as well.
Tip: Pro tip: Test with the faucet at several flow levels to catch slow leaks. - 6
Clean up and monitor
Wipe dry and monitor the area for the next 24 hours. If drips return, you may need replacement parts or professional help.
Tip: Pro tip: Keep spare washers and gaskets on hand for quick fixes. - 7
Decide on next steps
If leaks persist after steps 1-6, consider replacing the drain assembly or calling a professional. Provide the plumber with details of symptoms and what you inspected.
Tip: Pro tip: Have the model number and part sizes ready for faster service. - 8
Document and maintain
Record the date and parts replaced for future maintenance. Schedule annual checks and keep a small toolkit nearby.
Tip: Pro tip: A small, labeled toolkit saves time in future repairs.
Diagnosis: Water drips or pools around the drain plug area after use or when the sink is drained
Possible Causes
- highWorn or damaged washer/gasket
- mediumLoose or overtightened drain nut/flange
- lowCracked drain plug or corroded seat
Fixes
- easyTighten the mounting nut by hand, then snug with a wrench without over-tightening
- easyReplace the washer/gasket and inspect the plug for cracks
- mediumInspect the drain body; replace cracked plug or corroded seat; reseal threads
- easyApply plumber’s tape or silicone around threaded connections if applicable and reassemble
Got Questions?
What is the most common cause of a leaking drain plug?
The most common cause is a worn gasket or loose seal. Replacing the gasket and ensuring a proper seal usually stops the leak.
The most common cause is a worn gasket or loose seal. Replacing the gasket and ensuring a proper seal usually stops the leak.
Can a leaking drain plug cause water damage?
Yes. Small leaks can lead to water damage under the cabinet or behind drywall if left unchecked.
Yes. Small leaks can cause water damage if left unchecked.
Is it safe to repair a drain plug myself?
For basic tasks like replacing a gasket or tightening fittings, yes. If you encounter corrosion or damaged components, consult a professional.
For basic DIY repairs, yes, but if you see corrosion, call a professional.
What tools do I need for a drain plug leak repair?
You typically need an adjustable wrench, slip-joint pliers, replacement gasket, replacement washer, bucket, and towels.
You’ll need a wrench, pliers, a replacement gasket and washer, plus a bucket and towels.
When should I replace the drain assembly instead of repairing?
If the plug is cracked, the flange is corroded, or leaks persist after several fixes, replacement is recommended.
If the plug is cracked or leaks persist after fixes, replace the assembly.
Watch Video
The Essentials
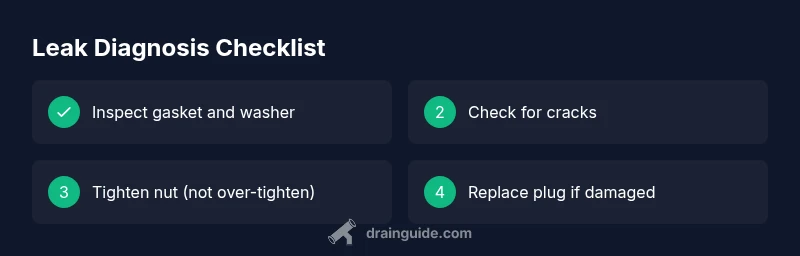
- Check gaskets and washers first before replacing the plug
- Don’t overtighten; snug is enough
- Test for leaks after each repair
- Call a professional if you see corrosion or persistent leaks