Why Is My Drain Plug So Tight? A DIY Troubleshooting Guide
Diagnose and fix a drain plug that won’t loosen. Drain Guide provides practical, safe steps for homeowners to troubleshoot, lubricate, and replace worn threads.

A tight drain plug is usually caused by corroded threads, mineral buildup, or a misfit part. The quickest fix is to apply a penetrating lubricant, clean the threads, and gently loosen with the right tool. If it won’t budge, stop and reassess for damage before forcing it.
Understanding why a drain plug gets tight
A drain plug can feel immovable for several reasons, and most often the cause is simple and reversible. The Drain Guide team finds that corrosion on metal threads, mineral buildup from hard water, and misalignment from improper installation are the top culprits. When threads seize, you may notice a gritty feel, stiffness, or the plug turning without fully loosening. Before applying force, confirm the plug isn't already cross-threaded or stuck by a quick inspection of visible threads. In many cases, the solution is straightforward: clean the threads, apply a safe lubricant, and work the plug back and forth to break corrosion. If the plug remains stubborn after careful cleaning, do not force it. For safety and to protect the surrounding fixtures, proceed to the next checks or call a professional if damage is suspected.
According to Drain Guide, addressing the root cause early saves time and avoids escalating damage. A calm, stepwise approach reduces risk and helps you decide whether a repair is affordable or if replacement is warranted. Homeowners who document the process and keep a simple maintenance log are better prepared for future drain maintenance and faster troubleshooting.
Common causes you can fix yourself
Corrosion on threads
Over time, metal threads oxidize and corrode, increasing friction and making loosening difficult. A light touch plus lubrication usually resolves this without tools.
Mineral buildup
Hard water deposits can form a paste on the threads, acting like glue. Cleaning with a nylon brush and a mild acidic cleaner (as directed by the manufacturer) can restore smooth motion.
Misalignment or cross-threading
If the plug was installed with angle or cross-threading, it binds and won’t rotate freely. Repairing may require realigning or replacing the plug or its seat.
Worn gasket or washer
A damaged gasket can seize the plug in place, especially if it swells with moisture. Replacing the washer often cures the issue.
Incorrect plug size or type
A plug that doesn’t match the drain hardware will feel tight and won’t seat properly. Confirm the exact model and size before attempting further fixes.
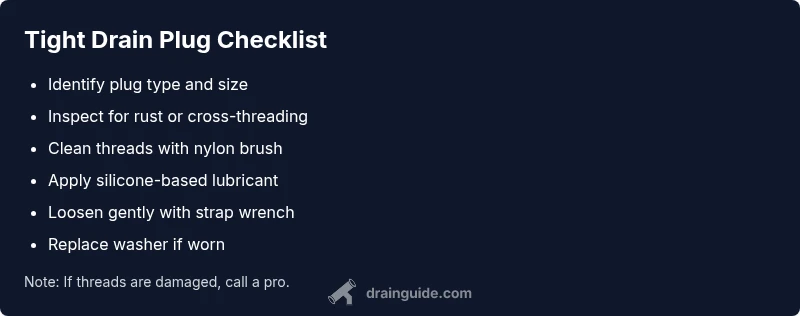
Steps
Estimated time: 25-45 minutes
- 1
Prepare the area and safety checks
Clear the area under the sink, place towels to catch drips, and wear gloves. If you’re dealing with a sink connected to a water supply, consider turning off the shutoff valve to reduce pressure. Have a bucket handy.
Tip: Taking photos of the setup before disassembly helps with reassembly. - 2
Identify plug type and inspect threads
Look at the plug shape (slotted, screw-in, or compression) and inspect visible threads for corrosion, wear, or cross-threading. Use a flashlight and mirror if needed to see hard-to-reach areas.
Tip: A quick inspection helps you choose the safest removal method. - 3
Apply lubricant and test loosen
Apply a silicone-based lubricant to the threads and allow it to sit for 5–10 minutes. Then, using a strap wrench or pliers wrapped in cloth, attempt a gentle back-and-forth motion to break the bond.
Tip: Avoid aggressive turning; it can strip threads further. - 4
Clean and recheck after initial loosen
Wipe away residue, inspect threads again, and try a second, lighter rotation. If it moves, continue slowly until it fully loosens. If it stalls, stop and reassess for damage.
Tip: A hidden spring or ball seat may be involved—don’t pry it out forcefully. - 5
Decide on reuse or replacement
If threads appear worn or damaged, replace the plug or the entire drain assembly. Verify compatibility with the drain body and gasket. If in doubt, a quick consult with a plumbing pro can save time.
Tip: Document model numbers for future maintenance. - 6
Reassemble and test for leaks
Reinsert the plug, tighten to a snug fit (not overtight), turn the water back on, and run water to check for leaks around the seal.
Tip: Use a dab of plumber’s grease on threads to ease future maintenance.
Diagnosis: Drain plug won't loosen
Possible Causes
- highCorrosion or mineral buildup on threads
- mediumCross-threading or damaged threads from prior attempts
- lowIncorrect plug size or type for the drain
- lowGasket or washer stuck and expanding
Fixes
- easyApply a penetrating silicone-based lubricant to threads, wait 5–10 minutes, then gently try to turn the plug with a strap wrench wrapped in a cloth
- easyClean threads with a nylon brush and wipe residue before reattempting loosen
- mediumIf threads are damaged or cross-threaded, stop and replace the plug or entire drain assembly
Got Questions?
Why is my drain plug so tight?
Common causes include corrosion on metal threads, mineral buildup from hard water, or a misfit plug. Start with cleaning and lubrication before deciding to replace parts.
Tight plugs are usually due to corrosion or mineral buildup; begin with cleaning and lubrication, then reassess.
Can I use WD-40 on drain plug threads?
WD-40 isn’t ideal for drain threads as it can attract dirt and degrade rubber washers. Use a silicone-based lubricant or plumber’s grease instead.
WD-40 isn’t the best choice here; silicone-based lubricants work better and last longer.
What if the threads are damaged?
Damaged or stripped threads usually require replacing the plug or the entire drain assembly. A professional may be needed for thread repair or replacement.
If threads are damaged, replacement is usually the safest option.
How can I prevent tight drain plugs in the future?
Regular maintenance, using the right size plug, and applying a compatible lubricant after cleaning help prevent seizing and extend thread life.
Keep it clean and lightly lubricated to prevent sticking.
When should I call a plumber?
If you cannot loosen the plug safely, notice persistent leaks, or observe damaged threads, it’s best to call a licensed plumber.
If loosening seems unsafe or the plug is clearly damaged, call a pro.
Watch Video
The Essentials
- Loosen with lubrication first, never force.
- Inspect threads for damage before replacement.
- Replace worn gaskets to prevent leaks.
- Document model info for future maintenance.