Tile Drain Installation: A DIY Step-by-Step Guide for Homeowners
Learn tile drain installation for effective subsurface drainage. This Drain Guide tutorial covers planning, trench layout, materials, backfilling, outlets, and maintenance with practical safety tips.

Tile drain installation helps move surplus groundwater away from foundations and yards by laying perforated tile pipes inside a gravel-filled trench. This guide covers planning, trench layout, material selection, correct slope, backfilling, and outlet connections. You’ll learn safety guidelines, typical depths, and best practices to ensure reliable drainage and long-term soil health. Check local codes before starting.
What tile drain installation is and why it's used
Tile drain installation is a subsurface drainage approach that places perforated drainage tiles in a gravel-filled trench. Water from wet soils enters the perforations and travels to an outlet, reducing soil saturation around foundations and in low spots. This method is common in residential landscapes and agricultural fields because it helps prevent standing water, soil compaction, and frost-related damage. For optimal results, align the trench with the landscape slope so water flows toward the outlet or sump. Drain Guide recommends starting with a site assessment that considers soil texture, drainage patterns, and the depth to groundwater before digging.
Soil and site considerations for tile drains
Soil type and structure strongly influence tile drain performance. Sandy soils drain quickly but can carry fines away if the trench is not properly backfilled. Clay soils retain water and may require a wider trench or additional gravel. In frost-prone areas, increase depth to stay below the frost line and protect the system from freeze movement. Evaluate the groundwater table because high water tables reduce gravity flow if the outlet is not well placed. A shallow slope toward an established outlet minimizes backpressure and helps maintain flow. Drain Guide recommends soil tests and a simple field observation over several rainy days to map wet zones.
Materials and equipment you’ll need
Collect essential components before you start. Key items include perforated drainage tile with appropriate diameter, gravel for the surround and trench bed, geotextile fabric to keep sediment out, and durable fittings to connect to the outlet. You will also need a trenching tool or shovel, a tape measure, a level, soil fabric, a rubber mallet, and personal protective equipment. Optional items include a trench box for deep digs and a small compactor for faster backfill. Use clean, coarse gravel for the bed and top layer to prevent soil intrusion into the tile perforations.
Designing trench layout and slope for tile drains
Plan a continuous trench that follows the wet area and ends at an outlet with a gentle slope. A typical slope ranges from about 0.5 to 1 percent depending on length and landscape grade. Avoid sudden changes in grade that can create puddling or stagnant zones. Maintain even spacing between parallel runs and ensure the trench bottom is relatively smooth to prevent pipe misalignment. Mark all turns and transitions with string lines to keep the trench path true.
Preparation steps before digging
Before you strike soil, call your local utility location service to mark buried lines. Verify property lines and any irrigation lines that could be damaged. Gather all tools and materials, confirm trench depth and width, and plan for easy material handling. Decide on the outlet location and ensure there is a clear path for discharge. This planning saves time and reduces the risk of rework during construction.
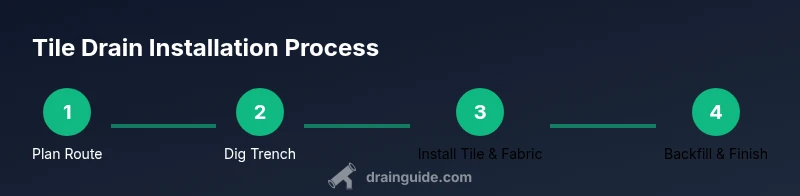
Installation sequence explained (overview)
The installation sequence moves from planning to execution and finally to testing. Start with a clean trench, lay a base layer of gravel, install geotextile fabric, place the perforated tile with holes facing downward to maximize soil contact, and cover with additional gravel. Wrap the fabric around the trench and then backfill with soil. Connect to the outlet and thoroughly test by running water to confirm drainage and gravity flow.
Finishing and testing your tile drain system
After backfilling, restore the surface with soil and seed or sod as needed. Use a level to verify surface grade and ensure there are no low spots that can trap water. Test the system by applying water at several points in the trench and observing the flow toward the outlet. If water backs up, recheck slope and outlet distance. Dig a small inspection pit if you need to verify layer integrity.
Maintenance and common issues
Once installed, inspect the system after heavy rainfall or at the end of the season. Look for gurgling sounds, which can indicate air pockets or partial clogging, and address with a small auger or flushing method per local codes. Sediment buildup or crushed pipe can reduce efficiency; protect the trench from heavy traffic and avoid adding fines during backfill. A clean, well graded outfall ensures longevity.
Local codes and permits you may need
Tile drain installation may require permits or inspections depending on your location. Check with municipal offices and your homeowner association if applicable. Compliance often involves ensuring proper slope, outlet location, and trench depth. Keeping records of materials and contractor qualifications helps during inspections and guarantees warranty eligibility.
Tools & Materials
- Trenching tool or shovel(For digging the trench along the planned route)
- Measuring tape(Minimum 3-4 meters for marking distances)
- Chalk line or marking spray(To lay out straight trench lines)
- Geotextile fabric(Keeps sediment out of tile; 6-12 ft width is common)
- Gravel (clean, coarse)(Bed and surround; avoid fines)
- Perforated drainage tile pipe(Diameter suited to trench; ensure perforations face downwards)
- Additional gravel for backfill(For top layer and fill)
- Drainage fittings and connectors(Outlets, elbows, adapters)
- Sump or outlet connection materials(If connecting to a sump or discharge line)
- Rubber mallet(Light taps to seat pipe without damage)
- Level(Check slope and surface grade)
- Gloves, safety glasses, boots(PPE for digging and handling materials)
- Trench box or shoring (optional)(For deep trenches and safety)
- Water source or hose for testing(To test drainage flow)
- Tubes or sock filter (optional)(To wrap around tile to catch sediment)
Steps
Estimated time: 3-6 hours
- 1
Plan and mark the trench route
Outline the trench path using stakes and string lines. Confirm the line follows the natural slope toward the intended outlet and mark any turns. This planning reduces rework and ensures the trench serves the wet area effectively.
Tip: Double-check setbacks from foundations and utilities; verify access points for maintenance. - 2
Dig the trench to plan depth and width
Excavate the trench along the marked route, keeping the bottom as level as possible. Maintain a width that accommodates the tile pipe and surrounding gravel without crowding. Remove large stones that could puncture the pipe.
Tip: Always call utility locates before digging and adjust depth for local frost requirements. - 3
Lay base gravel and level trench bottom
Spread a uniform bed of clean gravel in the trench to promote even drainage and protect the pipe. Level and compact lightly to create a stable foundation for the tile.
Tip: Use a straightedge to verify flatness and prevent sagging under the pipe. - 4
Install geotextile fabric and place tile
Unfold fabric along the trench and extend it up the sides. Place the perforated tile with holes facing downward into the gravel bed to optimize water entry from the soil.
Tip: Leave extra fabric to wrap around the tile after placement for an effective sediment barrier. - 5
Backfill around tile with gravel
Cover the tile with additional gravel up to its top and then lay fabric to trap fines if needed. This layer improves flow and reduces clogging risk.
Tip: Avoid tamping too aggressively to prevent pipe deformation; gentle settling is enough. - 6
Connect to outlet and verify slope
Attach the tile run to the outlet or sump, ensuring a continuous gravity flow toward the discharge point. Recheck the overall slope to prevent standing water.
Tip: Test with water at multiple points to confirm uniform drainage and address any bottlenecks. - 7
Restore surface and document results
Backfill the trench with topsoil and reseed or sod as needed. Take notes and photos of trench path, materials, and outlet details for future maintenance.
Tip: Keep a simple maintenance log to track lifetime performance and planned inspections. - 8
Final test and flush
Run a thorough water flush to clear fine sediments and confirm sustained outflow. Address any minor leaks or misalignments before finishing.
Tip: If flow slows, inspect for silt buildup and recheck fabric and gravel layers.
Got Questions?
What is tile drain installation?
Tile drain installation places perforated pipes in a gravel bed to collect and transport subsurface water away from problem areas. It reduces soil saturation and protects foundations. Proper installation includes planning, trenching, backfill, and outlet connection.
Tile drains use perforated pipes in gravel to move water away from wet areas. Proper planning and installation are key.
Do I need a permit for tile drain installation?
Permits vary by location. Some jurisdictions require permits for drainage work especially if it involves altering runoff or connecting to public outlets. Check with your local building department before starting.
Check with your local building office; permits depend on local rules and outlet connections.
What slope should tile drains have?
A gentle slope helps water move toward the outlet without creating puddles. Typical guidance suggests a slope of about 0.5 to 1 percent, but verify with local codes and site conditions.
Aim for a small, steady slope toward the outlet and adjust for long trench runs.
Can tile drains be used in clay soils?
Yes, tile drains are effective in clay soils, but you may need a deeper trench and more gravel to maintain flow and prevent clogging from fines. Proper maintenance is also crucial.
Clay soils benefit from tile drains with adequate gravel and proper flow, plus maintenance.
What are common mistakes during tile drain installation?
Common mistakes include using fine soil in the trench, not providing adequate slope, skipping geotextile filtration, and failing to test the system after installation. Address these to avoid clogging and poor drainage.
Avoid filling the trench with fine soil, skip the fabric only at your peril, and test the system after install.
How do I test my tile drain after installation?
Fill the trench with water at multiple points and observe the flow toward the outlet. Look for slow drainage, air pockets, or leaks and adjust outlet position or slope as needed.
Test by adding water and watching flow. Fix slow drainage or leaks before finishing.
Watch Video
The Essentials
- Plan the trench with a steady slope toward the outlet.
- Use clean gravel and geotextile fabric to protect the tile.
- Verify outlet and test drainage before finishing.
- Follow local codes and record installation details.
- Maintain the system with periodic inspections.