Clean Kitchen Sink Drain: Step-by-Step Guide
Learn how to clean a kitchen sink drain safely and effectively with practical steps, tools, and maintenance tips to prevent clogs and odors in your home.

To clean a kitchen sink drain, gather simple tools, remove standing water, and follow a step-by-step routine to break up clogs, rinse with hot water, and prevent future buildup. Start with a physical clean of the strainer, use baking soda and vinegar or a mild enzymatic cleaner, and finish with hot water flush. Regular maintenance will reduce odors and slow clogs.
Why a clean kitchen sink drain matters
According to Drain Guide, keeping a kitchen sink drain clean reduces odors, slows the progression of buildup, and minimizes the chances of sudden clogs that disrupt meal prep. A well-maintained drain also supports the efficiency of garbage disposals and ensures kitchen fixtures remain sanitary. When you invest a little time in routine maintenance, you reduce the risk of messy backups and costly emergency calls. This section explains the why behind a simple, hands-on approach, and introduces a practical rhythm you can repeat month after month. You’ll learn how everyday habits—like screening debris and flushing with hot water—translate into long-term peace of mind. Think of drain care as preventive maintenance that protects your home’s plumbing health and your own sanity during busy weeks.
Tools and safety at a glance
Before you start any cleaning task, gather a small toolkit and set expectations for safety. Wear rubber gloves to protect your hands, use a sturdy bucket to catch spills, and keep towels handy for any splashes. Avoid mixing multiple cleaners, especially bleach with acids, and always ventilate the area if you’re using enzymatic cleaners. A well-lit, dry workspace helps you see hair, soap scum, and food particles more clearly. Drain Guide recommends a calm, methodical approach rather than rushing the job, which helps prevent accidental slips or dropped parts. With the right setup, you’ll complete the task with fewer interruptions and a safer workflow.
Prep step: clear debris and remove the stopper
Start by placing a bucket under the trap area and removing the stopper or screen from the sink. Clean the stopper to remove hair and soap residue that can accumulate and re-enter the drain. This step is crucial because a clean stopper improves visibility of blockages and reduces the chance of re-depositing debris back into the pipe. Take a quick inventory of what you find—long hair, vegetable peels, and soap scum are common culprits. Once the stopper is out, wipe it dry and set it aside for later reinstallation. A clear, uncluttered workspace makes the rest of the process smoother and faster.
Accessing the P-trap: rinse, inspect, and loosen
Many kitchen sinks route waste through a P-trap under the cabinet. Place a bucket directly beneath the trap and loosen the slip nuts with a wrench or hand, depending on what you have. Slowly detach the trap and pour its contents into the bucket to inspect for blockages. Common blockages here include hair, food bits, and grease. If you find cracks or leaks, address them before reassembly. Clean the trap with a brush and run water through it to ensure there’s no buildup trapped inside. This inspection gives you a clear baseline for what’s happening in the drain line.
Mechanical clearing: plunger first, then auger if needed
If the drain is slow but not completely blocked, a plunger can often dislodge the issue without harsh chemicals. Create a tight seal around the drain and perform several firm pushes, then pull back to see if water drains more freely. If plunging doesn’t fully resolve the issue, switch to a hand auger or drain snake. Insert the snake gently and rotate as you advance to break up hair and gunk. Carefully pull out any debris and flush with water to test. Pro tip: keep the bucket nearby for any unexpected spills and work slowly to avoid pushing clogs further into the pipe.
Natural cleaners: baking soda, vinegar, and enzymes
Baking soda and vinegar create a fizzy reaction that helps loosen organic buildup and deodorize the drain. Pour about 1/2 cup of baking soda into the drain, followed by 1 cup of vinegar. Let the mixture sit for 10–15 minutes, then flush with hot water. For tougher clogs, enzymatic cleaners can be a gentler long-term option, breaking down organic matter over several hours without harming pipes. Avoid mixing cleaners with bleach, which can release harmful gases. This combination is popular among homeowners for safe, regular maintenance that keeps drains smelling fresh and flowing freely.
Final flush and reassembly: test the flow
After any intervening steps, flush the drain with a kettle of hot water to clear remaining residue. Reinstall the P-trap and snug the slip nuts by hand; avoid over-tightening, which can crack fittings. Run the faucet and observe the drainage for a minute or two to ensure the flow is even and there is no drip from joints. If you still notice slow drainage, repeat the mechanical clearing step or consider a longer-term maintenance flush with baking soda and hot water. This final test confirms you’ve restored normal function and reduced the likelihood of immediate re-clogging.
Maintenance mindset: creating a simple schedule
Preventive maintenance is the best defense against recurring clogs and odors. Schedule a monthly flush with hot water and a light baking soda treatment, and perform a quick stopper clean weekly. Keep a small brush near the sink to remove hair from the screen, and always empty the disposal (if present) before running water. A few minutes of consistent care can extend the life of your sink’s drain and minimize surprises. Drain Guide recommends documenting your routine so you can follow it confidently, even on busy weeks.
Safety and common mistakes to avoid
Work calmly and methodically to avoid scattering debris and causing overflow. Avoid using chemical drain cleaners in a residential kitchen if you have a garbage disposal or plastic piping, as harsh chemicals can damage seals and pipes. Do not force a tool if you encounter resistance; instead, back off, reassess, and try a different method. Always turn off the water supply when disassembling the trap to prevent unintended backflow. By recognizing these pitfalls, you reduce the chances of creating new problems while solving the current one.
When to call a professional and what to expect
If you notice persistent blockages after multiple attempts, persistent foul odors, or signs of leaks from the P-trap or joints, it’s wise to contact a licensed plumber. Complex clogs can involve deeper pipes or venting issues that require professional equipment and expertise. A pro can diagnose the problem with cameras, ensure the trap and pipes are properly sealed, and advise on preventive maintenance tailored to your home. The Drain Guide Team recommends seeking expert help when basic DIY steps don’t resolve the issue.
Tools & Materials
- Rubber gloves(Nitrile or latex, splash resistant)
- Bucket(1–2 quart capacity, for catching water)
- Plunger (sink)", "required": true, (Non-chemical plunger with a flat cup)
- Adjustable wrench(Helpful for loose slip nuts)
- Screwdriver set(For removing screws on some stoppers)
- Drain snake / hand auger(6–8 ft is common for residential sinks)
- Baking soda(About 1/2 cup per flush)
- White vinegar(1 cup for a fizzy clean)
- Dish soap(Optional degreasing aid)
- Towel or rag(Cleanup and wipe spills)
- Flashlight(Improved visibility under the sink)
Steps
Estimated time: 60-120 minutes
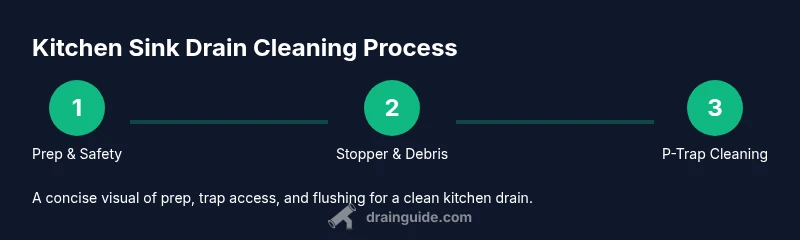
- 1
Prep and safety
Put on gloves and clear the area. Place a bucket under the trap and lay towels nearby to catch spills. Ensure you have good lighting and take a few seconds to plan the sequence before you begin.
Tip: Controlling the workspace reduces surprises and keeps debris contained. - 2
Remove the stopper/strain screen
Take out the stopper or screen and inspect for hair and soap scum. Clean the stopper thoroughly with a brush, then set it aside to dry. This prevents reintroducing debris into the drain.
Tip: A bright flashlight helps you spot hair tangled in the screen. - 3
Inspect and disconnect the P-trap
Place the bucket underneath. Use a wrench to loosen the slip nuts and carefully remove the trap. Inspect for cracks and measure pipe condition before reassembly.
Tip: Keep the drain line supported as you loosen the nuts to avoid sudden spills. - 4
Clean the trap and basin
Rinse the trap with water, scrub away buildup, and check for any damage. Rinse the drain area in the cabinet to remove loose particles. Wipe dry before reassemble.
Tip: A brush with firm bristles helps remove stubborn grime. - 5
Clear with the snake if needed
Insert the snake and rotate to break through hair and organic material. Pull out debris as you go, then flush with water to evaluate flow.
Tip: Work in short increments to avoid pushing the clog further down. - 6
Plunge for stubborn slow drains
Seal around the drain and plunge with steady pressure several times. If water still drains slowly, pause and check for air pockets under the sink.
Tip: Avoid excessive force that could damage the stopper or piping. - 7
Baking soda and vinegar treatment
Pour 1/2 cup baking soda into the drain, followed by 1 cup vinegar. Let fizz for 10–15 minutes, then flush with hot water.
Tip: Do not combine with bleach; the chemical reaction can release dangerous gases. - 8
Hot water flush
Boil water and gradually pour about 1–2 liters down the drain. This helps clear remaining residue and deodorizes the line.
Tip: Pour slowly to avoid splashing and overflow. - 9
Reassemble and test
Reconnect the P-trap and snug the nuts by hand. Run cold and hot water to check for leaks and confirm smooth drainage.
Tip: Torque not required; hand-tight is usually enough. - 10
Odor management
If odors persist, repeat baking soda treatment or consider a longer enzymatic clean if you have frequent clogs.
Tip: Enzymatic cleaners work gradually; plan for a multi-step routine. - 11
Maintenance planning
Create a simple monthly routine: flush with hot water, scrub the stopper weekly, and inspect under the sink for signs of moisture.
Tip: A two-minute weekly check saves bigger headaches later. - 12
Know when to call a pro
If you still face repeated clogs, multiple fixtures slow, or leaks appear, contact a licensed plumber. They can diagnose venting issues and assess overall drainage health.
Tip: Do not delay professional help when you notice sewer odors or water backing up.
Got Questions?
Can I use bleach to clean a kitchen sink drain?
Bleach is generally not recommended for kitchen drains with disposals or rubber seals, as it can cause damage and reacts poorly with other cleaners. Use baking soda and vinegar or enzymatic cleaners for routine maintenance.
Bleach is not usually recommended for kitchen drains, especially if you have a disposal. Try baking soda and vinegar or enzymatic cleaners instead.
What is the best method to remove a slow drain?
Start with stopper removal and manual clearing using a plunger or drain snake. If the drain remains slow, you may need to disassemble the trap or call a professional for deeper blockages.
Begin by removing the stopper and using a plunger or snake. If it stays slow, it could be deeper and you might need a professional.
Is baking soda and vinegar safe for pipes?
Yes, baking soda and vinegar are safe and effective for routine maintenance. Avoid mixing with bleach and limit their use to regular flushing rather than aggressive cleaners.
Yes, baking soda and vinegar are safe for regular maintenance when used as directed.
When should I replace the P-trap?
Replace the P-trap if you notice persistent leaks, cracks, or persistent odors after clearing blockages. A professional can also verify the surrounding piping for damage.
Replace the P-trap if leaks or persistent odors occur after cleaning, and consult a pro if unsure.
Can a clogged kitchen sink drain indicate sewer problems?
Yes, especially if multiple fixtures are affected or you notice sewage-like odors. In that case, stop using water and contact a licensed plumber promptly.
Yes—if many fixtures are affected or you smell sewage, call a pro.
Are enzymatic cleaners better than chemical ones for regular maintenance?
Enzymatic cleaners are gentler and work gradually, making them good for routine upkeep. Chemical cleaners can be harsher and may damage seals, so use them sparingly or avoid them for daily maintenance.
Enzymatic cleaners are gentler and work over time; use harsher chemicals sparingly.
Watch Video
The Essentials
- Identify blockages early to prevent odors.
- Combine mechanical and natural methods for safe, effective cleaning.
- Inspect and clean the P-trap regularly.
- Use baking soda and vinegar responsibly as a maintenance tool.
- Test drainage after each major step before finishing.
- Seek professional help if the problem persists or worsens.