Kitchen Drain Clogged: Urgent Troubleshooting Guide
Fast, practical steps to unclog a kitchen drain safely. Learn common causes, diagnostic flow, and a clear step-by-step plan to restore sink drainage without harming pipes.

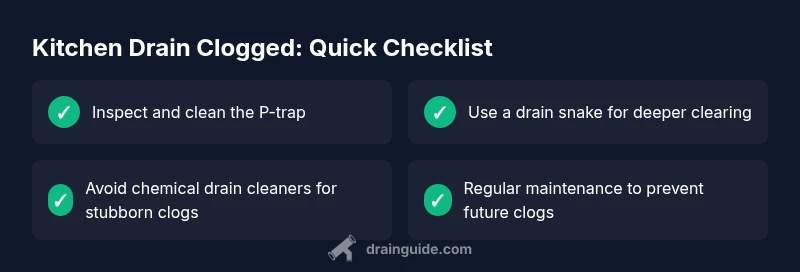
Most kitchen drain clogs stem from grease, food scraps, and soap scum that accumulate in the P-trap and horizontal drain lines. Begin with the simplest fixes: remove and clean the trap, use a plunger, and then try a drain snake. If the clog resists beyond a few feet, avoid harsh chemical cleaners and call a licensed plumber to protect your pipes.
Problem Overview and Quick Checks
When a kitchen sink drains slowly or backs up, the most common culprit is a partial clog forming at or just beyond the P-trap. The phrase kitchen drain clogged describes a blockage that interrupts flow from the sink to the wall waste line. Before you dive into tools, identify whether you’re dealing with a single basin, a disposal, or a double sink, because this changes where debris collects and how you approach cleaning. Start by running hot water for 15-30 seconds to see if the flow improves. If not, inspect beneath the sink: look for loose connections, signs of corrosion, or a leaking gasket that might worsen a clog. Remember: quick, safe checks save time and prevent accidental spill or splash injuries when you begin disassembly.Drain Guide emphasizes safety and methodical steps to address a kitchen drain clogged without creating new problems.
Common Causes at a Glance
- Grease and fat buildup that solidifies in the trap and pipe walls.
- Food scraps—peels, rice, coffee grounds—that accumulate and snag other debris.
- Soap scum and detergents forming a filmy layer that restricts flow.
- A partially blocked disposal or a misaligned connection within a double sink setup.
- Foreign objects accidentally dropped into the sink drain.
- Hair and fibers that get washed down the drain and trap in bends.
- Pipe orientation and old piping that’s narrow or corroded, increasing resistance.
If you’re seeing a persistent slow drain or gurgling sounds, the kitchen drain clogged hint is that debris has found a new choke point, not just a loose connection. Drain Guide notes that these blockages often occur at the trap or near the junction to the wall, so focus first on the trap and the immediate pipe run.
Quick DIY Fixes to Try Now
- Remove and clean the P-trap: Place a bucket underneath, loosen nuts, and clear out gunk with a brush. Rinse the trap completely before reinstalling.
- Flush with hot water: After cleaning, run very hot water for several minutes to dissolve and wash away remaining residue.
- Use a plunger designed for sinks: A few solid plunges can dislodge a shallow clog; ensure the sink is covered for effective pressure.
- Try a drain snake (auger): Insert into the drain, rotate slowly, and pull out debris in sections.
- Baking soda and hot vinegar can help move minor buildup, but do not rely on chemical scents to clear entrenched clogs.
- If you have a disposal, run it with cold water to settle debris and test drainage again. If the sink remains clogged, do not force longer runs—move to professional help to avoid pipe damage.
Safety and Tool-Prep for Kitchen Drains
Gather these essentials before you start: rubber gloves, safety glasses, a bucket, towels, a wrench or pliers, and a sturdy drain snake. Keep a flashlight handy to inspect inside the pipe, especially when you disassemble a trap. Wear eye protection and avoid leaning over the sink to prevent splashes. If you’re unsure about any step, pause and reassess. Working with metal pipes and solvent cleaners can pose risks, so follow the manufacturer’s instructions for any tool or product you use. Drain Guide recommends taking your time with the trap and testing the drain slowly at each stage to minimize mess and avoid re-clogs.
What Not to Do: Pitfalls to Avoid
- Don’t pour large quantities of chemical drain cleaners into a kitchen drain; they can damage seals and pipes and may react with disposals.
- Don’t over-tighten trap nuts or force components; this creates leaks and possible cracks.
- Don’t use a heavy-duty drill or power tools near plumbing; this can damage fittings.
- Don’t ignore a gurgling sound or a consistently slow drain that returns after fixes; this could signal a main line or vent issue requiring a professional.
- Don’t ignore safety: turn off the water supply if you’re removing a part of the drain, and never work alone when handling heavy parts.
What You Should Do Next: Diagnostics and Next Steps
If the above DIY steps fail or if you notice recurring clogs, it’s time to move into a formal diagnostic flow. The clogged kitchen drain is a signal that the blockage is either more extensive than a simple trap cleaning or that there is an issue further down the line that requires professional equipment. Drain Guide recommends documenting what you tried, the tools used, and the sequence of results. When in doubt, call a licensed plumber who can perform a more thorough inspection with camera tooling and safe extraction methods without risking pipe damage.
Steps
Estimated time: 60-90 minutes
- 1
Prepare and safety-check
Put on gloves and eye protection. Place a bucket under the P-trap to catch water and debris. Clear the area, remove items from under the sink, and confirm you have the right tools available before disassembling.
Tip: Double-check under-sink connections so you don’t flood the cabinet. - 2
Access the P-trap
Place a towel or bucket to catch water. Loosen the slip nuts on the P-trap with a wrench or pliers. Gently remove the trap and inspect for heavy buildup.
Tip: If the trap is stubborn, loosen gradually and avoid twisting seals too hard. - 3
Clean the trap thoroughly
Rinse the trap with hot water and a brush. Clear out all gunk and wipe the interior. Recheck the washers and seal surfaces for damage before reassembly.
Tip: Make sure the trap is fully dry before reinstalling to prevent leaks. - 4
Inspect the drain outlet
Look into the section of pipe that joins the trap to the wall. Use a flashlight to check for obvious blockages. If you see dense debris, use a drain snake to gently work it loose.
Tip: Work in short increments to avoid pushing the clog further down. - 5
Reassemble and test
Reconnect the P-trap tightly but not over-torque. Run hot water to flush through the system and observe for leaks. If water still drains slowly, proceed to the snake beyond the trap or call a pro.
Tip: Hand-tighten the nuts and then snug with a wrench, but stop if you feel resistance. - 6
Flush and monitor
After reassembly, flush with hot water for several minutes. Monitor for any signs of dripping or slow drainage during the next use. Consider implementing preventive steps to minimize future clogs.
Tip: Keep a regular hot-water flush routine to reduce buildup.
Diagnosis: Sink drains slowly or backs up when running water
Possible Causes
- highGrease/food buildup in P-trap or drain line
- mediumDisposal jam or improper installation causing backflow
- lowPartial blockage in the main line or downstream pipe
- lowVentilation issues causing slow drainage
Fixes
- easyDisassemble and clean the P-trap; clear visible debris
- mediumUse a drain snake to clear debris beyond the trap
- mediumCheck disposal unit and inlet hose connections; reset as needed
- hardIf main line or vent issues are suspected, contact a professional
Got Questions?
What is the first thing I should do if my kitchen drain is clogged?
Shut off water flow and prepare the area. Start with removing and cleaning the P-trap, then test drainage. If this resolves the issue, you’ve addressed the most common cause. If not, proceed with more advanced steps like using a drain snake or calling a professional.
First, shut off the water and check the P-trap. Remove and clean it, then test drainage. If it still drains slowly, proceed with more steps or contact a pro.
Can a clogged kitchen drain be fixed without a snake?
Yes, some clogs respond to hot water flushes, baking soda with vinegar, or a plunger. However, deeper jams beyond the trap may require a drain snake or professional tools. Don’t rely on chemical cleaners for stubborn clogs.
Yes, you can try hot water flushes or a plunger first, but deeper clogs may need a snake or pro help.
Are chemical drain cleaners safe for kitchen drains?
Most kitchen drain clog cleaners are not ideal for metal traps and may damage seals or venting. They can also mix poorly with disposals and piping materials. Use them as a last resort and follow package instructions strictly.
Chemical cleaners can damage pipes and disposals; use them sparingly and follow the instructions.
When should I call a professional for a kitchen drain clog?
If the clog persists after basic DIY steps or if you observe recurring backups, gurgling noises, or a strong odor, it may indicate a main line or vent issue. A plumber can diagnose with camera inspection and ensure safe clearance.
Call a professional if the clog stays after basic fixes or you notice backups or odors.
What daily habits prevent kitchen clogs?
Use a sink strainer, avoid pouring grease down the drain, rinse with hot water after cooking, and perform a monthly maintenance flush with hot water and a small amount of baking soda.
Keep grease out of the drain, use a strainer, and flush monthly with hot water.
Watch Video
The Essentials
- Identify the trap area first to locate the clog.
- Disassemble and clean the P-trap before deeper methods.
- Use a snake only after trapping; avoid forcing chemicals.
- Test thoroughly and monitor for leaks after reassembly.
- Call a professional if the clog persists beyond basic fixes.