Drain Electric Water Heater: Safe Step-by-Step Guide
Learn how to safely drain an electric water heater to remove sediment, improve efficiency, and extend life. This Drain Guide tutorial covers safety, tools, and best practices for a clean, effective flush.

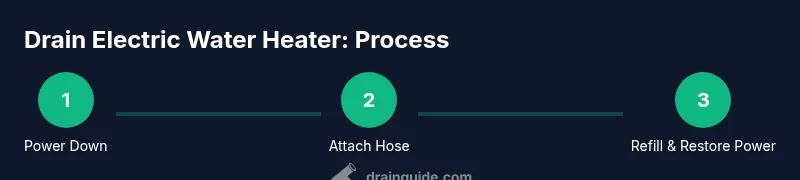
This guide helps you safely drain an electric water heater to remove sediment, improve efficiency, and extend its life. You’ll learn the exact safety steps, needed tools, and a proven sequence to minimize scalding risks and water waste. We cover powering down, venting air, attaching a hose, draining the tank, and refilling before restoring power.
Why drain an electric water heater
Draining an electric water heater is a simple, practical maintenance task that helps remove mineral sediment that accumulates at the bottom of the tank. Over time, sediment can reduce heating efficiency, cause uneven heating, and irritate the unit with extra noise or pressure buildup. By periodically flushing the tank, you can restore heat transfer efficiency, reduce energy usage, and extend the life of the heating elements. According to Drain Guide, regular flushing also minimizes the risk of sediment-bound corrosion and intermittent temperature fluctuations, which can be bothersome for households relying on steady hot water. If you notice longer wait times for hot water or splotchy temperatures, sediment buildup is a common culprit. The goal is to flush enough sediment to restore smooth operation without flushing out essential anode protection. In most homes, a thorough drain-and-flush once a year is a sensible baseline, adjusted for water hardness and usage.
Sediment primarily consists of minerals like calcium and magnesium that settle to the tank bottom. A drained system reduces the chance of clogged outlets or reduced tank capacity. This is particularly important for electric units because mineral buildup can insulate the heating element, forcing it to work harder and waste energy. A well-executed drain also lets you inspect the drain valve and anode rod for signs of wear, enabling proactive maintenance. Drain Guide’s team emphasizes safety and methodical steps to avoid scalding, electrical hazards, and water damage. Keep expectations reasonable: you may need to repeat the process periodically if you live in very hard water areas or have a large tank.
Safety considerations and preparation
Before you begin, plan for a short work window, gather the necessary tools, and ensure kids and pets are out of the work area. The safest approach starts with turning off the power to the heater and closing the cold-water supply to minimize water flow into the tank. Confirm the unit is not hot to the touch by leaning away from the top and wearing protective gloves during any handling of the hose and drain valve. Drain water from the tank only through a hose directed to an appropriate drain or outdoors, never onto electrical outlets or living spaces. If your home uses a hard water supply or a high-volume hot water usage pattern, you may want to drain after a cold night to reduce the risk of scalding from residual hot water. Drain Guide endorses following the tank’s manual for any model-specific cautions, such as valve orientation or recommended hose connections.
What to expect during the draining process
During the drain cycle, expect a controlled stream of water to exit the tank through the drain valve. The speed of drainage depends on tank size, valve condition, and how well the hose is attached. You may notice air bubbles as the tank vents, which is normal—the hot water replacement air must escape before full drainage. Sediment can loosen in layers, sometimes producing a slightly murky mix; a clear, steady stream indicates most sediment has exited. If water stops abruptly, there may be a valve issue, air block, or hose kink that you should troubleshoot before proceeding. Plan for 15–60 minutes of draining, with additional time for refilling and re-pressurizing the system. Drain Guide emphasizes taking it slow to avoid splashing and scalding, especially if the tank is near or above knee level. After drainage is complete, you’ll refill the tank and restore power, which requires careful timing to avoid running the heater dry and damaging heating elements.
Aftercare and maintenance tips
Once you’ve drained and flushed the tank, reattach the drain hose, close the drain valve, and slowly reopen the cold-water supply to begin refilling the tank. As the tank refills, bleed air from the hot-water taps nearby to prevent air locks and ensure a smooth flow. When the tank is full, turn the power back on at the circuit breaker and test a hot water tap to confirm normal operation. Inspect the drain valve for leaks and consider replacing it if you notice seepage; a tight seal is critical to prevent future drainage problems. Drain Guide recommends documenting the date of maintenance and the observed sediment level to tailor future flush frequency to your water quality.
To maintain long-term efficiency, couple the drain with a yearly or biannual schedule based on hardness and usage. If sediment returns rapidly, you may need a more thorough flush or a professional inspection to check the anode rod, which protects the tank from corrosion. Finally, always check the T&P safety valve operation during maintenance; ensure it’s not blocked and can release pressure if needed. Drain Guide’s verdict is that consistent maintenance helps sustain energy efficiency, hot-water reliability, and the longevity of electric water heaters.
Tools & Materials
- Garden hose (heat-resistant, 5–8 ft)(Attach to drain valve and direct water into a drain or bucket)
- Plastic bucket or drain pan(Capture water and sediment; have at least one large container)
- Adjustable wrench or pliers(Loosen drain valve if it’s tight)
- Towels or old rags(Protect floors and wipe spills)
- Owner’s manual (model-specific)(Helpful for valve type and safety guidance)
Steps
Estimated time: 45-75 minutes
- 1
Power off the heater
Locate the circuit breaker for the electric water heater and switch it to off. Verify with a non-contact tester if possible to ensure no live current is present before touching any wiring or panels.
Tip: Power-off first to prevent electrical shock and damage to heating elements. - 2
Shut off the cold-water supply
Close the valve on the cold-water inlet to stop fresh water from entering the tank. If your unit lacks a dedicated shutoff, close the main water supply to the house temporarily.
Tip: Close slowly to avoid a pressure surge that could push out joints. - 3
Attach the garden hose to the drain valve
Connect the hose securely to the drain valve and route the other end to a safe drainage area or outside. Check that the connection is tight so there’s no leakage during drainage.
Tip: Ensure hose is rated for hot water and remains unobstructed. - 4
Open a nearby hot-water tap to vent
Open a hot-water faucet in the house to vent air and help the tank drain smoothly. This prevents airlocks and allows a continuous flow of water through the hose.
Tip: Vent early; you should hear a steady hiss as air is released. - 5
Open the drain valve and start draining
Carefully open the drain valve to begin draining. If the flow is slow, wait a few minutes. If water stops, inspect for hose kinks, valve issues, or air block and correct before continuing.
Tip: Wear gloves and eye protection; hot water can cause burns. - 6
Flush until clear and close the drain
Continue draining until the water runs fairly clear and free of silt. Close the drain valve and remove the hose once the tank is empty or near empty.
Tip: Close slowly to avoid splashing. - 7
Refill the tank and restore power
Slowly reopen the cold-water supply to refill the tank, bleeding air from nearby taps. When full, restore power at the breaker and test hot water temperature at a faucet.
Tip: Do not turn the power back on until the tank is full to avoid overheating and element damage.
Got Questions?
Can I drain an electric water heater if it's hot?
Yes, but exercise caution. The water and surfaces can be very hot, so wear protective gear and drain slowly to prevent scalding.
Yes, you can drain it when hot, but wear gloves and take it slow to avoid burns.
Do I need to turn off power before draining?
Absolutely. Turn off the circuit breaker for the heater and verify there is no live current before touching electrical components.
Yes. Switch off the breaker and ensure there’s no electrical current before you start.
How often should I drain my electric water heater?
Most households drain annually, with more frequent flushing if you have very hard water or heavy sediment buildup.
A yearly flush is common, adjust if your water is especially hard or deposits form quickly.
What if water won't drain or the valve leaks?
Shut off water, do not force the valve, and inspect the seal. If leakage persists, replace the valve or contact a professional.
If it won’t drain or leaks, stop and inspect the valve; replace if needed or call a pro.
Is the drain water safe to reuse in the garden?
Drained water contains minerals and sediment; avoid using it on plants that are sensitive to mineral deposits. Prefer disposal down a drain.
Better to drain into a drain and not reuse for delicate plants.
Watch Video
The Essentials
- Power down and isolate water supply before draining.
- Attach a hose and vent air for a smooth flush.
- Refill completely before restoring power to protect the heating elements.
- Inspect components (valve, anode rod) during maintenance for longevity.