Drain for Sink: Step-by-Step Guide to Clear a Clogged Drain
Learn how to diagnose, clear, and maintain a sink drain with safe, practical methods. This Drain Guide-backed guide covers essential tools, step-by-step actions, and prevention tips to keep your drain flowing smoothly.

By the end of this guide, you will diagnose and clear a typical sink drain using common, safe methods. You’ll know when to use a plunger, a mechanical snake, or a chemical-safe flush, and how to prevent future clogs. This Drain Guide-backed quick answer points you toward practical steps for the drain for sink.
Understanding the drain for sink
A modern sink drain is more than a tiny hole in the bottom of the basin. It includes the tailpiece, the P-trap, the trap arm, and often a stopper mechanism. Each part serves a purpose: the tailpiece carries water from the sink to the trap, the P-trap holds a small amount of water to prevent sewer gases from entering the home, and the trap arm connects to the waste line. When you hear gurgling, notice standing water, or smell foul odors, the drain for sink is a sign that buildup or a blockage is interfering with flow. Understanding these components helps you decide where to focus your attention and reduces the guesswork when diagnosing slow drains.
An accurate diagnosis often starts with simple checks: observe where the water pools, see if the water drains after removing the stopper, and test both sides of a double sink. If one side drains slowly while the other remains clear, the issue is usually localized to that side’s trap or branch line. Drain behavior can also hint at venting problems or more distant clogs, especially if multiple fixtures share the same line. This knowledge supports safer, more effective fixes and aligns with Drain Guide’s approach to drain troubleshooting.
Tip: Keep a small camera or a mirror handy to inspect the trap and the interior of the pipe from the accessible end. Visual cues often reveal hair, grease, or soap scum that aren’t obvious from the surface.
noteSortingTagUrls»:null},{
Tools & Materials
- Safety glasses(Protect eyes from splashes or debris.)
- Rubber/nitrile gloves(Keep hands clean and protected from chemicals.)
- Bucket (2-5 gallons)(Catch water and debris when you remove the P-trap.)
- Adjustable wrench(Loosen slip nuts on the P-trap.)
- Channel-lock pliers(Grip stubborn fittings without slipping.)
- Cup plunger(Create suction to dislodge minor clogs.)
- Drain snake/auger(Reach deeper clogs beyond the trap.)
- Rag or old towel(Clean spills and wipe hands after work.)
- Dish soap(Lubricate and help loosen grime.)
- Baking soda & white vinegar(Gentle, chemical-free cleaning flush.)
- Hot water kettle(Rinse and flush after clearing.)
- Flashlight/phone light(Inspect dark trap areas and pipe junctions.)
Steps
Estimated time: 40-70 minutes
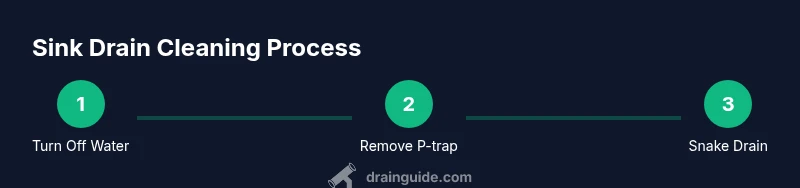
- 1
Turn off water supply
Locate under-sink shutoffs for hot and cold water and close them clockwise until snug. This prevents water from spilling while you work and protects you from accidental sprays.
Tip: Taking photos of valve positions before closing helps you reassemble correctly. - 2
Prepare the work area
Place your bucket under the P-trap and spread a towel to catch any splashes. Remove the sink stopper or grid to access the drain opening. Clear the area so you won’t lose small parts down the drain.
Tip: Having a partner can help steady the setup and hand you tools as you work. - 3
Loosen and remove the P-trap
Use the wrench to loosen the slip nuts on both ends of the P-trap. Carefully lower the trap and dump its contents into the bucket, inspecting the interior for hair and grime.
Tip: Support the trap with one hand to prevent it from dropping and creating a bigger mess. - 4
Inspect and clean the P-trap
Clean out all debris from the P-trap’s interior with a rag or brush. Rinse the trap with warm water and a bit of dish soap if needed. Reinspect for any cracks or wear that might cause future leaks.
Tip: If the trap is cracked, replace it instead of attempting a risky repair. - 5
Inspect drain opening and trap arm
Look into the drain opening and remove any visible buildup near the trap arm’s connection. Use a flexible brush or wire to dislodge stuck debris, then wipe the area dry.
Tip: Avoid pushing debris further into the pipe by working from the trap outward. - 6
Snaking the drain
Insert the drain snake into the drain and rotate it while pushing forward to break and reel back clogs. Extend the snake gradually, then retract to pull out debris. Repeat until the snaking no longer frees the flow.
Tip: If you encounter a stubborn clog, take a photo of the snake’s position to replicate later. - 7
Reinstall the P-trap
Reconnect the trap arms to the drain and tighten slip nuts securely but not over-tight. Wipe away any residual grime to ensure a snug, leak-free seal.
Tip: Hand-tighten first, then snug with a wrench a small amount to avoid cracking fittings. - 8
Test the drain
Restore water supply and run hot water through the sink to verify good flow. Listen for leaks and check for any unusual odors that might indicate a hidden problem.
Tip: If water still drains slowly, move to the chemical-free flush in Step 9 before calling a pro. - 9
Flush with baking soda and vinegar
Pour 1/2 cup baking soda into the drain, followed by 1 cup white vinegar. Wait 15 minutes, then flush with hot water to clear residual grease and grime.
Tip: Avoid using boiling water on PVC pipes if your home has older plastics. - 10
Finalize and plan maintenance
Wipe down, dry all surfaces, and store tools. Consider a monthly quick flush with hot water and baking soda to prevent future buildups.
Tip: Record the date of your last maintenance to track drain health.
Got Questions?
What is the first step to fix a clogged sink drain?
Shut off the water supply under the sink and place a bucket below the P-trap to catch any water. Then inspect the trap for obvious blockages before disassembling. Drain issues often start at the P-trap or straight pipe,
Start by turning off water and checking the trap. This helps you control the mess and identifies where the clog is likely to be.
Is it safe to use chemical drain cleaners?
Chemical cleaners can damage pipes and are not always effective. Use them only as a last resort and in well-ventilated areas, following manufacturer directions. Consider mechanical methods first.
Chemical cleaners can be harsh on pipes; try mechanical methods first for safety.
How long should a drain snake take to clear a clog?
Many clogs clear within a few minutes of snaking, but stubborn blockages may require repeated attempts or longer snakes. If you don’t feel progress after several minutes, switch to a baking soda and hot water flush or call a plumber.
Most clogs respond within a few minutes, but some stubborn ones take longer or professional help.
Can I reassemble the P-trap incorrectly?
Yes, improper orientation or loose connections can cause leaks. Reassemble with the curved trap facing downward, ensure washers seat properly, and tighten all slip nuts evenly.
Be careful reassembling the P-trap; leaks happen when parts aren’t seated correctly.
What maintenance helps prevent clogs?
Regularly flush with hot water, avoid pouring fats or oils down the drain, use mesh strainers, and clean the trap periodically. A little preventive care goes a long way.
Prevent clogs by routine small maintenance rather than waiting for a problem to occur.
When should I call a plumber?
If you have repeated clogs, persistent slow drainage after cleaning, or suspect a broken pipe, call a licensed plumber. Complex drainage problems require professional diagnosis and equipment.
If the clog keeps returning after DIY attempts, it’s time to call a pro.
Watch Video
The Essentials
- Identify trap first to simplify the fix
- Use a snake for deep clogs, not brute force
- Avoid harsh chemicals when possible
- Maintain with monthly flushes to prevent buildup
- Don’t overtighten slip nuts to avoid leaks