How to Drain a Dishwasher: A Practical DIY Guide
Learn a practical, DIY-friendly method to drain a dishwasher safely. This guide covers common causes, essential tools, a detailed step-by-step process, maintenance tips, and safety notes to prevent future clogs.

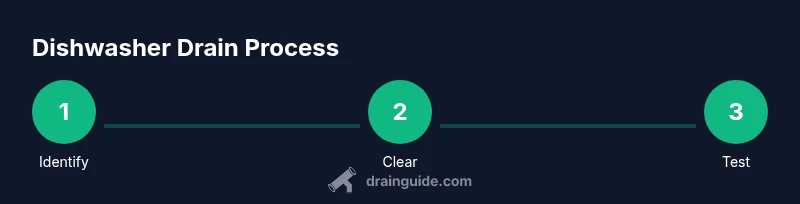
To drain a dishwasher, first ensure power and water are safely offline. Remove the bottom rack and scoop out standing water. Inspect the filter and drain hose for clogs, then clear debris. Reconnect and run a short rinse cycle to confirm drainage.
How dishwasher drainage works
A modern dishwasher drains through a small pump that pushes used water into a waste hose. This hose leads to either the sink drain or a disposal inlet, often via an air gap that prevents backflow into the appliance. The pump and filter are critical: the filter traps food debris, while the pump and hose carry wastewater away. Understanding these components helps you pinpoint where a blockage or leak originates. According to Drain Guide, recognizing each part makes DIY troubleshooting more reliable and reduces unnecessary disassembly. Regular checks on the filter and hose integrity extend the life of your dishwasher and prevent repeated drainage issues.
Key components to consider:
- Drain pump: powers water removal during the cycle.
- Filter: catches food particles to prevent clogs downstream.
- Drain hose: carries wastewater away; look for kinks, cracks, and secure connections.
- Air gap or disposal inlet: prevents backflow into the unit.
When any part is damaged or blocked, drainage performance declines, leading to standing water, gurgling sounds, or water backing up into the sink.
Common causes of drainage problems
Most dishwasher drainage issues fall into a few recurring categories: clogged filters, blocked drain hoses, and problems with the sink connection. Drain Guide analysis shows that many clogs originate in the filter housing or the hose where debris collects. A blocked drain hose can cause water to back up into the dishwasher or under the unit. In some homes, the air gap or disposal inlet becomes obstructed, creating a bottleneck that prevents proper drainage. Faulty seals or loose clamps can also leak or allow air to siphon wastewater back into the tub. Identifying the exact cause requires a systematic check: start with the easy fix (filter cleaning) and move toward hose inspection if needed.
Common scenarios include:
- A clogged filter with visible food particles
- A kinked or crushed drain hose beneath the sink
- Debris trapped near the disposal inlet or air gap
- A loose hose clamp or disconnected connection
- A malfunctioning drain pump or impeller
Step-by-step drain clearance: quick-start
This quick-start is designed to help you begin clearing a drainage obstruction without disassembling major components. Start with the simplest fixes and progress as needed. This section expands on the quick-answer steps with practical detail you can apply right away, including safe tools and best practices. Remember, if water is rising in the tub or you smell burning plastic, stop and seek professional help.
What to do first:
- Remove the bottom rack and scoop out standing water with a cup or sponge.
- Locate the filter assembly and remove any visible debris. Use clean water to rinse particles away.
- Inspect the drain hose for kinks, then disconnect at the sink end to check for clogs.
- If water still fails to drain, use a flexible drain snake or a brush to loosen hair and grime inside the hose.
- Reassemble, run a short cycle, and observe drainage. If issues persist, move to a deeper hose and air-gap inspection.
Tools and setup before you begin
Before you start, gather a few essential items and set up a safe workspace. A well-prepared area reduces mess and speeds up the process. This section outlines what to have on hand and how to position the unit for easiest access. For most homes, a 3–4 gallon bucket and a stack of towels are enough to catch water and clean up spills. A flashlight helps you see into tight spaces under the sink. Wear gloves to protect your hands from sharp edges and dirty water. If you plan to remove panels or inspect behind the unit, have a small screwdriver handy for screws and clamps. Keep a record of the model number in case you need the manual for specific drain configurations.
Pro tips:
- Place towels around the base of the dishwasher to catch drips.
- Work in a dry, well-lit area to avoid slips when water is present.
Cleaning the filter, pump, and spray arms
Regular cleaning of the filter and pump area is the cornerstone of reliable drainage. Start by removing the filter and rinsing it under warm water to remove trapped particles. Use a soft brush or old toothbrush to scrub the filter housing’s ridges. Check the pump impeller for debris that can hamper operation, removing any material you find with tongs. Spray arms should also be cleaned—remove them if possible and rinse the holes to ensure water can spray evenly during cycles. This maintenance reduces the chance of future clogs and improves wash performance.
Key maintenance tasks:
- Rinse the filter and housing to remove sludge and grease.
- Inspect spray arms for clogged holes and clean with a pin or thin wire.
- Dry all parts thoroughly before reassembly to prevent mold growth.
Inspecting the drain hose, air gap, and disposal connections
After cleaning the inner components, examine the drain hose for cracks, bulges, or obvious crushing. A damaged hose can leak or fail to drain completely. If your system uses an air gap, remove the cap and check for mineral buildup or kinks that restrict flow. At the disposal inlet, ensure the connection is secure and that the knockout plug (if present) is removed. Loose clamps can cause water to leak or drain poorly. If you have a garbage disposal, run it briefly to clear any debris that may be blocking the dishwasher’s discharge path.
Checklist:
- Inspect hose for damage; replace if needed.
- Clear the air gap of any buildup.
- Verify clamps are tight and connections are secure.
- Ensure the disposal inlet is clean and unblocked.
Testing drainage after clearing and when to escalate
With the components reassembled, run a test cycle with a small amount of water and observe the drainage in real time. Look for a steady flow and no backflow into the tub. If water drains slowly or pools again, repeat the filter and hose checks, and consider using a drain snake to loosen stubborn blockages. Persistent drainage issues may indicate a more complex problem such as a faulty pump, a collapsed drain line behind the wall, or an improper high loop. In such cases, consult a professional plumber to assess the system and prevent damage.
Test plan:
- Run a short cycle with a known-good load.
- Check the sink connection and brace the unit to reduce movement while draining.
- Note any noises or smells that accompany drainage for accurate diagnosis.
Maintenance to prevent future clogs and disasters
Preventive maintenance reduces the frequency and severity of drainage problems. Establish a routine that includes regular filter cleaning, hose inspection, and a yearly check of the disposal inlet. If you notice frequent clogs, consider a pre-rinse habit to reduce food particle buildup, use a dishwasher-safe cleaner periodically, and avoid pouring grease or large food scraps down the drain. When cleaning, keep a small brush handy to scrub the seals and crevices where grime hides. A small amount of white vinegar or baking soda can be used sparingly to deodorize, but avoid overuse of cleaners that may damage rubber gaskets.
Real-world tip from Drain Guide: a simple, consistent maintenance routine saves time and reduces the chances of emergencies in busy households.
Tools & Materials
- gloves(Protect hands from sharp edges and dirty water)
- bucket(Catch water and hold debris during cleaning (2-4 qt works))
- towels/rags(Mop up spills and dry parts after cleaning)
- flashlight(Insufficient lighting can hide debris; use as needed)
- slip-joint pliers(Loosen clamps and remove hoses safely)
- screwdriver set(Useful for removing panels if required by model)
- drain snake (flexible auger)(Optionally clears hard-to-reach clogs in hoses)
- shop vacuum(Only use for excess water cleanup if available)
- dishwasher-safe cleaning brush(Scrub filter housing and spray arms)
- vinegar or baking soda(Use sparingly for deodorizing; avoid harsh cleaners near gaskets)
Steps
Estimated time: 45-60 minutes
- 1
Power down
Turn off the dishwasher at the circuit breaker and unplug the unit if safely accessible. This prevents electrical shock while you work around water. If access is difficult, switch off the breaker first and only unplug if you can do so without pulling the appliance away from the counter.
Tip: Verify the power is truly off by testing a nearby outlet with a small device before handling components. - 2
Open and prep
Remove the bottom rack to access the drain area. Clear the space underneath and around the unit so you have room to work. Place a bucket and towels under the front panel to catch any water that spills during the process.
Tip: Keep a spare towel handy for quick wipe-ups; it helps reduce slips on wet surfaces. - 3
Remove standing water
Use a cup or sponge to scoop out water from the bottom of the tub. The goal is to create a dry working area so you can inspect the filter and hoses without wading through water.
Tip: Work gradually; remove water in small amounts to avoid splashing when you remove parts. - 4
Inspect and clean the filter
Locate the filter assembly and remove any debris. Rinse the filter under warm running water and scrub the housing with a soft brush to remove trapped grease and food particles. A clean filter significantly improves drainage and wash performance.
Tip: If you have a two-part filter, clean both parts and the housing to ensure no debris remains. - 5
Check the drain hose and disposal connection
Trace the drain hose to where it connects under the sink. Look for kinks, cracks, or loose clamps that could block flow. If your setup uses an air gap or disposal, inspect these connections for blockages and secure fit.
Tip: Place a towel under the hose junction before loosening clamps to catch residual water. - 6
Clear blockages
If you see a clog, carefully use pliers or a flexible drain snake to remove the obstruction. Do not force the tool; work gently to avoid damaging the hose or pump. For minor blockages, you can run a small amount of warm water through the hose to help flush debris.
Tip: Never use metal tools aggressively in the hose; they can puncture or scar the plastic. - 7
Test drainage with a rinse cycle
Reconnect the hose, reassemble the filter, and run a short cycle with a small amount of water. Observe whether water drains completely and check for any leaks. If drainage remains poor, proceed to a deeper assessment of the disposal inlet and air gap.
Tip: Listen for unusual noises; a grinding sound can indicate a loose impeller or remnant debris in the pump. - 8
Address persistent clog or professional help
If water still pools or drains slowly after these steps, the issue may involve the pump, a collapsed line, or a misconfigured high loop. In such cases, consult a licensed plumber or appliance technician to avoid causing damage to the unit or home plumbing.
Tip: Document symptoms, model number, and the steps you’ve taken to help the technician diagnose faster.
Got Questions?
Why is there standing water in my dishwasher after a cycle?
Standing water usually points to a clogged filter, blocked drain hose, or a malfunctioning drain pump. Start by cleaning the filter and checking the hose for kinks. If the issue persists, inspect the air gap and disposal connections for blockages.
Standing water after a cycle typically means a clog or a pump issue. Start with the filter and hose, then check air gaps and disposal connections.
How can I tell if the drain hose is clogged?
A clogged hose often causes slow drainage or water backing up into the tub. Disconnect the hose at the sink end and try to run water through it to see if it clears. If resistance or blockage is present, replace or thoroughly clean the hose.
If the hose is blocked, water will drain slowly or back up. Disconnect and flush the hose to verify.
Can I pour chemical drain cleaners down the dishwasher hose?
Chemical drain cleaners are not recommended for dishwashers; they can damage seals and hoses and may vent back into the tub. Stick to mechanical cleaning methods and consult a professional for persistent clogs.
No, avoid chemical cleaners in dishwashers. They can damage parts and worsen the problem.
What should I do if water backs up from the sink when the dishwasher drains?
Backups indicate a shared drain issue, often a blockage downstream from the dishwasher. Clear the dishwasher hose first, then check the sink drain and trap. If the problem persists, you may need to inspect the main line or consult a plumber.
If sink water backs up, there’s a blockage farther down the line. Clear the dishwasher path and inspect the sink drain or call a plumber.
When should I call a professional for dishwasher drainage issues?
Call a professional if you cannot locate or remove the blockage, if you notice signs of plumbing damage, or if the drain pump or electronics appear faulty. A pro can safely diagnose and repair complex issues without causing further damage.
Call a professional if you can't identify or fix the blockage, or if you suspect pump or electrical problems.
Watch Video
The Essentials
- Power down and prep the area before starting.
- Clean filters and inspect hoses for clear drainage paths.
- Use gentle tools to remove clogs; avoid damaging components.
- Test with a short rinse cycle and observe drainage carefully.
- Implement a regular maintenance routine to prevent future clogs.