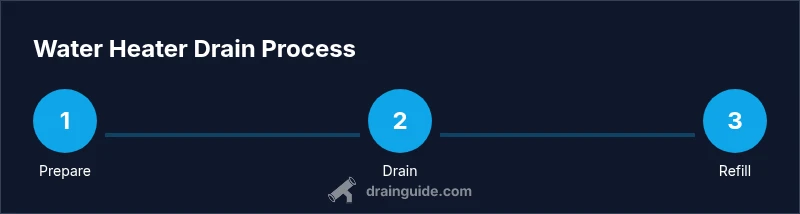
How Long to Drain a Water Heater: A Step-By-Step Guide
Learn how long it takes to drain a water heater, safe steps, time estimates, and maintenance tips to flush sediment and protect your system.

Draining a typical residential water heater takes about 30 to 60 minutes from start to finish, depending on tank size, sediment buildup, and flow rate. You’ll begin by shutting off power or gas, attaching a hose to the drain valve, opening a hot water faucet to vent air, and guiding the water into a safe drain or bucket. After draining, refill the tank and restore power safely.
What determines how long you need to drain a water heater
The exact duration to drain a water heater isn’t fixed; it depends on several interacting factors. Tank size matters: a standard 40- or 50-gallon unit will take less time to drain than larger 75- or 80-gallon tanks. Sediment buildup accelerates or slows the flush depending on how settled the minerals are and how easily they move through the dip tube and drain valve. Water pressure and hose diameter influence flow rate; a tight kink-free hose and a properly functioning drain valve move water more quickly. Finally, how you vent the system matters: opening a hot water faucet nearby reduces air lock and allows the tank to drain smoothly. If you’ve never drained a heater before, budget extra time for setup and cleanup. The goal is not only speed but also safety and a thorough flush.
Why Drain Time Varies by Sediment and Condition
Minerals like calcium carbonate build up at the bottom of tanks over years. A heavy sediment layer can slow the draining process and may require longer flushes to clear effectively. If the drain valve becomes clogged, or the hose is poorly secured, flow slows dramatically. Conversely, a clean, well-maintained drain system with a clear hose will drain faster. Budgeting for a 30–60 minute window gives you a realistic target, but expect longer if sediment is thick or the valve is stubborn. Drain Guide recommends taking extra care with older heaters, and using a slow, controlled valve opening to prevent air locks and splashing.
Steps You’ll Likely Follow During the Drain
A methodical drain involves shutting off power or gas, closing the cold-water supply, attaching a hose, opening a hot water faucet to vent air, and letting water flow out at a steady pace. If the water remains muddy after a first pass, you may flush again or perform a shallow refill and drain cycle. Keep in mind safety: scalding water can cause burns, and pressure can rise if you seal valves too quickly. This is the moment to slow down and verify each connection is secure. Drain Guide emphasizes patience and methodical steps to avoid accidents and ensure a thorough flush.
Post-Drain Steps: Refilling and Re-pressurizing
After draining, close the drain valve, remove the hose, and turn on the cold-water supply. Allow the tank to refill fully before restoring power or relighting the gas. For electric heaters, switch the breaker back on only after the tank is full; for gas heaters, set the control to the appropriate heat setting after ignition and confirmation of water flow. It’s normal to see a short surge as cold water enters, followed by steady hot water. Testing with a nearby faucet confirms heat and pressure are within safe ranges. Drain Guide notes that a proper refill protects the tank’s integrity and reduces the risk of overheating from air pockets.
Common Pitfalls That Extend Drain Time (and How to Avoid Them)
Avoid rushing the drain valve open; a sudden influx can create splashes and stress the drain line. Don’t forget to vent air—opening a hot water tap is essential. A clogged drain valve or kinked hose can slow the process to a crawl; check fittings before you start. If the water remains discolored after flushing, additional cycles may be required, or mineral buildup might indicate a larger maintenance need. Proper setup and a calm pace reduce the risk of scalding and leaks.
When to Call a Pro and What to Expect
If you discover persistent leaks at the drain valve, a broken drain valve, severe rust, or if draining reveals excessive sediment that won’t budge after multiple flushes, it’s wise to call a professional. A licensed plumber can inspect the anode rod, dip tube, and valve integrity and assess whether a more extensive cleaning or replacement is needed. Drain Guide suggests documenting each drain session, noting water color and the ease of flow, to help the technician diagnose underlying issues quickly.
Tools & Materials
- Hose rated for hot water(3/4 inch ID hose length long enough to reach a drain or outside area; avoid kinked hoses)
- Bucket or temporary receptacle(Large enough to hold several gallons; place to prevent spills)
- Adjustable wrench or pliers(For securing the drain valve and hose fitting)
- Towel or rag(For cleanup and wiping drips)
- Safety gloves(Heat-resistant; protects hands from hot water and sharp edges)
- Eye protection(Goggles or face shield to guard against splashes)
- Flashlight(Helps inspect the drain valve area for leaks)
Steps
Estimated time: 30-60 minutes
- 1
Power/gas shutoff
Turn off the electrical power at the circuit breaker for an electric water heater or set the gas control to the 'pilot' or 'off' position for a gas heater. This prevents the element from heating water while you drain and reduces scald risk.
Tip: Always confirm electric supply is off by testing a nearby outlet or the heater’s control panel before touching plumbing components. - 2
Close the cold-water supply
Locate the cold-water shutoff valve above the heater and turn it clockwise until fully closed. This prevents fresh water from continuously refilling the tank during the drain.
Tip: If the valve is hard to reach, use a helper to steady the hose while you operate it. - 3
Attach hose and vent
Attach the drain hose to the drain valve and place the other end into the bucket or safe drainage location. Open a nearby hot water faucet to vent air and speed up the draining.
Tip: Ensure the hose is secure and won’t come loose under pressure. - 4
Open drain valve and begin draining
Carefully open the drain valve with the wrench or by hand if it’s spring-loaded. Let water flow out at a steady pace. If the flow stalls, close and reopen the valve to reseat the seal.
Tip: Do not rush; a controlled flow reduces splashing and valve damage. - 5
Flush to clear sediment
If you’re flushing out sediment, briefly open and close the drain valve a few times or let the water run until it clears. Keep an eye on water color; clear water is the target.
Tip: If water stays muddy, repeat the flush step or perform a partial fill-and-drain cycle. - 6
Refill the tank
Close the drain valve, remove the hose, and turn the cold-water supply back on. Allow the tank to refill completely before restoring power or relighting the burner.
Tip: Open a hot-water faucet to vent air during refill and listen for gurgling—this indicates air is escaping. - 7
Restore power/gas and test
Once the tank is full (no air spurts from the hot water tap), restore power to an electric heater or re-light the gas burner. Set the thermostat and check for leaks around connections.
Tip: Check the first few hot water draws for stable temperature and ensure there are no leaks at the drain valve.
Got Questions?
Is it safe to drain a water heater while the water is hot?
Draining while hot increases the risk of scalding, so it’s safer to wait for the water to cool a bit or at least vent the system with a hot water faucet open. Always confirm you’ve turned off power or gas first.
Draining hot water can be risky. Turn off power or gas first and vent the system with a hot water tap open to reduce pressure and prevent burns.
How long does it take to drain a typical 40–50 gallon heater?
A typical drain for a standard 40–50 gallon unit takes about 30 to 60 minutes, depending on sediment and flow rate. Larger tanks or heavy mineral buildup can stretch this time.
Most 40 to 50 gallon heaters take around 30 to 60 minutes to drain, depending on sediment and flow.
How often should you drain a water heater?
Many homes flush their water heater annually to remove sediment and maintain efficiency. If you notice reduced hot water supply or murky water, consider more frequent flushing.
Flushing annually is common, but adjust frequency if you notice sand-colored water or slow hot water output.
Can I drain without a drain valve?
If your heater lacks a drain valve, draining safely becomes difficult and is not recommended. A professional may install a proper drain or advise alternative maintenance steps.
Without a drain valve, draining isn’t safe or practical; consult a pro for options.
What safety gear should I use when draining?
Wear heat-resistant gloves and eye protection. Use a sturdy hose and keep kids and pets away from the work area to prevent injuries.
Wear gloves and eye protection, and keep the area clear of kids and pets.
What if the water is rusty after draining?
Rusty water indicates sediment and potential corrosion. Flush again, inspect the anode rod, and consider professional evaluation if rust persists.
Rusty water means sediment or corrosion; flush again and consider a professional check if it persists.
Watch Video
The Essentials
- Turn off power or gas before draining.
- Use a proper hose and vent air to speed drainage.
- Drain until clear water runs out; flush if needed.
- Refill completely before restoring power.
- Regular draining improves efficiency and lifespan