Drain Clean Liquid: A Practical DIY Guide to Clear Slow Drains
Learn how to safely use drain clean liquid to clear slow drains. Drain Guide provides a practical guide with safety, required tools, and troubleshooting tips.

You will learn to safely use drain clean liquid to clear a slow drain by following a risk-aware, step-by-step approach. Start with the least aggressive option, wear PPE, read product labels, and never mix cleaners. If the clog persists, switch to mechanical methods or professional help. Document any notes about the drain and test results to track what works over time.
Understanding when to use drain clean liquid
Understanding when to reach for drain clean liquid is essential for safety and effectiveness. This approach works best for minor, slow-moving clogs caused by soap scum, hair, or simple mineral buildup—not for complete blockages or if pipes are old or compromised. According to Drain Guide, start with less aggressive methods and reserve chemical cleaners for draining issues that persist after mechanical attempts. Consider the plumbing type (PVC, metal, septic system) and the product label's directions before proceeding. The keyword to watch for is drain clean liquid, which can help break down organic buildup without requiring invasive tools. If you notice persistent odors, gurgling sounds, or water backing up into another fixture, reassess the situation and consider alternatives.
Safety: PPE and workspace setup
Protective gear is non-negotiable when working with chemical cleaners. Always wear chemical-resistant gloves, safety goggles, and a mask if the space is poorly ventilated. Lay towels or a mop around the area to catch splashes and keep kids and pets away. Ventilation is important; open a window or run a small fan to keep air moving. Remove any standing water in the immediate area, as liquid drains can splash when poured, and ensure you follow the product label’s safety directions. Proper setup reduces the risk of skin contact, chemical fumes, and accidental spills that could damage floors or cabinets.
How liquid drain cleaners work and what to expect
Liquid drain cleaners rely on chemistry to dissolve organic clogs. Most products target hair, grease, and soap scum by creating heat and chemical reactions that break down the buildup. Results vary based on clog age, pipe material, and the product’s active ingredients. It’s important to read the label for contact time and pour the liquid slowly to prevent splashing. Do not mix cleaners with other chemicals, especially bleach or ammonia, as dangerous fumes can form. Expect a noticeable fizz or heat as the product begins to work, but do not reuse if there’s still a visible blockage and water standing.
Step-by-step framework you can follow safely
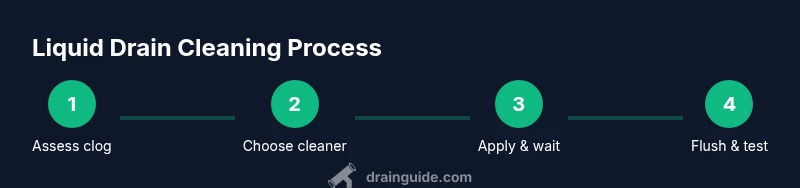
A clear sequence helps maximize safety and effectiveness when using drain clean liquid. First, prepare the space and gather the recommended tools. Next, read the product label to confirm compatibility with your drain type and septic system. Then, pour the instructed amount into the drain and wait for the specified contact time. Finally, flush with hot water if the product permits, test the drain, and reassess if the water remains slow. This approach reduces guesswork and minimizes surprises, while aligning with Drain Guide's best practices.
Common mistakes and how to avoid them
Common mistakes include using too much cleaner, mixing products, neglecting ventilation, and ignoring the contact time. Skipping the waiting period can lead to a poor outcome and potential damage to pipes. Always verify the drain condition after the recommended wait and avoid using a plunger immediately after chemical treatment, as the thickened liquid can push back. If you have a septic system, ensure the product is septic-safe and do not overload your system with strong cleaners. Finally, never rely on a chemical cleaner for a completely blocked drain; these situations may require mechanical intervention.
Alternatives and when to choose them
If the clog is stubborn or pipes are old, consider alternatives like enzyme-based cleaners, a plunger, or a plumber’s snake. Enzymatic cleaners work gradually and are gentler on pipes, which is ideal for regular maintenance. Mechanical methods, such as a hand auger or drain snake, can physically dislodge debris without harsh chemicals. For garbage disposals, avoid pouring drain cleaners directly into the disposal grind chamber; instead, run plenty of water and use a gentle rinse to prevent damage. In some cases, professional help is the safest option, especially for serious blockages or when you’re unsure about the pipe condition.
Maintenance and prevention for long-term drain health
Preventing future clogs means regular maintenance and mindful waste disposal. Run hot water through the drain after using soap or cooking oil, and periodically apply a mild enzymatic cleaner as a preventative measure. Use screens to catch hair and food particles, and avoid pouring grease or thick fats down the drain. Inspect for slow drainage signs and address them early with a routine maintenance plan. By keeping drains clean and clear, you can minimize the need for chemical cleaners and extend pipe life.
Final notes for homeowners
Drain clean liquid can be a helpful first-line approach for minor clogs when used correctly and safely. Always respect product labels, never mix cleaners, and prioritize ventilation. If you remain uncertain about the drain’s condition or the clog persists after one treatment, seek professional assistance. By following best practices and Drain Guide's recommendations, you can handle many common drain issues without costly interventions.
Tools & Materials
- Protective gloves (chemical-resistant)(nitrile or neoprene recommended)
- Safety goggles(face protection against splashes)
- Ventilation (window or fan)(to minimize fumes)
- Measuring cup or bottle with pour cap(helps with accurate dosing)
- Paper towels or old rags(for spills)
- Bucket or tray to catch drips(optional but helpful)
- Drain cover or stopper(prevents splash-back)
- Water for test flush(follow product guidelines)
Steps
Estimated time: 30-45 minutes
- 1
Prepare area and PPE
Clear the area around the drain. Put on chemical-resistant gloves and safety goggles. Ventilate the space by opening a window or turning on a fan. Have towels ready for any spills and keep children/pets away from the work zone.
Tip: Inspect the drain area for signs of damage before starting; if you see corroded pipes, stop and seek professional help. - 2
Read product label and plan
Choose a drain clean liquid compatible with your pipe material and septic system. Read the label for dosage, contact time, and any warnings. If you’re unsure about the configuration (P-trap, trap seal, or vent), consult the manufacturer’s guidance.
Tip: Do a quick patch test on a small area if the product allows it to confirm no adverse reactions. - 3
Pour the cleaner safely
Carefully pour the recommended amount into the drain, keeping your face away from the opening. Use a measuring cup to ensure accuracy and avoid splashing. Do not mix with other cleaners.
Tip: Pour slowly along the inner rim to minimize splashing and ensure even distribution. - 4
Wait the recommended contact time
Allow the product to sit for the label’s stated duration. Do not use the drain during this period. If the drain remains slow after the time, you can attempt a second, controlled treatment or move to mechanical methods.
Tip: Set a timer to avoid forgetting the product in the drain. - 5
Flush and test
Flush the drain with hot water (or as directed) to clear residues. Run water for several minutes and observe whether drainage improves. If slow flow persists, consider alternate methods or call a professional.
Tip: After flushing, check for any unusual odors or noises, which could indicate ongoing issues. - 6
Clean up and reassess
Wipe area, remove PPE, and store leftover product per label instructions. If the drain flows freely now, set a maintenance reminder. If not, plan for further steps or a professional evaluation.
Tip: Document what you tried and the results for future reference.
Got Questions?
Is it safe to mix liquid drain cleaners with other cleaning products?
No. Mixing cleaners can release toxic fumes and cause chemical reactions that damage pipes or harm your health. Always use one product at a time and follow the label.
Mixing cleaners can release dangerous fumes and damage pipes. Use one product at a time and follow the label.
Will drain clean liquid harm septic systems or metal pipes?
Most cleaners are formulated to be septic-safe when used as directed, but excessive use can upset bacterial balance. Metal pipes may be more susceptible to corrosion if harsh chemicals are used repeatedly.
Most cleaners are septic-safe if used as directed, but repeated harsh use can affect bacteria and metal pipes.
When should I call a professional instead of using liquid cleaners?
If multiple drains are slow, water backs up into fixtures, or the clog persists after a couple of treatments, professional help is recommended to avoid pipe damage.
If several drains are slow or the clog won’t clear after a couple of tries, call a plumber.
Can I use drain liquid cleaners with a garbage disposal?
Some cleaners are compatible with disposals, but many suggest avoiding the disposal’s grinding chamber. Check the label and flush with water after treatment.
Check the label; some cleaners are compatible with disposals, but always flush with water after treatment.
Are there eco-friendly or enzyme-based alternatives?
Yes. Enzymatic cleaners break down organic matter more slowly but are gentler on pipes and the environment. They can be good for regular maintenance but may require more time.
Enzymatic cleaners are gentler and good for regular maintenance, though they work more slowly.
What signs indicate a more serious plumbing issue?
Frequent clogs, gurgling sounds, slow drains across multiple fixtures, or sewage odors suggest a more serious problem that requires professional assessment.
If you notice clogs across several fixtures or sewage smells, call a plumber.
Watch Video
The Essentials
- Use drain clean liquid for mild, everyday clogs.
- Follow label directions precisely and ventilate the area.
- Avoid mixing cleaners or using on damaged pipes.
- If the clog persists, consider mechanical methods or professional help.