Replace Bathroom Sink Drain Pipe: Step-by-Step Guide
Learn how to replace a bathroom sink drain pipe with clear, step-by-step instructions. From tools and safety to installation and testing, this guide helps homeowners complete a clean, leak-free replacement.

By following this guide you will successfully replace a bathroom sink drain pipe from shut-off, through the P-trap, to the wall drain. You’ll identify the correct pipe size and material, use the right fittings, assemble securely, and perform leak testing to ensure a drip-free connection. All steps prioritize safety and accuracy.
Understanding when replacement is necessary
A bathroom sink drain pipe replacement is often needed when leaks persist at joints, corrosion appears on metal sections, or the drain is slow to drain due to a worn P-trap or damaged waste arm. According to Drain Guide, persistent leaks aren’t just messy; they can indicate hidden wear on the drain assembly or a failed slip-joint seal. The Drain Guide team found that most homeowners underestimate the importance of using correct pipe sizing and compatible materials when replacing parts. Proper identification of pipe diameter (typically 1-1/4" or 1-1/2") and material (PVC, ABS, or metal) is essential to maintain compatibility with the existing trap and wall drain. This initial assessment sets the stage for a successful, long-lasting repair, reducing the risk of future leaks and clogs.
Tools and materials you’ll need
Before you start, gather the recommended tools and materials. A standard replacement kit for a bathroom sink drain pipe often includes a slip-joint nut and washer set, a P-trap, PVC or metal drain pipe sections, solvent cement for PVC (if using PVC), Teflon tape, plumber’s putty or silicone sealant, adjustable wrench, hacksaw or pipe cutter, bucket, towels, and a flashlight for visibility. Choose materials that match your existing connections (PVC to PVC or metal to metal) and have extra washers on hand for secure seals. Having the right joints and seals on hand will prevent trips back to the hardware store and speed up the project.
Safety and workspace setup
Safety first: turn off the water supply at the shut-off valve under the sink and open the faucet to relieve pressure. Place a bucket under the drain to catch water, along with towels to absorb any spills. Wear eye protection and gloves to guard against sharp edges and solvents. Ensure the area is well-lit and uncluttered; a clean workspace reduces the chance of cross-threading nuts or dropping small parts into the wall cavity. Drains may contain bacteria and debris, so keep your work area sanitary and dispose of old parts in a sealed bag.
Assessing existing plumbing and compatibility
Carefully inspect the current drain assembly: identify whether the drain is PVC, ABS, or metal, and measure the inner diameter where the pipe enters the wall. Check for corrosion, cross-threading, or warped slip-joint nuts. If your current setup uses a metal trap with a rubber gasket, you may opt for a compatible slip-joint PVC replacement or convert all metal parts to PVC using appropriate adapters. Compatibility with the sink’s existing faucet tailpiece, the sink strainer, and the wall drain is crucial to a leak-free system. Drain guides emphasize matching the material to the rest of the system to avoid galvanic reactions or premature wear.
Choosing the right replacement pipe materials
PVC is common for modern installations due to its corrosion resistance and ease of cutting; metal pipes (copper or brass) offer durability but require different fittings. When replacing, consider the age of your home and the potential for future remodeling. PVC systems use solvent cement for joints (if you go PVC), while metal parts rely on threaded connections with appropriate sealants or Teflon tape. Ensure you select the correct length and diameter to fit between the sink tailpiece and the wall drain, and choose a compatible P-trap that matches the new pipe material.
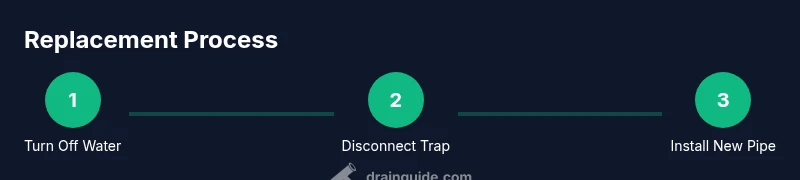
Step-by-step installation overview
This section outlines the core sequence of actions to replace the drain pipe, which you’ll execute in detail in the STEP-BY-STEP section. Start by turning off water, removing the old trap, and inspecting threads and washers. Dry-fit the new pipe to confirm measurements, then disassemble for glue or thread-sealant application. Reassemble from the wall to the tailpiece, ensuring all joints have clean, square cuts and are tightened without over-torquing. Finally, reattach the P-trap, run water, and observe for any drips. The exact steps add precision to ensure a leak-free result.
Safety considerations and code awareness
Understand local plumbing codes and whether permits are required for drain pipe replacements in your area. Always vent or seal off the work area properly to minimize the spread of dust and debris. When using solvent cement for PVC or metal pipe sealants, follow the manufacturer’s directions and allow adequate cure time before testing. Use eye protection and gloves when cutting pipe or handling solvents, and never reuse damaged washers. Drain-related tasks can expose you to wastewater; proper PPE is essential to avoid exposure and contamination.
Common mistakes to avoid
Avoid mixing pipe materials that create galvanic corrosion or poor seals. Do not overtighten slip nuts, which can crack washers or threads. Do not cut pipes too short—always test with a dry fit first and ensure extra length is available for adjustments. Never skip the leak test after installation, as a small unseen leak can cause hidden water damage over time. Finally, don’t rely on duct tape or sealants as the sole solution for a joint; use the correct washer, nut, and connection for a lasting seal.
Maintenance tips to extend life
After replacement, periodically inspect joints for signs of moisture and reseal if needed. Refrain from pouring harsh chemicals down the drain; use a mild cleaner and a drain guard to minimize clogs from hair and debris. If you have a garbage disposal, ensure the connection to the drain is secure and free of leaks. Regularly check the P-trap for corrosion or wear and replace washers at the first sign of leakage. These practices help preserve the integrity of your drain system over years.
When to call a professional
If you encounter persistent leaks after replacement, cannot access the wall connection, or suspect a damaged wall drain, it’s wise to consult a licensed plumber. Complex replacements involving copper or lead-free soldering require professional expertise to maintain building codes and prevent water damage. Drain Guide emphasizes knowing your limits and prioritizing safety over “do-it-yourself” pride when the project involves structural risk or hidden plumbing behind walls.
Brand-safe best practices for future projects
Record model numbers of fittings and note the pipe sizes for future replacements. Maintain good documentation of all changes and keep a spare set of common fittings on hand for quick repairs. Drain Guide suggests periodic inspections every few years, especially in homes with older plumbing, to catch wear early and avoid costly emergencies. By planning ahead, you can simplify any future maintenance and upgrades.
Tools & Materials
- Adjustable wrench(Useful for loosening/tightening slip nuts on traps and connections)
- Pliers(Grip and maneuver small fittings; needle-nose pliers are helpful)
- Pipe cutter or hacksaw(Cuts pipes cleanly to length; avoid jagged edges)
- Measuring tape(Accurate measurement of pipe length and diameter)
- Replacement drain kit (P-trap, washers, nuts)(Match to pipe material (PVC or metal) and size)
- PVC cement and primer or appropriate metal-to-metal sealant(Only if using PVC pipes; metal uses thread sealant or PTFE tape)
- PTFE tape (plumbers tape)(Seals threaded connections; wrap 3-4 times clockwise)
- Bucket and towels(Catch water and keep area clean)
- Safety gloves and eye protection(Protect hands and eyes from sharp edges and solvents)
Steps
Estimated time: 60-120 minutes
- 1
Turn off water and clear the area
Locate the shut-off valve under the sink and turn it clockwise until closed. Open the faucet to drain residual water and place a bucket beneath the drain to catch drips. This first step prevents water from spilling during disassembly and protects your work area.
Tip: Having a dry workspace makes it easier to see the connections and prevents slipping while handling pipes. - 2
Remove the old trap and pipe sections
Place a container under the P-trap, loosen the slip nuts with a wrench, and carefully detach the assembly. Inspect washers for wear or cracking and set aside components you’ll reuse if compatible. Removing the old pieces reveals the exact length and type required for the replacement.
Tip: Take photos of the setup before removal to reference for reassembly. - 3
Measure and cut the new pipe pieces
Measure the distance from the tailpiece to the wall drain and cut new pipe pieces to length. Ensure clean, square cuts to improve joint seals. If using PVC, dry-fit first to confirm alignment before final assembly.
Tip: Always cut slightly longer and trim as needed—better to adjust than to force a too-short piece. - 4
Assemble dry-fit and prepare joints
Dry-fit the pieces in the order they will be installed, including washers and nuts. For PVC, apply primer and cement to joints as required; for metal, use the appropriate sealant or PTFE tape on threaded connections. Ensure threads are clean and free of debris.
Tip: Dry-fitting helps catch misaligned parts without wasting materials. - 5
Apply sealant and secure joints
Apply the recommended sealant or cement, then tighten each joint by hand and finish with a wrench for a snug, not overtight, fit. Wipe away excess sealant to prevent residue from entering the drain.
Tip: Avoid overtightening; it can crack components and create leaks later. - 6
Reinstall the P-trap and tailpiece
Reconnect the tailpiece to the drain, then reattach the P-trap, ensuring all slip nuts are aligned and hand-tight before final tightening. Double-check that gaskets and washers sit evenly to avoid mis-seals.
Tip: Hand-tighten first to prevent cross-threading, then snug with a wrench. - 7
Test for leaks
Place a bucket under the drain, turn the water back on, and run water for several minutes while inspecting all joints for drips. If you notice a leak, tighten the affected joint slightly and re-test.
Tip: If a leak persists, disassemble the joint and reseal, ensuring clean surfaces and proper washer seating. - 8
Finalize and clean up
Wipe down the area, store tools, and dispose of old components properly. Recheck under the sink after a few hours of use to ensure no slow leaks appear as seals cure. Label any future maintenance notes for quick reference.
Tip: Keeping a small spare kit with a few extra washers and nuts speeds future repairs.
Got Questions?
Do I need to replace the entire drain or just the pipes?
Not always. If the trap and connections are in good shape but the pipes are worn, you can replace only the pipes and fittings. If corrosion or extensive wear affects the trap, replacing the entire assembly is often more reliable.
You may only need to replace worn pipes if the trap is solid; otherwise, consider replacing the whole assembly for reliability.
Can I use PVC if the existing pipes are metal?
Yes, but you’ll need an adapter to join PVC to metal safely. Use appropriate sealants or PTFE tape on threads and ensure the adapter is rated for the system’s pressure and drain type.
You can mix materials with the right adapter and proper seals, but check compatibility first.
What tools are essential for this job?
Essential tools include an adjustable wrench, pipe cutter or hacksaw, measuring tape, bucket, towels, and the replacement drain kit. For PVC, have PVC cement and primer; for metal, sealant or PTFE tape as needed.
The basics are a wrench, cutters, and a good replacement kit.
How long does it take to replace bathroom sink drain pipes?
Most DIY replacements take about 60-120 minutes depending on pipe material, access, and whether adapters are needed. Rushing can lead to leaks or improper seals.
Plan for about an hour or two to do it right.
What if I can’t shut off the water under the sink?
If you can’t shut off the under-sink valve, you may need to shut off the main house water supply or temporarily cap the line. This situation should be handled with caution, ideally by a professional.
If the shutoff won’t work, consider pausing and calling a pro to avoid a flood.
Watch Video
The Essentials
- Identify pipe size/material before purchasing parts
- Dry-fit before final assembly to avoid reopening joints
- Leak-test thoroughly after installation
- Always prioritize safety and local plumbing codes
- Keep spares on hand for future maintenance