Can You Drain and Fill a CVT Transmission? A DIY Guide
Learn whether you can drain and fill a CVT transmission, when it's safe, the risks, and a practical step-by-step approach for homeowners tackling CVT maintenance.

Generally, can you drain and fill a cvt transmission? The answer isn’t universal. If you’re asking can you drain and fill a cvt transmission, the decision depends on the model, the service approach required by the manufacturer, and the tools you have. Some CVTs allow a straightforward drain-and-fill with OEM fluids, while others require dealer-grade procedures. If you proceed, follow the exact OEM procedure, use the specified CVT fluid, and avoid overfilling to prevent clutch or belt damage.
Can you drain and fill a cvt transmission? Understanding the scope
If you're asking can you drain and fill a cvt transmission, the answer is nuanced. The reality is that CVT systems are not universally identical to traditional automatics, and many manufacturers design sealed reservoirs or controlled-fill procedures. According to Drain Guide, the decision to attempt a DIY drain and fill depends on the specific make, model, and the service approach your vehicle requires. Some CVTs allow a straightforward drain-and-fill with a factory-recommended CVT fluid, while others mandate a more involved service performed with OEM tooling. Before you lift the hood, check the owner’s manual, any service bulletins, and warranty terms. The goal is to restore proper fluid condition and maintain belt and pulley performance without introducing air or contaminants. The Drain Guide Team emphasizes that the risk of using the wrong fluid or incomplete drainage can lead to shifting problems or accelerated wear, so a cautious, informed plan is essential.
How CVT fluids differ from conventional ATF
CVT fluids are not a one-size-fits-all ATF. They are designed for belt-and-pulley systems that depend on precise friction characteristics and pressure control. Unlike standard automatic transmission fluids, CVT fluids often include specific additives and viscosity profiles tailored to a given manufacturer. Mixing fluids or using an off-spec fluid can alter friction properties, cause belt slip, or affect the CVT’s ability to maintain a stable variable ratio. Always verify the exact fluid specification from the vehicle’s OEM documentation, because some manufacturers require a unique CVTF labeled for their system. Drain Guide’s analysis highlights that fluid compatibility is a leading factor in CVT longevity, and incorrect fluid choices are a common maintenance pitfall.
Manufacturer guidance and why it matters
Manufacturers publish service procedures that describe whether a CVT can be serviced by a DIY approach or only by trained technicians. Following these guidelines is essential to maintain warranty coverage and to protect internal components. The OEM procedure will outline the correct fluid specification, service interval, fill method, and any required service tools. Failure to adhere to official guidance can void warranties and lead to premature wear of clutches or belts. Drain Guide Team notes that, while some models allow fluid replacement outside the dealer network, others require dealer-equipment checks or sealed-fill procedures to ensure the CVT remains within design tolerances. Always compare your vehicle’s service bulletin with the manual and consider a professional evaluation if you are unsure.
When DIY fluid changes are possible (and when not)
DIY CVT fluid changes are sometimes feasible on models with accessible drain plugs and clearly documented fill procedures. However, many CVTs rely on sealed units, and service requires factory tools to measure fluid level accurately, perform a controlled fill, and purge air. If your owner’s manual explicitly permits a drain-and-fill and you have the correct CVT fluid and the right tools, a basic maintenance change may be doable. If the manual indicates seal, pressurized, or sealed-fill procedures, or if the system operates with a pump and internal sensors, DIY work may not be appropriate. In short, proceed only when OEM guidance and your toolset align; otherwise, consult a trained technician. Drain Guide recommends prioritizing manufacturer guidance and safety over cost savings when uncertainty exists.
The risks of DIY CVT fluid service
DIY CVT maintenance carries several risks. Wrong fluid specification, incomplete drainage, or air entering the system can cause harsh shifting, belt wear, or overheating. CVTs depend on precise fluid properties and controlled pressure; deviations can create abnormal clutch engagement, slip, or noisy operation. Mechanical risks include stripping drain plugs, damaging seals, or inadvertently creating leaks. Safety concerns—hot fluid, moving components, and battery power—mean you should have a solid plan, proper PPE, and a clean workspace. If you notice any abnormal noise, slipping, or warning lights after a DIY change, stop driving and seek professional service. Drain Guide emphasizes thinking through the potential consequences before starting a DIY CVT fluid service.
Required tools, fluids, and specifications
To plan a CVT drain-and-fill job, assemble CVT-specific fluid as specified by the manufacturer, a proper drain pan, a funnel, and the appropriate hand tools to access the drain plug or service port. A torque wrench may be required if the service includes re-torquing bolts or covers. Have gloves, eye protection, and lint-free towels ready to manage spills. In addition, obtain OEM documentation for capacity, fill procedure, and any special steps. If the vehicle uses a seal or cover that must be replaced during service, ensure you have the correct gasket kit. The safety margin improves when you confirm the exact fluid type and capacity with the owner’s manual or a dealer service bulletin; wrong fluid or incorrect amounts are common, costly mistakes.
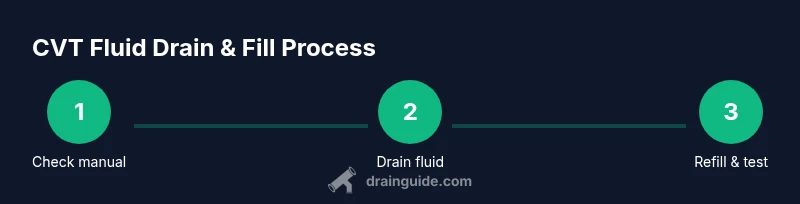
A high-level overview of the process (before you start)
Before you start the actual drain, plan the sequence: verify model-specific requirements, prepare the workspace, and confirm the vehicle is on a level surface with wheels chocked. Locate the drain plug or service port and have a suitable container ready. If the CVT requires a special fill procedure, you may need a hydraulic lift or dedicated lifting points to achieve the correct angle for accurate fluid measurement. The aim is to drain, measure, and refill with the exact CVT fluid grade, then run through a cycle to distribute new fluid. If your manual forbids DIY service, do not proceed. Drain Guide advocates aligning your approach with OEM specifications to reduce risk.
Common CVT fluid problems and symptoms
Symptoms that CVT fluid is degraded or incorrectly serviced include delayed engagement, slipping, or abnormal whining under load. If the wrong fluid is used, you may notice irregular shifting or a burning smell from the transmission area. Contamination from dirt or water can degrade friction properties, causing belt wear or clutch slippage. If you see foam on the drained fluid or metallic debris, stop and seek professional evaluation. Document any changes you observe after refilling so you can discuss them with a technician if needed.
Aftercare: Monitoring, logging, and next steps
After a CVT fluid service, monitor for changes: listen for unusual noises, watch for warning lights, and note any shifting behavior. Keep a service log that records the date, vehicle mileage, fluid type, and measured fill level. Inspect the drain area for leaks over the next 24–72 hours and clean any spills promptly. If the vehicle returns to normal operation, schedule the next maintenance per the OEM interval and continue to monitor fluid color and smell. When in doubt, consult a professional to confirm that the CVT is performing within specification.
Tools & Materials
- CVT-specific transmission fluid(Use the exact specification and viscosity as per the vehicle's manual.)
- Drain pan(Large enough to hold used CVT fluid with some extra margin.)
- Funnel with narrow spout(For controlled pouring into a possibly recessed fill point.)
- Wrench set (metric sizes)(To remove drain plugs or service covers as specified by the manual.)
- Torque wrench (optional)(Only if the service requires precise torque specs for bolts.)
- Gloves and eye protection(Chemical-resistant PPE recommended.)
- Rags or lint-free towels(Keep the workspace clean and prevent spills.)
- Jack stands or ramps(Secure vehicle after raising to working height.)
- OEM service manual or bulletin(Contains fluid capacity, fill procedure, and tools.)
Steps
Estimated time: 60-120 minutes
- 1
Prepare and verify the vehicle
Confirm the manufacturer’s guidance for CVT service and ensure you have the correct replacement fluid. Check the vehicle's warranty status and identify the exact service procedure from the owner’s manual or service bulletin. Gather PPE and all required tools before starting to minimize mid-work surprises.
Tip: Double-check the fluid specification and capacity before opening any drain points. - 2
Raise and secure the vehicle
Park on a level surface, engage the parking brake, and place wheel chocks. If needed, lift the car with a jack and secure it with jack stands or use ramps. Proper support prevents accidents and allows clear access to service points.
Tip: Never rely on a jack alone; always use stands for stability. - 3
Access the drain plug or service port
Identify the correct drain point or service port as per the OEM manual. Remove any access covers with the appropriate tool and prepare to capture old fluid in the drain pan.
Tip: Take care to avoid damaging seals or threads when removing plugs. - 4
Drain the old CVT fluid
Open the drain plug and allow the old fluid to flow into the pan. Let gravity do the work but avoid forcing fluid out under pressure. Collect and measure the drained volume for reference.
Tip: If you need to pause, cover the port to prevent dirt ingress. - 5
Inspect the drained fluid and intermediate components
Examine the old fluid for color, smell, and any particulate matter. If you suspect contamination or metal debris, stop and consult a professional. Check for a bypass valve, filter, or screen if accessible.
Tip: Contamination is a red flag; do not proceed without diagnosis. - 6
Refill with the correct CVT fluid
Use the funnel to pour the exact OEM-specified CVT fluid. Do not mix fluids from different brands or viscosity grades. Refill gradually to avoid overfilling and heater-related issues.
Tip: Pour slowly and measure the volume against OEM capacity. - 7
Cycle through the transmission modes
With the engine running and the vehicle warmed, move through the transmission range (N, R, D, etc.) to distribute the new fluid. This helps purge air pockets and improve circulation.
Tip: Perform the cycle slowly to avoid sudden torque changes. - 8
Check level and adjust
Re-check the level using the OEM method. Add or drain to reach the specified level at the correct fluid temperature. Wipe the fill area clean and inspect for leaks.
Tip: Level accuracy hinges on temperature and method; follow the manual precisely. - 9
Lower the vehicle and finalize
Lower the car safely, dispose of old fluid per local regulations, and log the maintenance. Run a short test drive to verify performance and re-check levels after cooling.
Tip: Always dispose of used CVT fluid responsibly and document the service.
Got Questions?
Can I drain and fill a CVT transmission at home?
You can in some cases, but many CVTs require dealer-grade tools, precise fluid specifications, and controlled procedures. Review the owner’s manual and service bulletins first, and consider professional service if you’re unsure.
You can in some cases, but many CVTs need professional service. Check the manual and consider a pro if unsure.
What CVT fluids are acceptable for my vehicle?
Use only the fluids specified by the manufacturer for your specific CVT. Mixing fluids or using the wrong viscosity can cause clutch wear and poor performance.
Always use the fluid your manufacturer specifies; mixing fluids can hurt the CVT.
Will draining the CVT fluid fix slipping or harsh shifting?
A fluid change is maintenance, not a fix for worn components. If problems persist after changing the fluid, there may be mechanical wear or sensor issues requiring professional diagnosis.
Fluid change helps with maintenance, but persistent problems need a professional check.
Do CVTs have drain plugs, or do they require a special service?
Some CVTs have drain plugs, while others use sealed service that requires OEM tools and procedures. Always follow the model-specific guidance.
Some have a drain plug; others need OEM tools and a specific service approach.
Is DIY CVT service safe if the vehicle is under warranty?
DIY service might affect warranty coverage if not performed to OEM standards or by an authorized technician. Check the warranty terms and consult the dealer if in doubt.
DIY work can affect coverage; check terms or ask the dealer first.
What are warning signs after a CVT fluid change?
If you notice new noises, slipping, overheating, or warning lights, stop driving and have the CVT inspected. These can indicate fluid-related issues or air entrainment.
Listen for new noises or shifting issues and seek inspection if they appear.
Watch Video
The Essentials
- Verify OEM guidance before attempting any CVT drain/fill
- Use only CVT-specific fluid and follow exact fill volumes
- Do not overfill or introduce air into the system
- Document service details for warranty and future maintenance
- Seek professional help if the procedure or vehicle requires dealer tools