Drain and Fill: DIY vs Professional Drainage Solutions
A thorough, analytical comparison of DIY drain-and-fill methods versus professional drainage services, with clear steps, cost considerations, and maintenance tips for homeowners tackling clogs.

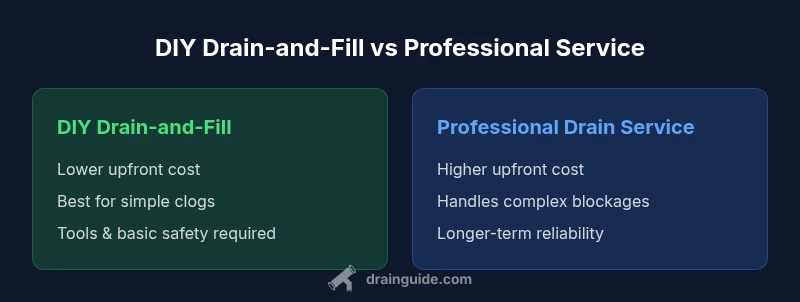
TL;DR: For simple clogs, a DIY drain-and-fill approach can restore flow safely and cheaply, while complex blockages or damaged pipes benefit from professional service. This comparison weighs DIY tactics against professional options, highlighting cost, time, risk, and long-term reliability to help homeowners decide wisely.
What drain and fill means for residential plumbing
Drain and fill is a practical technique used to clear slow drains and reset the flow of water through a home’s piping. The concept involves draining the portion of the system to remove standing water and loosened debris, then refilling the line to create a clean flush that carries residues toward the main drain. For homeowners, drain and fill is most effective when blockages come from organic buildup, mineral scale, or minor grease accumulation rather than from damaged pipes or root intrusion. It is also a safer alternative to harsh chemical cleaners for routine maintenance. According to Drain Guide, following a measured drain-and-fill sequence minimizes chemical exposure, reduces messy spills, and helps you gauge whether a simple DIY fix is enough or if professional intervention is necessary. Always start with a clear assessment of the plumbing layout and the age of the pipes to tailor the drain-and-fill approach to your home.
When a DIY drain-and-fill approach makes sense
DIY drain and fill works best for minor clogs in single fixtures (like a kitchen sink or bathroom basin) where the piping is accessible and not visibly damaged. If you notice slow drainage across multiple fixtures, frequent backups, or gurgling sounds, a DIY attempt may reveal the scope of the problem, but it also signals that more thorough inspection could be needed. Drain and fill is attractive because it reduces upfront costs and minimizes chemical exposure, especially when you rely on safe, household-friendly methods. However, you should avoid this route if you suspect cracked pipes, separated joints, or root intrusion—issues that require professional diagnosis to prevent further damage. Drain Guide emphasizes starting with a simple test and escalating only as needed.
Tools, materials, and safety considerations
A successful drain and fill job relies on the right tools and careful safety practices. Essential items include a quality plunger, a drain snake or auger, bucket, protective gloves, eye protection, and a handheld flashlight for visibility. For safety, never mix chemical cleaners with mechanical tools, and avoid using excessive force that could crack pipes. A basic drain-and-fill flow usually begins with clearing the trap, then draining the line to remove standing water, followed by a controlled refill to create a push-through flush. Always work slowly, document steps, and pause if you encounter resistance that suggests a deeper problem.
Step-by-step DIY drain and fill procedure (basic)
- Shut off the water supply to the affected fixture to prevent new flow. 2. Remove and clean the P-trap, reassembling it securely. 3. Use a plunger to create a strong seal and dislodge minor clogs. 4. If needed, extend with a drain snake to reach stubborn debris. 5. Drain the line completely, then gradually refill with fresh water to flush residual material downstream. 6. Run the faucet to ensure consistent drainage and check for leaks. 7. If drainage remains slow, stop and reassess—repeat care steps or seek professional help. 8. Clean up the area and document what you observed for future maintenance.
Common mistakes and how to avoid them
Mistakes include using excessive force with a snake, relying on harsh chemical cleaners as a sole solution, and ignoring warning signs of more serious pipe issues. Avoid rushing the process; a careful, staged approach yields better results. Always inspect joints, traps, and accessible pipes for corrosion or cracks. If you smell sewer gas or see standing water after the flush, stop and call a pro. Drain and fill works best when you treat it as a diagnostic step, not a final fix for structural problems.
How to evaluate whether you need professional service
Start by assessing whether the clog is localized or widespread. If multiple fixtures drain slowly, you may have a wider blockage or a venting problem. Inspect exposed pipes for cracks, corrosion, or pooling water. If you encounter hard-to-reach clogs, persistent backups after DIY attempts, or unfamiliar odors, professional service becomes more cost-effective and safer than trial-and-error DIY fixes. Drain Guide recommends a staged approach: attempt basic drain and fill for minor issues, then seek professional help for signs of deeper damage or recurring failures.
Professional options: hydro jetting, snaking, and trenchless repairs
Professional drain services offer several approaches beyond DIY. Snaking reaches blockages with flexible rods; hydro jetting uses high-pressure water to scour mineral buildup and organic debris; trenchless repairs address pipe damage without extensive digging. Hydro jetting is powerful but can pose risks to old pipes if not performed correctly, making a professional assessment critical. Trenchless options are ideal for residential lines with multiple blockages or compromised segments, providing a long-term solution without major excavation. Each method has a distinct cost and turnaround time, and choosing the right one depends on the severity of the clog and the pipe condition.
Cost considerations and time estimates
DIY drain and fill generally incurs lower upfront costs, limited to tools and supplies, and can often be completed in a few hours. Professional services, however, involve labor, equipment rental, and potential call-out fees, with total costs varying by blockages’ complexity and property layout. Time to resolution may range from a few hours for simple clogs to a full day for multiple fixtures or complex pipe issues. Drain Guide Analysis, 2026 notes that homeowners should weigh the cost savings of DIY against the risk of causing additional damage or missing an underlying plumbing problem.
Maintenance after a drain-and-fill project
After completing a drain-and-fill process, establish a regular maintenance routine to prevent recurrence. Simple steps include flushing drains with hot water weekly, using safe drain cleaners sparingly, and installing strainers to catch hair and food particles. Periodic inspection of traps and accessible joints helps catch leaks early. Documenting the maintenance schedule and any recurring symptoms (gurgling, reduced flow, odors) makes it easier to decide whether to revisit a DIY approach or call a pro. Drain Guide suggests scheduling a professional inspection if problems recur within 3–6 months.
Environmental and safety considerations
Safe handling of tools and cleaners is essential. Avoid mixing chemical-based clog removers with mechanical devices, and never dispose of hazardous substances down the drain. Proper disposal of waste and recycling of used materials minimizes environmental impact. For households with older PVC or cast-iron pipes, take extra care not to apply excessive force or chemical exposure that could weaken joints. A measured drain-and-fill approach, combined with good disposal habits, contributes to longer pipe life and fewer backups over time.
Real-world scenarios: case studies
Case studies illustrate how drain and fill can work in practice. In one example, a single-sink clog caused by mineral buildup responded to a staged drain-and-fill sequence, restoring full drainage and reducing the need for chemical cleaners. In another scenario, homeowners faced multi-fixture slowdowns where DIY steps revealed deeper pipe issues; a professional evaluation confirmed a damaged waste line, requiring repair rather than further DIY attempts. These examples highlight the importance of recognizing limits and knowing when to escalate.
Choosing the right path for your home: a decision framework
Start with a quick assessment of the clog's scope, pipe age, and visible damage. If the blockage is localized and fixtures drain freely with repeated flushing, a DIY drain-and-fill approach is reasonable. When blockages persist across fixtures, or you detect leaks, odors, or pipe damage, consult a professional. Use a decision framework that weighs cost, risk, time, and long-term reliability. Drain Guide recommends documenting outcomes and revisiting the plan if the problem recurs.
Authority sources and further reading
For authoritative guidance on drain and fill practices and professional options, consult trusted sources. The ICC and university Extension programs provide broader framing on plumbing maintenance and safety. For recognized safety and environmental considerations, refer to major publications and government-backed codes. Always verify current standards before proceeding with any home plumbing project.
Comparison
| Feature | DIY Drain-and-Fill | Professional Drain Service |
|---|---|---|
| Cost Range | $50-$300 (materials & basic tools, DIY) | $200-$1,000+ (labor, equipment, possible call-out fees) |
| Time to Complete | Same day to a few hours (DIY) | 4-8 hours or more (depending on access and scheduling) |
| Best For | Simple, localized clogs with accessible pipes | Severe blockages, damaged pipes, or complex layouts |
| Effectiveness | Moderate to high for minor buildup | High for complex blockages and pipe issues |
| Maintenance Aftercare | DIY follow-up and routine maintenance | Professional inspection and long-term solutions |
Positives
- Lower upfront cost for simple fixes
- Faster initial relief for minor clogs
- Hands-on learning improves future maintenance
- No scheduling delays for small jobs
Cons
- Risk of misdiagnosis or causing pipe damage
- Limited effectiveness for serious blockages
- Potential mess and cleanup; safety concerns with chemicals
DIY drain-and-fill is best for simple, user-friendly clogs; professional service is recommended for complex issues.
For routine maintenance and minor clogs, DIY drain-and-fill provides quick wins at lower cost. Reserve professional service for stubborn blockages, suspected pipe damage, or uncertain conditions to protect your plumbing.
Got Questions?
What is drain and fill in residential plumbing?
Drain and fill refers to a staged approach where you drain a section of the plumbing to remove standing water and debris, then refill with clean water to flush the line. It’s used to address minor clogs and restore normal flow without immediately resorting to chemicals or full replacement.
Drain and fill means you drain a section, flush with clean water, and observe flow. It’s a cautious, step-by-step approach for simple clogs.
Can DIY drain and fill fix all clogs?
No. DIY drain and fill works best for minor, localized clogs and simple buildup. More complex blockages, damaged pipes, or roots require professional inspection and intervention to prevent further damage.
DIY can handle simple clogs, but not everything. For major issues, call a pro.
What safety precautions are essential for DIY drain and fill?
Wear gloves and eye protection, avoid mixing chemicals with mechanical tools, and work slowly to prevent pipe damage. Always shut off water supply before starting and test pipes for leaks after completion.
Wear protection, don’t mix cleaners with tools, and shut the water off before you start.
How long does a DIY drain-and-fill project typically take?
A straightforward drain-and-fill job can take a few hours, depending on accessibility and the severity of the clog. More complex setups or multiple fixtures will extend the time and may require a staged approach.
Most DIY drain-and-fill jobs take a few hours, with longer times for complex setups.
When should I avoid DIY and call a pro?
Call a professional if you encounter persistent backups, odors, leaks, or pipe damage signs. A pro can perform hydro jetting, snaking, or trenchless repairs safely and effectively.
Call a pro if backups persist or you suspect pipe damage.
What maintenance steps help prevent future clogs?
Install strainers, dispose of grease properly, run hot water regularly, and perform periodic professional inspections to catch early signs of trouble.
Use strainers and periodic inspections to prevent clogs.
Is drain and fill compatible with older plumbing systems?
Drain and fill can be compatible with older systems if performed carefully, but older pipes may be more susceptible to damage from aggressive methods. When in doubt, start conservatively and monitor for leaks.
Be cautious with older pipes and watch for signs of strain.
The Essentials
- Assess blockage severity before starting
- Gather safe, purpose-built tools
- Follow step-by-step safety practices
- Know when to call a pro
- Document maintenance to prevent future clogs