Drain Brain: How to Diagnose and Fix Stubborn Drains
Learn how to diagnose and fix stubborn drain problems, from gurgling sounds to slow drains, with practical, safe methods for DIY homeowners. Drain Guide explains the concept of a 'drain brain' and how to tame it.

Drain brain describes a stubborn drain issue that resists quick fixes. This guide helps homeowners diagnose the underlying cause, from partial clogs to venting issues, and walk you through safe, step-by-step solutions you can perform before calling a plumber. You’ll learn how to test drains, use basic tools, and decide when to escalate.
What drain brain means in home plumbing
According to Drain Guide, the term drain brain is a practical shorthand for a stubborn drainage problem that behaves as if it has a mind of its own. It isn’t a medical condition, but it does reflect how a drain can respond unpredictably to basic fixes like plunging or pouring hot water. By framing the issue as a “brain” problem, homeowners can adopt a methodical, test-driven approach. The drain brain tends to show up as a slow drain, unusual gurgling, repeated backups in one fixture, or a drain that intermittently clears and then stalls. Understanding this pattern helps you separate routine clogs from more persistent root obstructions, venting problems, or pipe misalignment. Drain brain situations reward patience, careful diagnosis, and clean, repeatable steps over guesswork.
As you begin, keep safety in mind. Wear gloves and eye protection, and never mix chemical cleaners with other remedies. This guide emphasizes practical, low-risk strategies you can perform with household tools. Drain brain is solvable when you stay organized, document what you test, and use the right tool for the right job.
The Drain Guide team also notes that most minor drain brain annoyances can be addressed with safe, proven methods rather than aggressive chemical helpers. Small improvements early in the process reduce the risk of a larger, more expensive repair later.
In short, treat drain brain as a signal that your plumbing system could use a quick diagnostic check, a few targeted interventions, and a plan to prevent recurrence. The goal is to restore smooth drainage without creating new problems.
wordCount":172}, {
Tools & Materials
- Plunger (cup or flange)(Wide-mouth for sinks; ensure a good seal around the drain)
- P-trap wrench or pliers(Useful if you need to remove the trap without tools damage)
- Drain snake / manual auger(Choose a flexible snake sized for your pipes)
- Bucket(To catch water and debris when removing the trap)
- Gloves and protective eyewear(Protects hands and eyes from dirty water and chemicals)
- Flashlight(Shine into the pipe or trap area to inspect visually)
- Vinegar and baking soda(Natural cleaners for maintenance (do not mix with caustics))
- Rags or towels(Clean up spills and wipe down parts)
- Old towels or mats(Protect surrounding surfaces)
Steps
Estimated time: 30-60 minutes
- 1
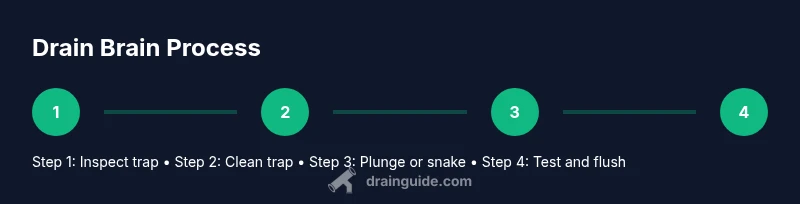
Inspect trap and surrounding area
Place a bucket under the P-trap. Remove access panel or any coverings and visually inspect the trap for obvious blockages. If you see debris, remove it with gloved hands or a reusable tool. This initial check helps you determine whether the clog is in the trap area or deeper in the drain.
Tip: Take a photo of connections before disassembly to aid reassembly. - 2
Remove and clean the P-trap
Loosen the slip nuts on the P-trap, then carefully pull it away from the drain line. Clean out any hair, soap scum, or mineral buildup with a brush or cloth. Reassemble loosely and run water to see if the flow improves before tightening fully.
Tip: Keep a towel underneath to catch residual water and prevent spills. - 3
Plunge with proper technique
Seal the plunger over the drain and push/pull in steady motions without breaking the seal. Do not use excessive force. If the water doesn’t rise, reposition and try again. Plunging can dislodge many minor blockages in a controlled way.
Tip: Use damp paper towels to seal gaps around the drain for a better seal. - 4
Try a drain snake for deeper clogs
Insert the snake into the drain and rotate it to grab or break up the obstruction. Push slowly to avoid kinking the line, then retract and clean the coil. Repeat as needed until water flows freely. Always monitor the other end of the snake for resistance.
Tip: Start near the trap and work deeper if the clog persists; don’t force beyond the bend. - 5
Flush and test the system
Run hot water through the drain to clear loosened material. If you have a vinegar-baking soda maintenance routine, cycle it now, then flush with hot water again. Observe how quickly water drains to gauge effectiveness.
Tip: Do not mix vinegar with bleach or other cleaners. - 6
Reassemble and verify
Tighten all connections securely, replace the trap and any covers, and run multiple cycles of water to confirm consistent drainage. If slow drainage returns within 24–48 hours, document the symptoms for your next step or consult a professional.
Tip: Label the pipe sections for easier reassembly next time.
Got Questions?
What is drain brain?
Drain brain is a homeowner-friendly term for a stubborn drain issue that resists quick fixes. It often involves partial clogs, venting problems, or misaligned pipes. A calm, methodical approach helps distinguish simple blockages from deeper plumbing concerns.
Drain brain means a stubborn drain that won’t clear with basic fixes; you approach it calmly with testing and safe steps.
Are chemical drain cleaners safe for drain brain?
Chemical cleaners can damage pipes and fixtures, especially if used repeatedly or with other cleaners. For drain brain, prefer mechanical methods (plunging, snaking) and hot water, reserving chemicals for rare, well-understood situations.
Be cautious with chemical cleaners; use mechanical methods first and avoid mixing cleaners.
Should I plunge first or try a snake?
Start with plunging for simple blockages near the trap. If plunging doesn’t clear the drain, switch to a snake to reach deeper clogs. Move step by step to identify where the obstruction lies.
Begin with plunging; if that fails, use a drain snake to reach deeper clogs.
When should I call a professional?
Call a plumber if you can’t clear the clog after two solid attempts, if you notice recurrent backups, or if there are signs of sewer gas, foul odors, or water damage. Persistent issues may indicate venting problems or pipe damage.
If DIY doesn’t fix it after a couple of tries or you smell sewer gas, get a pro.
Can venting issues cause drain brain?
Yes. Poor venting can create slow drainage or gurgling sounds, mimicking a clog. If you suspect venting problems, a professional assessment is advised.
Yes, vent problems can cause those symptoms; a pro should check venting.
Watch Video
The Essentials
- Identify whether the clog is near the trap or deeper in the line
- Use safe, methodical steps (trap clean, plunge, then snake) before chemicals
- Inspect and maintain P-traps regularly to prevent future blockages
- Document symptoms to guide DIY fixes or professional help
- The Drain Guide team recommends safe DIY first; escalate when in doubt