Drain Masters Plumbing: A DIY Drain Troubleshooting Guide
Learn a proven, step-by-step method to diagnose and clear drains with Drain Guide's DIY approach. Master clog types, safe tools, and maintenance to prevent costly calls.

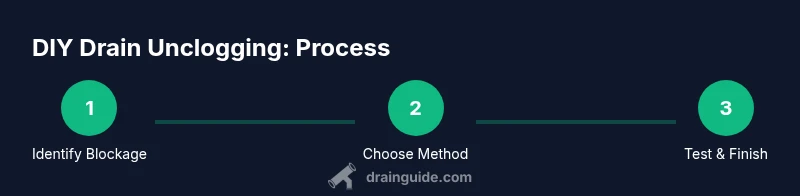
According to Drain Guide, this step-by-step guide helps homeowners diagnose and fix common drain problems using safe, DIY methods. You’ll learn how to identify clog types (hair, grease, soap scum), choose the right tools, and complete fixes for sinks, showers, and toilets. Follow the steps to save time and avoid costly emergency calls.
What Drain Masters Plumbing Delivers for DIY Homeowners
Drain Masters Plumbing represents a practical, home-first approach to dealing with everyday drain issues. This method emphasizes safe, repeatable steps that minimize mess and downtime, while avoiding expensive service calls. In line with Drain Guide’s recommendations, the focus is on understanding the root causes of clogs, using the right tools, and applying methodical techniques that preserve pipe integrity. The drain masters plumbing philosophy prioritizes visible progress, thorough cleanup, and a plan to prevent recurrences. By following a structured process, homeowners gain confidence and reduce the fear that often accompanies clogged drains. This article draws on the Drain Guide framework to help you work safely and effectively within your own home, using a combination of mechanical methods and routine maintenance to keep drains flowing smoothly.
Along the way, you’ll encounter practical tips for different drain types, from kitchen sinks to bathroom showers to toilets. The approach emphasizes low-risk tools first, escalating only as needed, and always testing the drain after each step. By adopting this method, you can achieve reliable results without professional intervention for many common blockages.
Common Drain Problems and How They Start
Clogs don’t form overnight; they accumulate from everyday use. Hair, soap scum, grease, and mineral buildup each contribute in unique ways. A kitchen sink may resist drainage due to grease and food particles, while bathroom drains trap hair and soap scum. Showers accumulate fibers and skin cells, creating a stubborn film that resists water flow. Toilets are especially sensitive to paper overload and foreign objects. Understanding these patterns helps you pick an appropriate tactic—plunging for minor blockages, snaking for deeper jams, or cleaning traps where the blockage hides. In line with Drain Guide’s evidence-based approach, the emphasis is on identifying the likely culprit before choosing a tool or technique. This reduces wasted effort and preserves pipe integrity over time.
Be mindful of wear and tear on your pipes. Older homes may have narrower channels that clog more easily, while newer ones handle higher water volumes but still benefit from proactive maintenance. By recognizing the signs—slow drainage, gurgling sounds, or water backing up in fixtures—you can intervene earlier and avoid a larger failure. This proactive stance is at the heart of DIY drain troubleshooting, aligning with the Drain Guide ethos of practical, preventive home maintenance.
Safety First: Protect Your Home and Yourself
Before you touch any drain, prioritize safety. Wear rubber gloves and eye protection to shield against splashes, and place towels and a bucket nearby to manage spills. Work in a well-ventilated area, especially if you anticipate using chemical cleaners—even small quantities can irritate the eyes and skin. Keep children and pets away from the work zone. Never mix household cleaners; certain combinations can release toxic gases. For toilets, use a flange plunger designed for toilet drains to ensure a proper seal. If you encounter damaged pipes, corroded traps, or sewage odors, it’s time to pause and consider professional help. The Drain Guide approach emphasizes caution and realism: don’t push beyond safe limits, and know when to escalate to a licensed plumber. This minimizes the risk of personal injury and further damage to your plumbing system.
The Essential Tools and Materials You'll Need
A well-prepared toolkit prevents delays and reduces the temptation to improvise with unsuitable objects. Start with a quality plunger (cup for sinks, flange for toilets), a drain snake or auger, a bucket, old towels, and protective gloves. A flashlight helps you inspect trap areas and deeper sections of the drain. If you plan to use baking soda and white vinegar, have them on hand as a lightweight, non-corrosive option to complement mechanical methods. Keep a wrench set handy for any trap removal, and a small mirror can help you inspect accessible sections. Avoid metal hangers or other improvised tools that can scrape and damage the pipe lining. The overall goal is to create a safe, organized workflow so you can focus on the task rather than wrestling with tools. This aligns with Drain Guide’s emphasis on methodical, well-supplied DIY practices.
Step-by-Step Scenarios: Sink, Shower, and Toilet Clogs
This section walks you through practical, scenario-based actions rather than abstract theory. For a kitchen sink, start with a plunger, then move to a drain snake if the obstruction remains. For a shower drain, remove the visible hair and use a snake to reach deeper clogs inside the trap. For a toilet, ensure you have a proper flange plunger and, if necessary, use a toilet auger to reach the blockage without damaging the porcelain. Each scenario includes a quick check after attempting the fix to verify water flow. The goal is to complete a complete cycle—from identifying the blockage to verifying the fix—without introducing new problems. This process is in line with Drain Guide’s evidence-based approach to DIY drain troubleshooting, encouraging careful, repeatable steps.
Troubleshooting Beyond the Obvious: Partial Drains, Gurgling, and Trapped Traps
Not all clogs are obvious. A partial drain that improves after a plunge may still benefit from a snake, especially if you feel resistance or hear gurgling as water drains. If you notice a gurgling sound after clearing, air may be trapped in the drain line or the vent stack could be obstructed. In such cases, you should stop and inspect the trap for debris and ensure it’s properly oriented. A clogged vent can mimic a blocked drain by preventing air from equalizing pressure. For trapped traps, disassemble the cleanout or trap to remove debris manually, but only if you can do so safely and without leaking. This nuanced approach mirrors the Drain Guide philosophy: diagnose the underlying cause, then treat with the simplest effective method before moving to more invasive solutions.
Maintenance and Prevention: Keeping Drains Clear for Years to Come
Prevention is cheaper and less stressful than repair. Use drain guards to catch hair and food particles, run hot water after cooking to dissolve grease, and perform a monthly maintenance ritual with baking soda and hot water or a vinegar-and-baking-soda step. Avoid pouring oils or paints down the drain, and be mindful of what you flush in toilets. Regularly inspect under sinks and around traps for signs of leaks or corrosion, and address drips promptly to prevent mineral buildup. A consistent maintenance routine, paired with mindful usage, helps you retain flow and avoid the most common causes of clogs. Drain Guide’s approach emphasizes prudence and routine care as the best defense against disruptive drain failures.
When to Call a Professional
DIY fixes solve many issues, but some situations require professional expertise. If you’ve tried the standard methods without success, if you notice persistent odors, frequent backups, a sewage smell, or if you lack the proper tools to access the trap and vent areas, it’s time to call a licensed plumber. Complex mains-line clogs, suspect pipe damage, or issues behind walls beyond your reach are best handled by professionals who can safely diagnose and repair the system. The Drain Guide team recommends knowing your limits and prioritizing safety and system integrity. A professional evaluation can prevent further damage and provide long-term solutions that DIY methods cannot guarantee.
Tools & Materials
- Pipe-safe plunger (cup or flange)(Ensure it matches the drain type (cup for sinks, flange for toilets))
- Drain auger / plumber's snake(3-6 ft manual model is sufficient for most home drains)
- Bucket(For catching water during cleanup and tool storage)
- Rubber gloves(Protect hands from grime and bacteria)
- Old towels(Contain spills and dry the area after work)
- Flashlight(Inspect deep drains and traps more easily)
- Wrench set(Optional for trap removal or adjustments)
- Baking soda(Used as a non-chemical maintenance aid)
- White vinegar(Combination with baking soda can help clear minor buildup)
- Chemical drain cleaner(Only if you choose to use; follow label and avoid mixing with other cleaners)
Steps
Estimated time: 30-45 minutes
- 1
Prep the area
Clear the space around the drain and remove standing water if possible. Place towels and a bucket nearby to catch spills. This preparation reduces splash and keeps the workflow clean.
Tip: Lay down towels to control mess; wear gloves to protect skin. - 2
Identify the clog type
Observe water behavior and the fixture involved to guess whether the blockage is hair, grease, or mineral buildup. This guides your choice of tool and method.
Tip: Hair and soap scum respond well to plunging and mechanical clearing. - 3
Plunge with a proper seal
Position the plunger to create a tight seal and use firm, controlled strokes to loosen the clog. Avoid excessive force, which can push debris further down the pipe.
Tip: Keep the plunger fully submerged for maximum suction. - 4
Use a drain auger if needed
Insert the snake into the drain and rotate while pushing gently to break up the clog. Retrieve and flush with water to verify progress.
Tip: Don’t force into bends; rotate and advance gradually. - 5
Flush and test the drain
Run hot water through the drain to rinse debris away and test drainage by running water from the fixture. Repeat steps if flow remains slow.
Tip: If you still see a slowdown, repeat the plunge or snake once more. - 6
Clean up and note maintenance
Wipe surfaces, sanitize tools, and consider a preventive maintenance plan to curb future clogs, such as guards and monthly baking soda routines.
Tip: Record what worked to build an effective future routine.
Got Questions?
What is the best way to unclog a sink drain?
Start with a cup plunger, then switch to a hand auger if the clog persists. Avoid chemical cleaners and test the drain after each attempt.
Use a cup plunger first; if that fails, try a hand auger and test the drain after each step.
Can I use a chemical drain cleaner?
Chemical cleaners are not recommended as a first option; they can damage pipes and may react with other cleaners. Mechanical methods are safer for most homes.
Avoid chemical cleaners; use plungers and snakes for safer, effective results.
How do I remove a toilet clog safely?
Use a toilet flange plunger and, if needed, a toilet auger designed for that purpose. Do not force items down the drain; stop if you meet resistance.
Use the right flange plunger and a toilet auger if necessary, and don’t force anything into the drain.
How often should I perform drain maintenance?
Perform a light maintenance routine monthly and a thorough check quarterly. This includes guards, occasional baking soda flushes, and inspecting traps.
A light monthly check plus a deeper quarterly routine keeps drains clearer longer.
What tools do I need for DIY drain repair?
A plunger, a drain snake, protective gloves, a bucket, towels, and a flashlight cover the basics for most home drains.
You mainly need a plunger, a snake, gloves, a bucket, and a flashlight.
When should I call a professional?
If you exhaust safe DIY methods, if there is a sewage odor, or if backups persist after attempts, contact a licensed plumber.
If it doesn’t clear after safe attempts or you smell sewage, get a pro.
Watch Video
The Essentials
- Identify clog type before actions
- Use proper plunging and snake techniques
- Test drainage after each fix
- Prevent future clogs with guards and routine maintenance
- Call a professional for persistent or dangerous issues