Drain Hose LG Washing Machine: Step-by-Step Guide
Learn to install or replace the drain hose on an LG washing machine with a safe, DIY-friendly guide. Includes tools, steps, tips, and maintenance advice for long-term reliability.

In this guide you will learn how to install or replace the drain hose on an LG washing machine, ensuring a secure connection and proper drainage. You’ll check hose condition, routing, clamp security, and height requirements to prevent leaks. A few safety steps and the right tools will save time and protect your home.
Understanding the drain hose lg washing machine
The drain hose is the lifeline that carries used rinse water from your LG washing machine to the building’s drain. In practice, this hose connects to the machine’s drain outlet at the back and terminates in a standpipe, laundry tub, or wall drain. A hose that is too short, kinked, or routed without an air gap can overflow, leak, or siphon back dirty water into the tub. According to Drain Guide, choosing the right drain hose for an LG washing machine reduces clogs and spills. Start by locating the back panel and the drain outlet, then trace a clear path to your chosen drain. Consider the hose material (usually flexible plastic) and whether your model uses a straight or corrugated end. Checking compatibility with your standpipe height and any required adapters now will prevent later headaches. A solid plan keeps leaks at bay and makes future maintenance easier. For most households, a hose length that allows a gentle, unobstructed arc without sharp bends is best. Always consult your washer’s manual for model-specific guidance.
Why a secure drain hose matters
Leak prevention is foundational: a loose clamp or a loose connection can drip during cycles and lead to water damage under the washer. A properly secured drain hose also minimizes siphoning, which can push dirty water back into the tub or create standing water in the drain path. Spills aren't just messy; they can mold quickly in humid laundry rooms. A secure hose reduces noise and movement, especially on high spin cycles. In addition, a correctly routed hose with a safe air gap prevents backflow that could introduce sewer gases into your home. Drain Guide emphasizes that routine checks of the hose and clamps are part of preventive maintenance, not after-the-fact repairs. The goal is reliability: you shouldn't have to babysit a washing machine to catch a leak. Think of the drain hose as a critical safety feature rather than a disposable accessory.
Tools and materials you’ll need
Before you begin, gather these items. Essential: a compatible drain hose (new, if replacing), stainless steel hose clamps, pliers, a tape measure, a bucket or towels, and a screwdriver if your hose uses a secured clamp. Optional but helpful: a flashlight for dark corners, a small flashlight, and a silicone lubricant to ease fitting. Having everything on hand minimizes trips to the toolbox and helps you stay focused on each step. Keep a clean workspace around the washer so you can dry up any spills quickly and inspect the floor for signs of prior leaks. Remember to turn off power to the machine and shut off water supplies before starting any maintenance to avoid shocks or accidental sprays.
Inspecting the current setup and preparing replacement parts
Take a moment to inspect the existing drain hose for cracks, stiffness, or bulges. If you notice damage, replace the hose entirely rather than attempting patch fixes. Compare the new hose to the old one and ensure the fittings match the washer outlet and the standpipe or drain. Clear the area behind the machine; remove dust, lint, and any obstructions that could catch the hose. If your LG model specifies a minimum bend radius or a maximum supported length, adhere to these limits. Prepare the mounting area by wiping away water, and position a towel to catch any leaks that may occur during removal. Finally, loosen clamps and prepare adapters if your setup uses a different drain path.
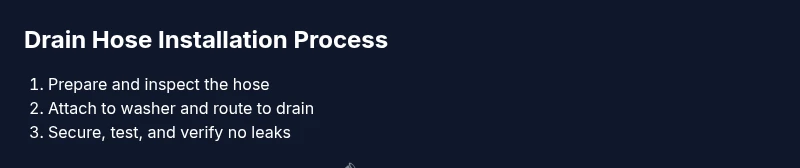
How to route and connect the drain hose (step-by-step overview)
With the old hose removed, plan a clean path to the drain that avoids sharp bends and kinks. Attach the new hose to the washer’s drain outlet, aligning any tabs or grooves and tightening the clamp securely. Route the hose toward the chosen drain, ensuring it sits above floor level to prevent standing water and check for secure anchor points to prevent movement. If you’re connecting to a standpipe, keep a small air gap to help with drainage and prevent backflow. Use the included adapters if required by your standpipe or laundry tub, and confirm that the hose end is fully inserted into the drain with no gaps. Finally, install clamps or fasteners and ensure the hose is stable before testing.
Testing, troubleshooting, and long-term maintenance
Run a short wash cycle with a test load to check for leaks around the hose clamp and connections. If you see any drips, tighten clamps incrementally and inspect for hair or lint buildup that could pinch the hose. If you notice a persistent leak at the outlet, recheck the hose seating and ensure the washer’s drain outlet is clean and undamaged. To prevent future problems, replace older hoses every few years or when signs of wear appear. Periodic inspections as part of a seasonal laundry room checkup save time and avoid water damage.
Tools & Materials
- Compatible drain hose for LG washing machine(New hose if replacing; ensure it fits your model and drain path)
- Stainless steel hose clamps(Secure hose to washer outlet and drain end)
- Screwdriver or pliers(For clamps and mounting hardware)
- Measuring tape(Check hose length against required path)
- Bucket or towels(Contain minor spills during removal/installation)
- Adapter(s) if needed(If your standpipe or sink drain requires adapters)
Steps
Estimated time: 90-120 minutes
- 1
Unplug and secure area
Unplug the washer and shut off the water supply to prevent shocks and leaks. Move the washer slightly away from the wall to give you room to work.
Tip: Ask a helper to assist with moving a heavy appliance. - 2
Move the washer for access
Gently pull the washer forward, keeping cords untangled so you can reach the back panel and drain outlet.
Tip: Place a towel under the feet to catch any residual water. - 3
Inspect the old hose
Check the existing hose for cracks, bulges, or stiffness. Note the connection type at both ends.
Tip: Take a photo of the original setup for reference. - 4
Detach the old hose
Loosen the clamps on the washer outlet and the drain end, then remove the old hose carefully to avoid spills.
Tip: Have a bucket ready for any remaining water. - 5
Prepare the new hose
Compare the new hose to the old one; confirm fittings match the washer and drain. Ready any adapters if your drain path requires them.
Tip: Ensure the hose is clean and free of debris before installation. - 6
Connect to washer
Attach the hose to the washer’s drain outlet and tighten the clamp securely without over-tightening.
Tip: Start with a snug fit, then give a final gentle tighten. - 7
Route to drain
Position the hose along a path that avoids sharp bends and ensures a safe air gap, then anchor it so it won’t move during cycles.
Tip: Avoid routing the hose against sharp metal edges. - 8
Test for leaks
Run a short cycle with a small load and check all hose connections for leaks or drips. If needed, tighten clamps and recheck.
Tip: Keep towels handy during the test run.
Got Questions?
Do I need to replace the drain hose when installing a new LG washer?
Not always. If the hose is in good condition, the length is appropriate, and fittings match, you can reuse it. If there are cracks, stiffness, or signs of wear, replace the hose to prevent leaks.
You can reuse a hose if it's in good condition, but replace it if you see wear or damage.
Can I install a longer hose than the original?
Only within manufacturer recommendations. A hose that's too long or too short can cause improper drainage or leaks.
Only use a length recommended by the manufacturer to avoid drainage problems.
What is an air gap, and why is it important?
An air gap prevents backflow and sewer gas from traveling back through the hose. Maintain a small uninterrupted space between the hose end and the drain.
An air gap stops backflow; keep a small gap where the hose enters the drain.
Do I need a plumber for this task?
Most installations can be done by homeowners with basic tools. If the drain or plumbing path is unusual or shows persistent leaks, consult a professional.
Usually not, but call a pro if leaks persist or the setup is unusual.
What should I do if there’s a leak after installation?
Turn off power, unplug the machine, and inspect hose connections for tightness and proper seating. Re-seat and re-tighten clamps if needed, and check for any cracks.
Shut off power and check the hose connections; reseat and retighten if needed.
How often should I inspect or replace the drain hose?
Inspect annually or after signs of wear. Replace if you notice cracks, bulges, or stiffness to prevent leaks.
Check once a year or if you notice wear; replace worn hoses.
Watch Video
The Essentials
- Secure all hose clamps firmly.
- Maintain proper hose routing to avoid kinks.
- Test for leaks before finishing.
- Inspect and replace hoses periodically.
- Keep the laundry area dry and organized.