LG Drain Hose Dishwasher: A Complete DIY Guide
Learn how to diagnose, replace, and maintain the LG dishwasher drain hose with safe, step-by-step instructions. Drain Guide provides practical tips to stop leaks and backups, with a clear, homeowner-friendly approach.

Goal: safely inspect or replace the lg drain hose dishwasher to stop leaks and backups. You’ll learn how to identify a faulty hose, choose the correct replacement, and install it with proper clamps and routing. This guide uses practical steps, safety tips, and brand-appropriate considerations from Drain Guide.
Understanding LG dishwasher drain hose basics
An lg drain hose dishwasher system routes used water from the dishwasher to the home's drainage, typically via an air gap or disposal connection. In this context, the hose length, inner diameter, routing, and clamps determine how reliably the unit drains and whether leaks occur. According to Drain Guide, the most common failures involve kinks, loose clamps, or a cracked end that cannot seal properly. Understanding these basics helps you diagnose problems quickly and choose a replacement that matches your model. When you work with LG appliances, always consult the owner’s manual for model-specific hose paths and compatibility notes. In many kitchens, the drain hose is pig-tailed to the sink drain or disposal rather than the direct drain, so correct routing is essential to prevent backflow and air-gap issues. This section lays the groundwork by explaining hose materials, typical connections, and how to visually assess the hose for damage. A well-maintained lg drain hose dishwasher setup reduces the risk of standing water in the sump and minimizes the chance of drain-induced odors traveling back into the appliance or cabinets. Drain Guide’s guidance emphasizes checking hose clamps for wear and ensuring the hose ends remain sealed after every service.
Signs your LG drain hose is failing and needs attention
A leaking, kinked, or poorly routed drain hose can cause standing water in the sink cabinet, gurgling noises during cycles, or slow draining. Look for damp spots along the hose, white crust from mineral deposits, or soft spots that feel spongy rather than firm. If the hose section near the connection to the dishwasher shows cracks or splits, replace it immediately to avoid wastewater exposure. Misrouting—such as an overly tight bend, an improper connection to the disposal, or a missing air gap—can also trigger backflow into the dishwasher or cabinet. According to Drain Guide, consistent backups after a cycle are a strong indicator that the hose or its fittings require replacement. Documenting the cycle where symptoms appear helps you determine whether the issue is the hose itself or another part of the drainage path.
How to choose the right LG drain hose replacement and fittings
Start by confirming compatibility with your LG model. Use the original hose or an LG-approved OEM replacement to ensure the correct inner diameter, length, and end fittings. Avoid generic hoses that may not seal properly or fit the clamp areas correctly. Check for a straight run without sharp bends, and verify that the hose clips and clamps are included or readily sourced. Material quality matters: reinforced rubber or flexible plastic hoses resist kinking and chemical exposure from detergents. If your setup includes an air gap or disposer connection, make sure the replacement hose supports that configuration and that the thread on the connection matches your appliance. Drain Guide notes that choosing the right hose helps prevent future leaks and reduces maintenance time over the life of the dishwasher.
Getting access: where the LG drain hose lives and how to reach it safely
Most installations route the drain hose from the dishwasher’s back panel toward the sink area or disposal. To access it safely, open the dishwasher door fully, pull the machine out just enough to inspect the hose, and disconnect power at the outlet or circuit breaker. Place a container or towels under the hose to catch water that will drain when you loosen fittings. If your home features an air gap, you may need to remove the cap and clear any debris that obstructs flow. Take photos of the original routing before you remove parts so you can replicate the path precisely on reassembly. A calm, methodical approach reduces the likelihood of accidental spills and damage to cabinet surfaces.
For LG models, the drain hose may connect to the disposal inlet or a dedicated drain stub-out. The key is to avoid creating new bends that could trap food particles or cause backflow. Drain Guide recommends labeling fasteners and keeping track of each clamp’s position, which saves time during reassembly and helps you maintain a clean, organized workspace.
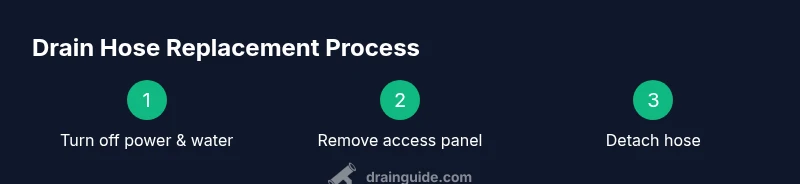
Step-by-step overview (high-level) and what to expect
This section provides a high-level roadmap of the replacement process. Expect to confirm power off, drain water, disconnect the hose, inspect for damage, prepare the replacement, install, route with care, and test thoroughly. The detailed, step-by-step instructions follow in the dedicated STEP-BY-STEP block. If you encounter unusual configurations—such as a hard-to-reach hose behind a built-in cabinet—plan extra time and consider documenting your journey with photos to avoid misrouting the new hose.
Best practices for hose routing, clamps, and air gaps
Route the hose with gentle curves and avoid sharp 90-degree turns that can trap waste and cause clogs. Use stainless steel clamps or high-quality plastic equivalents rated for dishwasher temperatures and detergents. Ensure there is a slight downward slope toward the drain, which helps prevent standing water in the hose. If your installation uses an air gap, verify that the gap is clean and unobstructed; a blocked air gap can cause water to back up into the dishwasher. For LG drain hoses, keep the hose ends clean and dry during installation to form a solid seal with the clamps. Drain Guide’s recommendations emphasize secure connections and clean routing to maintain long-term drainage reliability.
Maintenance, safety, and warranty considerations
Regular inspection of the hose and clamps helps you spot wear before it becomes a leak. Look for brittle sections, cracks, or swelling at the ends, particularly where the hose attaches to the dishwasher and to the drain. When replacing, document the model and serial information so the replacement is covered under warranty and aligns with LG’s maintenance guidelines. Always disconnect power and water before starting, wear gloves to protect against sharp cabinet edges, and ensure the area is well-ventilated to avoid odors from standing wastewater. If you notice persistent leaks after replacement or if the dishwasher sits under a water-damaged cabinet, contact a professional to assess potential cabinet damage or underlying plumbing issues. Drain Guide advises treating drainage systems as a coordinated path; even a single faulty hose can echo through your home’s plumbing network.
Safety, warranty, and when to call a professional
A hose replacement is typically straightforward for many homeowners, but there are situations where professional help is prudent—limited cabinet access, gas lines nearby, or you’re unsure about disconnections. If you cannot locate the drain hose or if replacing the hose does not resolve the problem, a licensed plumber or service tech should examine the installation. Always consult the LG owner manual for model-specific guidance and confirm whether the repair will affect warranty coverage. By following proper safety procedures and using compatible parts, you minimize risk and ensure your lg drain hose dishwasher system functions reliably after the repair.
Tools & Materials
- LG-compatible drain hose (replacement)(Ensure the hose fits the model's inlet and outlet sizes.)
- Screwdriver set (Phillips and flathead)(For clamps and covers.)
- Pliers(For hose clamps and quick-disconnects.)
- Bucket or deep tray(To catch water during hose removal.)
- Towels or rags(To absorb spills and keep workspace dry.)
- Utility knife (optional)(Only if you need to trim damaged hose edges.)
- Gloves(Protect hands from sharp edges and grime.)
- Camera or notepad(Document the original routing for reassembly.)
Steps
Estimated time: 60-90 minutes
- 1
Power off and shut water supply
Before starting, unplug the dishwasher or switch off the circuit breaker and close the under-sink water valve. This prevents electrical shock and water sprays during hose removal. Have towels nearby to catch any residual water.
Tip: Double-check the breaker with a quick test by briefly powering the unit on, then off again to confirm no power is flowing. - 2
Locate and access the drain hose
Carefully pull the dishwasher forward to expose the back panel. Identify the drain hose, where it attaches to the dishwasher and to the drainage path. Take a photo of the routing to help with reassembly and check for any kinks or damage along the length.
Tip: Label each clamp and take note of clamp positions to avoid confusion during reassembly. - 3
Disconnect from the drain or disposal
Loosen the hose clamp at the dishwasher and gently detach the hose from the sink drain, garbage disposal, or air-gap connection. Keep the bucket in place to catch any residual water.
Tip: Use pliers if clamps are tight, but avoid twisting the hose to prevent internal damage. - 4
Inspect the hose and connections
Examine the entire length of the hose for cracks, bulges, or hardening. Check the ends for wear where they seal to the dishwasher and drain. If damage is present, replace the hose rather than attempting a repair.
Tip: Check the interior for mineral buildup that can restrict flow. - 5
Prepare the replacement hose
Compare the old hose with the new LG-compatible replacement in length and diameter. Ensure you have all required clamps and fittings. Pre-install clamps loosely so you can adjust the hose position during final installation.
Tip: Avoid using any old clamps that may have stretched or corroded. - 6
Install the new hose
Attach the new hose to the dishwasher outlet first, then route it toward the drain or air gap. Secure with clamps, ensuring a snug fit but not so tight as to pinch the hose. Reconnect to the drain path and confirm there are no sharp bends.
Tip: Maintain a gentle slope toward the drain to prevent standing water. - 7
Test for leaks and finalize
Restore power and run a short cycle to test drainage. Check both connections for leaks and monitor the hose for any signs of movement or pinching. If leaks appear, tighten clamps a bit more or reposition the hose.
Tip: Keep towels handy during the test in case of unexpected drips.
Got Questions?
Can I use a generic drain hose for my LG dishwasher?
Generic hoses can sometimes fit, but to ensure correct diameter, fittings, and warranty compliance, use the LG-approved hose or OEM equivalent.
Generic hoses may fit, but for the best fit and warranty compliance, use LG-approved hoses.
Do I need an air gap for the LG drain hose?
Air gaps are required by code in some areas and for certain setups; check local codes and the LG manual for guidance.
Local codes may require an air gap, so verify before installing.
What if the hose end is cracked or leaking?
A cracked hose should be replaced; do not rely on temporary fixes like tape or glue for a dishwasher drain.
Replace the hose if cracked or leaking.
What tools do I need for this repair?
A screwdriver, pliers, a bucket, towels, and a new hose are essential; you may also need a utility knife for edge trimming.
You'll need basic tools plus a new hose.
How long does replacement typically take?
Most replacements take about an hour, depending on cabinet access and whether old fittings need extra work.
Around an hour for a straightforward replacement.
Should I call a professional if I’m unsure?
If access is difficult, you’re uncomfortable with disconnections, or there’s any doubt about the plumbing, contact a professional.
If you’re unsure about any step, it’s safer to hire a pro.
Watch Video
The Essentials
- Inspect hose for wear and damage before every service
- Use LG-compatible parts to protect warranty
- Route hoses with gentle curves and proper clamps
- Test thoroughly after installation
- Maintain a dry workspace to avoid slips and mistakes