GE Dishwasher Drain Hose: Replacement & Troubleshooting
Learn how to inspect, clean, and replace the dishwasher drain hose on GE models. A practical, step-by-step guide to prevent leaks and ensure proper drainage.

In this guide, you will learn how to inspect, clean, and replace the dishwasher drain hose on GE models. You'll confirm hose condition, check for kinks, ensure proper routing, and test the drain flow to prevent water backing up. The steps cover safety, tool prep, and reassembly.
Why the GE Dishwasher Drain Hose Needs Attention
The drain hose on a GE dishwasher is a small, flexible conduit that carries wastewater from the tub to the home's drain system. Over time it can develop cracks, kinks, or become routed incorrectly, which can lead to leaks, water backing up into the tub, or poor drainage. For GE models, proper hose routing and secure connections are essential to prevent siphoning and backflow. Regular checks help homeowners catch problems before they cause floods or dirty dishes. In this section we’ll explain how to identify symptoms, understand typical configurations, and decide when a repair or replacement is the best option. The keyword here is prevention: by understanding the role of the drain hose in GE dishwashers, you reduce the chance of messy and expensive failures. Take a few minutes to locate the hose under the sink area or behind the kickplate and inspect for signs of wear, mold around the connection, or loose clamps. If you notice the hose is soft, swollen, or discolored, it’s time to investigate further. Drain hoses for GE models are designed to be flexible, but they still require careful routing to avoid sharp bends that restrict flow. This guide uses plain-language steps that homeowners can follow without special tools.
Identifying Common Problems with GE Drain Hoses
Common GE drain hose problems include visible cracks or soft, swollen sections, tight bends that restrict flow, and clamps that have loosened over time. A hose routed too low or with a sharp turn can trigger backflow or siphoning, especially when the dishwasher drains while the sink is in use. Debris can also collect inside the hose, leading to partial or complete clogs. If the hose ends are not firmly connected to the dishwasher drain or to an air gap or disposer, you may see leaks or water on the floor. Regular checks can reveal these issues early, before they cause malfunctions. When diagnosing, look for signs of mold or mildew around the connection, which often indicates a slow leak or standing water. If you find any of these symptoms, plan a maintenance session using GE-compatible parts and follow proper routing guidelines.
Measuring and Selecting the Right Hose for GE Models
Choosing the correct drain hose for GE models hinges on matching the connection type (to a disposer or to an air gap) and ensuring sufficient length with a comfortable bend radius. Start by inspecting the old hose for diameter and end fittings. Then measure from the dishwasher drain outlet to the connection point under the sink, accounting for any loops or high points that prevent backflow. Hose ends come in different configurations—barbed ends with clamps vs quick-connect or other GE-approved fittings—so confirm the exact end type on your machine before buying. Using a hose that’s too long or too short can cause drips, leaks, or backflow, so opt for a hose that fits the setup with a little slack for movement.
Cleaning vs Replacing: When to Act
A hose that shows minor cracks or a few kinks might be cleanable and serviceable, especially if the rest of the routing is sound and clamps are secure. Flush the hose with warm water and a flexible brush to remove trapped debris, then run a test cycle to verify drainage. However, replace the hose promptly if you see deeper cracks, softening, swelling, or if the hose is hard and inflexible. A damaged hose is a high-risk point for leaks and water damage, so when in doubt, choose replacement with a GE-compatible part. Do not reuse old clamps that show signs of wear, as they can fail under pressure.
Replacing the GE Drain Hose: What to Expect
Replacing the drain hose is a straightforward DIY task for many GE models, but it requires careful disconnection, measurement, and reattachment to avoid leaks. Gather the correct GE-compatible hose, secure clamps, and the necessary tools, then follow a step-by-step sequence to detach the old hose and install the new one. Keeping the routing consistent with the original path—avoiding sharp bends and ensuring the hose isn’t trapped under the unit—helps prevent backflow and gurgling sounds. After installation, run a brief test cycle to confirm proper drainage and check for leaks around both ends.
Maintenance Tips to Extend Hose Life
Extend the life of your GE dishwasher drain hose with simple habits: inspect the hose monthly for signs of wear, avoid tight bends, and secure the hose along a protected path to prevent chafing. Use anti-siphon loops where recommended to reduce backflow potential, and replace worn clamps as a precaution. Keep the area around the hose clean and dry to prevent mold growth and corrosion on metal clamps. A light wipe-down after each cycle helps maintain the hose and connections, reducing the chance of leaks over time.
Safety and Best Practices for DIY Plumbing
DIY plumbing work should always begin with de-energizing the appliances and isolating the water supply. GE dishwasher work is generally safe when you follow manufacturer guidance and use proper tools. Wear protective gloves, work in a well-lit area, and keep the workspace organized to avoid dropping small parts. If you encounter unusual resistance when removing the hose or if you discover corrosion on clamps, pause and seek professional help. By following these best practices, you reduce the risk of electric shock, water damage, and further wear on components.
Quick Reference: How to Tell When You’ve Found the Right Hose
Before you buy, check the model number on your GE dishwasher and compare with GE-compatible hoses. Verify the connection type and length, confirm the end fittings match your drain system, and confirm there is a safe mounting path with a gentle curve. Once installed, test with a short cycle and observe for drips at both ends. If no leaks appear and drainage is steady, you’ve likely chosen the correct hose.
Tools & Materials
- New GE-compatible dishwasher drain hose(Ensure correct connection type (to disposer or to air gap); length matching your model)
- Bucket(Catch residual water during hose removal)
- Old towels or rags(Wipe up spills and dry the area after removal)
- Screwdriver set(Loosen hose clamps; have both flathead and Phillips handy)
- Pliers(Grip clamps and fittings securely)
- Utility knife or scissors(Trim hose length if necessary after measuring)
- Gloves(Protect hands from sharp edges and dirty water)
Steps
Estimated time: Estimated total time: 45-60 minutes
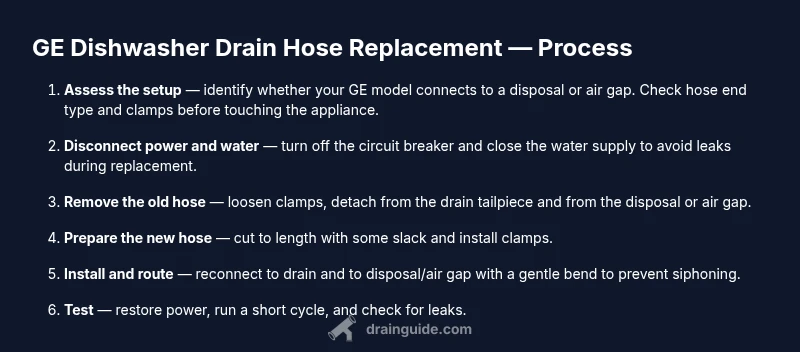
- 1
Power down and isolate
Turn off the dishwasher’s circuit at the breaker and shut off the home water supply. This prevents accidental shocks and water spray while you work. Confirm power is disconnected by attempting a brief cycle test without water flow.
Tip: If you can’t locate the valve, shut off the main water supply to the house before proceeding. - 2
Access the drain hose
Remove the kick panel or toe kick to access the drain hose behind the machine. Identify whether the hose runs to a disposer, air gap, or direct drain, and note clamp positions for reinstallation.
Tip: Take a quick photo of the setup before disconnecting anything to ensure correct reassembly. - 3
Detach the old hose
Loosen the clamps with the screwdriver or pliers and gently detach the hose from the drain tailpiece and any connection to the disposal or air gap. Have a bucket ready for water that drains out during removal.
Tip: Hold the hose ends as you loosen clamps to avoid twisting or bending the hose. - 4
Prepare the new hose
Measure the required length, then cut the new hose if needed using a utility knife or scissors. Install clamps loosely at both ends so you can adjust the fit after routing.
Tip: Avoid leaving long stubs inside the cabinet that could catch on moving parts. - 5
Install the new hose and route
Attach the hose to the drain tailpiece and to the disposer or air gap, ensuring a smooth, gentle bend with no sharp kinks. Create a slight loop to prevent backflow and perch the hose above the sink line where possible.
Tip: Secure with clamps, ensuring they are tight but not over-tightened to avoid damaging the hose. - 6
Test the installation
Reconnect power and water, run a short cycle, and watch for leaks. Check both ends and beneath the cabinet for any drips or moisture. If you see leaks, reseat clamps and recheck hose routing.
Tip: Keep towels handy during the first test and monitor for a few minutes after the cycle ends.
Got Questions?
What are the signs that my GE dishwasher drain hose needs replacement?
Look for visible cracks, bulges, or soft spots, as well as frequent leaks and poor draining. If you notice water on the floor after cycles or gurgling sounds, inspect the hose. Replacement is advisable if wear is present.
Watch for cracks, leaks, and slow draining. Replace the hose if wear is evident to prevent spills.
Can I reuse a standard drain hose for a GE dishwasher?
Use only GE-approved hoses that match your model’s connection type (disposer or air gap). Mismatched fittings can leak or fail under pressure. When in doubt, replace with a compatible part.
Use a GE-approved hose to ensure a proper fit and safe operation.
How do I measure the correct hose length for my GE model?
Measure from the dishwasher drain outlet to the connection point under the sink, leaving a small slack for movement. Avoid hoses that are too long and may sag or kink.
Measure the distance and add a little slack for a clean bend.
Is it safe to replace the drain hose myself?
Yes, with the power off and the water supply shut off. Follow a step-by-step guide and use GE-compatible parts. If you’re unsure, consult a professional.
Yes, it’s usually safe if you follow proper steps and stay cautious.
What maintenance helps extend hose life?
Regularly check for cracks, avoid tight bends, and secure the hose away from hot surfaces. Clean the interior occasionally to prevent buildup.
Check for wear and keep the hose routed in a safe path.
What tools do I need to replace the GE drain hose?
Pliers, screwdriver, bucket, towels, and a new GE-compatible hose. Have a utility knife handy if you need to trim length.
Gather basic tools and a replacement hose before you start.
Watch Video
The Essentials
- Inspect hoses for wear before use.
- Measure and route carefully to prevent backflow.
- Replace damaged hoses with GE-compatible parts.
- Test for leaks after installation.
- Routine maintenance extends hose life.