When to Replace a Dishwasher Drain Hose: A Practical Guide
Learn when to replace your dishwasher drain hose, how to inspect for wear, and a safe, step-by-step replacement method to prevent leaks and backups in your kitchen.

Understanding when to replace dishwasher drain hose helps prevent costly water damage. You should replace the hose if you observe cracks, bulges, kinks, hardening, leaks, or mold growth, or if backups persist. The following steps explain how to safely inspect and install a new hose for reliable drainage. This quick guide from Drain Guide outlines practical checks and a straightforward replacement process.
Why replacing the dishwasher drain hose matters
A worn or faulty drain hose is a leading cause of leaks, backups, and sanitation problems in dishwashers. When you understand when to replace dishwasher drain hose, you can act before water damage occurs and before dirty wastewater backs up into the tub or onto the floor. According to Drain Guide, preventive maintenance of drainage components can save water damage and headaches. A new hose is more resistant to chemical cleaners, heat, and repeated flexing, which reduces the risk of failure. Replacing the hose at the right time protects your cabinets, floors, and indoor air quality, and helps maintain the efficiency of your dishwasher. Consider this a small investment that yields big peace of mind for busy kitchens.
In many homes, the hose is the first line of defense against backflow. If the hose is deteriorating, even a minor leak can lead to damp insulation, mildew growth, or slippery floors. Drain Guide Team emphasizes that proactive replacement, rather than reactive repairs, minimizes disruption to daily life and preserves appliance longevity.
Common signs of wear to watch
Identifying wear early is key to avoiding surprises. Look for the following indicators of a hose in need of replacement:
- Cracks, splits, or visible fraying on the exterior
- Bulges or soft spots indicating internal damage
- Brittle or stiff sections that don’t flex smoothly
- Leaks at hose clamps or fittings
- White powdery deposits or mold growth around connections
- Frequent backups or water pooling under the sink after cycles
These signs often appear gradually, so regular visual checks are worth the small effort. If you notice any of them, plan a hose replacement before a bigger issue arises. Drain Guide analysis shows that worn hoses are a common source of dishwasher drainage problems in older homes.
How to inspect and measure the current hose
Start with a quick, careful inspection:
- Power off the dishwasher and, if required, shut off the under-sink water supply to avoid accidental leaks.
- Remove the lower rack to access the drain hose and connections.
- Check the hose body for cracks, kinks, or stiff sections. Gently bend the hose to test for hidden cracks.
- Inspect clamps or fittings for corrosion, rust, or looseness.
To ensure the new hose will fit, measure the run from the dishwasher drain port to the sink drain or disposal connection. Note the hose diameter and end fittings to match the new part exactly. If your setup uses an air gap, verify the hose length and routing will accommodate it without sharp bends. Accurate measurements prevent installation problems and ensure optimal drainage.
Hose types and selection tips
Choosing the right hose is as important as the installation itself. Consider these guidelines when shopping for a replacement:
- Look for a reinforced hose made for dishwashers, with durable exterior and a sturdy interior.
- Select a length that allows a gentle, unobstructed slope from the dishwasher to the drain connection without sharp bends.
- Ensure the hose ends are compatible with your connection type (disposal inlet, air gap, or sink drain).
- Prefer hoses with corrosion-resistant clamps or built-in clamps and food-grade materials.
- Avoid overly cheap hoses that may collapse or kink under heat and pressure.
A well-made hose reduces the risk of future wear and simplifies maintenance. Always follow the manufacturer’s guidelines for compatible connections and installation torque.
Installation considerations and safety
Safety comes first when replacing a dishwasher drain hose. Plan the project when the dishwasher is not in use and allow time for drying any residual water. Follow these guidelines:
- Disconnect power at the circuit breaker, then turn off the water supply under the sink.
- Remove the lower dish rack and access the drain hose. Take photos of the original setup for reference.
- Detach the old hose from the dishwasher drain port and from the drain connection at the sink or disposal.
- Attach the new hose to the dishwasher drain port using the original clamps or new ones if supplied. Route the hose to avoid sharp bends and ensure proper clearance from the sink, garbage disposal, or water lines.
- Secure every connection with clamps and inspect for any kinks that could impede flow.
After installation, run a short cycle with the area under the sink protected by towels or a bucket. Check all connections for leaks and wipe clean any spills promptly. If you smell sewer gas or detect persistent leaks, stop and consult a professional. The Drain Guide team recommends a careful, step-by-step approach to ensure a safe, leak-free setup.
Maintenance tips to extend hose life
Keeping your dishwasher drain hose in good shape reduces future maintenance. Try these habits:
- Inspect the hose every six to twelve months for signs of wear and replace proactively.
- Ensure the hose is kept away from heat sources and sharp edges that could cause damage.
- Keep clamps tight but not overly tight to avoid squeezing the hose.
- Use a hose with reinforced walls and secure connections to resist corrosion and leaks.
- If you notice slow drainage or unusual odors, re-check hose routing and clamps immediately.
Regular checks and proper installation extend the life of your hose and reduce emergency repair scenarios. The Drain Guide team emphasizes that a proactive approach delivers long-term reliability and cleaner kitchen environments.
Tools & Materials
- Dishwasher drain hose (reinforced, dishwasher-rated)(Match length to reach the drain without tight bends; consider a hose with thicker walls for longevity)
- Screwdriver (Phillips #2 or flathead)(For clamps and access screws)
- Pliers (slip-joint)(Helpful for clamps and fittings)
- Bucket or towels(Catch water from the tub and hose)
- New hose clamps (if required)(Use corrosion-resistant clamps that fit the hose ends)
- Safety gloves(Protect hands from sharp edges and dirty water)
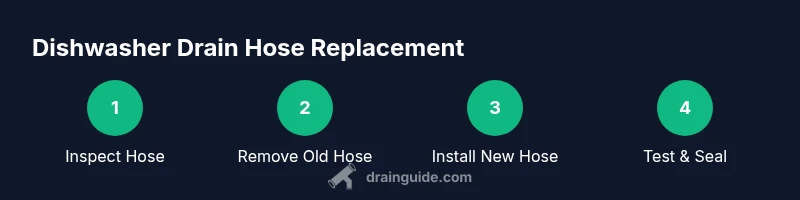
Steps
Estimated time: 20-40 minutes
- 1
Power down and isolate
Turn off the dishwasher at the circuit breaker and shut off the under-sink water supply. This prevents electrical shock and water leaks while you work.
Tip: Unplug the dishwasher or switch off the dedicated outlet if accessible. - 2
Gain access to the hose
Remove the lower rack to reveal the drain hose and its clamps. Take note of the routing and take a photo for reference.
Tip: Keep towels handy to absorb any residual water. - 3
Remove the old hose
Loosen and remove clamps. Detach the hose from the dishwasher drain port and the sink drain or disposal connection.
Tip: Do not pull the hose out through tight spaces; ease it back along its path. - 4
Prepare the new hose
Compare the new hose length and end fittings with the old one. Install the new clamps if provided and ensure a clean, straight path.
Tip: Avoid excessive bending; a gradual bend prevents kinking. - 5
Attach the new hose
Connect one end to the dishwasher drain port and the other end to the drain or air gap as required. Tighten clamps evenly without over-tightening.
Tip: If an air gap is present, route the hose through it as per manufacturer instructions. - 6
Test for leaks
Restore water supply and run a short washing cycle. Check all connections for leaks and wipe away any moisture.
Tip: Place a towel under the connections during testing to catch any drips.
Got Questions?
How do I know if my dishwasher drain hose needs replacement?
Look for cracks, bulges, leaks at connections, or mold around the hose. Persistent backups after cycles also indicate replacement may be needed.
Check for cracks, bulges, leaks, or mold around the hose. If backups persist, replacement is likely needed.
Can I reuse the old hose if it looks okay?
It's generally best to replace with a new hose when wear is suspected. Reusing an aging hose increases the risk of hidden failures and leaks.
It's usually better to replace the hose rather than reuse an aging one.
Do I need a professional to replace the hose?
For most homes, DIY replacement is feasible with basic tools. If you encounter unusual fittings, a complex disposal setup, or persistent leaks, consult a plumber.
Most people can replace it themselves, but call a plumber if it’s hard to access or leaks persist.
What’s the difference between an air gap and a direct hose connection?
An air gap prevents backflow by introducing a physical separation before draining, which is required in some jurisdictions or setups. A direct connection to the drain relies on clamps and proper routing to avoid backflow.
An air gap stops backflow; a direct connection depends on proper routing and clamps.
What safety steps should I take before starting?
Turn off power to the dishwasher at the breaker, shut off the water under the sink, and have towels ready to catch spills. Wear gloves if you’re handling dirty water.
Power off the unit and shut the water, with towels handy. Gloves help with cleanliness.
How long does a typical hose replacement take?
Most DIY replacements take a short session, often under an hour, depending on access and connections. Plan for a little extra time if you’re learning the steps.
Usually under an hour, unless access is tight.
Watch Video
The Essentials
- Inspect the hose for wear before it leaks.
- Replace worn hoses promptly to prevent backflow.
- Choose a reinforced, dishwasher-rated hose for longevity.
- Ensure proper routing and secure clamps during installation.
- Test thoroughly for leaks after replacement.