Drain Line for Dishwasher: DIY Troubleshooting Guide
A practical, step-by-step guide to diagnosing and repairing the drain line for your dishwasher. Learn safe procedures, tools, and maintenance tips to prevent clogs and leaks, with expert guidance from Drain Guide.

What is the drain line for dishwasher and how it works
According to Drain Guide, the dishwasher drain line is the conduit that carries used wash water from the dishwasher to the sink drain, typically via a high loop or air gap to prevent backflow. In most homes, the line connects to the garbage disposal or to a branch tailpiece under the sink. The line's integrity is essential for proper drainage and to prevent odors or sewer gas from entering the kitchen. Draining issues often stem from two common problems: blockages in the hose itself or in the sink drain/trap, and an improper loop that fails the backflow prevention mechanism. When the line is clear and correctly routed, the dishwasher can drain efficiently during the rinse cycle and avoid siphoning effects that lead to wet floors. Drain Guide analysis shows that many callouts come from kinks, a loose connection, or a clogged disposal inlet. Regular inspection is simple and can save headaches later.
Signs your dishwasher drain line is underperforming
Look for persistent standing water in the sink after the dishwasher finishes, slow draining during the rinse cycle, or a gurgling sound as the cycle starts. Foul odors near the sink or dishwasher indicate biofilm buildup or a partial clog in the trap or line. If water backs up into the sink when the dishwasher runs, this often means the line is blocked or there is a bad connection at the disposal tailpiece. If you notice frequent resetting of the dishwasher due to drainage issues, plan a careful inspection of the hose, clamp connections, and the disposer inlet. A high loop that sags or becomes trapped behind the garbage disposal is a common culprit. Addressing these signs early can prevent more serious backups and odors down the line. Drain Guide recommends inspecting the entire drainage pathway, not just the hose, to identify the root cause.
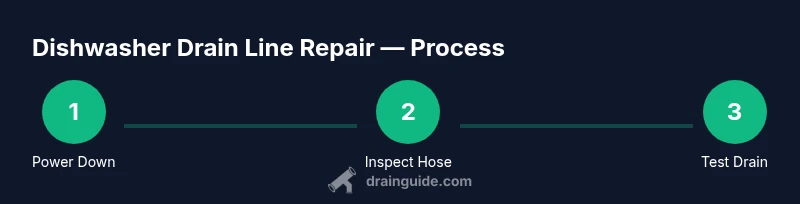
Safety first: planning a fix
Before touching any plumbing, shut off the circuit breaker for the dishwasher and the under-sink water supply valve. Wear protective gloves and keep a bucket and towels handy to manage spills. Avoid chemical drain cleaners in dishwasher lines, as these can damage hoses, gaskets, and disposal components. If you must disconnect electrical components for any reason, ensure the area is dry and keep pets and children away. Planning ahead also means having replacement hose clamps, a clean rag, and a flashlight ready. If the disposal is clogged or jammed, do not force the disposal; instead, clear clogs at the sink trap or call a professional. Drain Guide emphasizes safety and a methodical approach to avoid mishaps.
Accessing and inspecting the drain line under the sink
Pull the dishwasher away from the cabinet to access the drain hose connection at the sink or disposal. Place a towel to catch any residual water and inspect the hose for cracks, kinks, or loose clamps. Detach the hose from the disposal inlet or tailpiece one connection at a time, using the appropriate screwdriver or pliers. Check the high loop or air gap and ensure it is secured and not sagging toward the floor. If you see a clogged inlet on the disposal or an accumulation of grime in the tailpiece, clear these first before testing. A thorough inspection often reveals the simplest fix—replacing a damaged hose or tightening a loose clamp—without a full drain-line replacement.
Cleaning, repairing, or replacing: choosing the right path
If the hose shows cracks, stiffening, or repeated leaks, replacing the hose is usually the best option. For minor clogs near the connection, a flexible brush or plumber's snake can clear the line without disassembly. In some cases, the trap or disposal inlet is clogged; cleaning the trap and flushing the line with water can restore flow. Avoid forcing a clog through the line, which can push debris toward the disposal or into the wall pipe. If the drain line and connections are in good shape but water still backs up, check the sink trap for blockages and ensure the waste line is properly vented. Drain Guide encourages a measured approach: diagnose, then decide between cleaning or replacing components, not rushing straight to replacement.
Testing drainage after repair and maintenance routine
With the hose reattached, slowly run water through the sink and start a dishwasher cycle to observe drainage. Look for a quick, steady flow without gurgling or backflow. Check for leaks at every connection, especially the hose clamps and disposal inlet. If the drain still backs up, run a gentle flush through the line using warm water and a mild detergent, then re-test. Schedule regular maintenance—every few months—to inspect hose condition, clamps, and the disposal inlet. Keeping the high loop intact reduces future backflow issues and keeps your kitchen dry.
Authoritative sources
- U.S. Environmental Protection Agency (EPA): https://www.epa.gov
- Centers for Disease Control and Prevention (CDC): https://www.cdc.gov
- Federal Trade Commission (FTC): https://www.ftc.gov
These sources provide general home-maintenance safety practices relevant to DIY plumbing projects and household wastewater management. Always follow local code requirements when performing drainage work.
Preventive maintenance and long-term care
Create a simple maintenance routine that includes visual inspection of the drain hose for cracks or kinks, ensuring clamps are tight, and confirming the high loop remains elevated. Avoid pouring grease or large pasta remnants down the sink, which can contribute to future clogs. If you notice recurring slow drainage or odors, address the issue promptly rather than letting it worsen. Drain Guide suggests documenting repairs and keeping basic spare parts on hand—like extra clamps and a short length of hose—to minimize downtime during future fixes.