Drain Inspection: A Homeowner's Step-by-Step Guide
Explore everything you need to know about drain inspection, from signs you need one to DIY checks, professional methods, and maintenance tips for a healthy plumbing system.

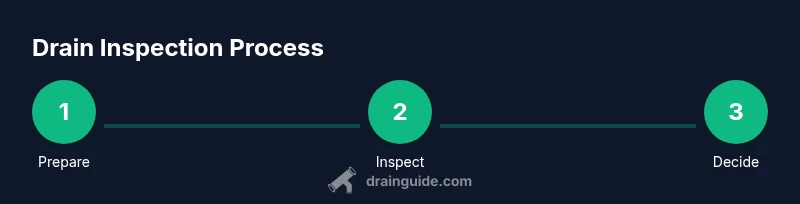
Drain inspection helps you spot clogs, leaks, and venting problems before they cause backups or water damage. Start with safe DIY checks, then decide if a camera inspection is needed. This guide covers when to inspect, the methods used by pros, a clear step-by-step approach, and how to choose the right professional for deeper diagnostics.
What is drain inspection and when it's needed
Drain inspection is the process of evaluating the condition and reliability of a home’s drainage system. According to Drain Guide, regular drain inspection helps homeowners catch issues early and avoid costly repairs. This service isn’t only for when a backup happens; it’s a proactive maintenance practice that preserves home value and reduces the risk of hidden leaks. A typical inspection checks the main drain line, branch lines, traps, vents, and cleanouts to confirm they’re free of blockages and functioning as designed. For many households, a scheduled drain inspection is a smart step before major renovations, when buying an older home, or after recurring clogs or unusual odors. By understanding what to look for, you can set up a reliable maintenance plan and avoid reactive fixes.
Signs a drain needs inspection
Slow draining, frequent clogs, and gurgling sounds are classic warning signs that something isn’t right with your drainage system. Odors near sinks or floors, damp spots around the base of the toilet, and sudden changes in water pressure can indicate venting problems or sewer line issues. If you notice water backup in multiple fixtures during a single use, that’s a stronger signal for a near-term inspection. Even if the symptoms seem minor, a professional assessment can prevent more serious damage, such as pipe cracks, root intrusion, or collapsed lines. Regular home checks also help you differentiate routine maintenance from more expensive repairs.
How professional drain inspections work
Professional drain inspections typically begin with a visual assessment of accessible pipes and cleanouts, followed by a camera-based inspection of the interior of the pipes. A durable, flexible rod-mounted camera is fed through the drain to capture high-definition video and still images, often recorded for later review. The inspector looks for cracks, root intrusion, misalignments, buildup, and venting problems. Most reports translate the footage into clear findings, recommendations, and cost estimates. In some cases, a dye test or hydrostatic test is used to confirm flow and identify pressure-related leaks. The goal is a comprehensive map of the system’s health and a practical remediation plan.
Common inspection methods: camera inspection, dye testing, hydrostatic tests
Camera inspection uses a pushable or wheel-enabled camera to traverse pipes and reveal internal conditions. Dye testing introduces colored dye into the system to visualize flow paths and detect leaks, especially in hidden sections. Hydrostatic tests pressurize the drain system with water to reveal weak points and slow leaks under controlled pressure. Each method has its place: camera inspections are best for locating blockages and structural problems, while dye and hydrostatic tests validate functionality and identify hidden defects. A skilled contractor chooses methods based on observed symptoms, the pipe material, and the system layout, ensuring a targeted and cost-efficient plan.
Tools, safety, and preparation
Before you begin or call a pro, assemble essential safety gear and accessibility tools. Wear gloves and eye protection when handling dirty water or climbing access points. Have a flashlight, a bucket, and towels on hand for any minor spills. If you plan a DIY check, ensure you have a cleanout access point that’s safe to reach, and turn off any nearby fixtures or appliances if needed. Keep pets away and ensure children don’t interfere during the inspection. Proper preparation minimizes mess and reduces the risk of injury or accidental contamination. If you’re unsure about safety, err on the side of professional assistance.
DIY checks you can perform before calling a pro
Homeowners can perform several preliminary checks that don’t require specialized equipment. Start by flushing all drains with hot water to loosen minor buildup and observe whether water clears quickly or remains slow. Remove the trap (under-sink) to inspect for standing debris and evidence of leaks. Clear hair and grease from visible traps and ensure venting seems unobstructed—look for signs of condensation or unusual odors. Record any patterns you notice, such as recurring clogs after heavy rainfall or frequent backups in multiple fixtures. If these checks don’t reveal a clear cause, a professional camera inspection is warranted to diagnose deeper issues.
Understanding inspection findings and what they mean
During an inspection, typical findings include root intrusion, cracks in pipes, misalignments, and heavy mineral buildup. Camera footage provides a precise map of where the issue exists, its severity, and potential causes. A mild buildup in a clay or cast-iron pipe may be cleanable with professional snaking and cleaning, while root intrusion often requires root removal or pipe replacement. Cracks and misalignments threaten long-term integrity and may necessitate pipe relining or replacement. Venting problems can cause slow drainage and sewer gas pressure; correcting vent paths often resolves these symptoms. Understanding the findings helps you prioritize actions, estimate costs, and plan a realistic remediation timeline.
Hiring the right professional: questions to ask
Choosing the right contractor makes a big difference in both outcomes and value. Ask about the camera’s resolution, the age and type of pipes, and whether the tech will provide a detailed video review and written report. Inquire about the scope of the service, whether dye/hydrostatic tests are included, and what remediation options they recommend for similar issues. Request a clear written estimate with itemized costs for inspection, potential repairs, and any follow-up visits. Check references, licenses, and insurance, and verify that they follow local codes and best practices. A trustworthy professional will explain findings in plain language, not industry jargon, and offer a transparent plan.
Preventive maintenance after inspection
After an inspection, put a maintenance plan in place to keep drains running smoothly. Regularly flush drains with hot water, avoid pouring grease or oil down the sink, and use enzyme-based cleaners to maintain biofilm balance. Consider installing strainers to catch hair and debris, and schedule routine inspections every few years or after major plumbing work. If you received actionable recommendations, implement them promptly and track their impact on performance. A proactive maintenance mindset reduces the likelihood of unexpected backups and extends the life of your plumbing system.
Tools & Materials
- gloves(Nitrile or heavy-duty work gloves for protection when handling traps and traps cleanouts)
- flashlight(Bright LED flashlight; headlamp optional for hands-free lighting)
- bucket(To catch water and transport debris during DIY checks)
- paper towels or rags(For cleanups and quick lens wipes)
- screwdriver or pliers(To remove access panels or traps if needed)
- plunger(Basic tool to clear minor clogs during DIY checks)
- drain snake or auger (manual)(Optional for shallow, easy-access cleanouts)
- camera inspection device (optional for DIY)(Consumer-grade cameras exist but professional equipment is preferred for accuracy)
Steps
Estimated time: 25-40 minutes
- 1
Prepare the area and safety
Clear the workspace around the access point and ensure you have adequate lighting. Put on gloves and safety glasses, and keep a bucket handy for spills. Verify that you know the location of main water shutoff in case of a leak, and plan to work with a helper if possible.
Tip: Label the area with a note to prevent accidental disturbance during the inspection. - 2
Gather your tools and materials
Assemble all essential items before you start. Having everything within reach minimizes disruptions and keeps the process smooth. Check equipment for damage and ensure you have fresh batteries for any cameras or flashlights.
Tip: Test each tool briefly to confirm it’s functioning before you begin. - 3
Locate a drain access point
Identify a reachable cleanout or trap that provides a direct route into the main drain. Avoid forcing panels or accessing hard-to-reach spaces that could cause damage. If you can’t locate a proper access point, do not force entry; call a professional.
Tip: If you’re unsure about access points, stop and evaluate alternative routes with a pro. - 4
Inspect visible drain components
Check exposed pipes for signs of damage, corrosion, or leaks. Look under sinks, around the toilet base, and near the sewer stack for moisture or staining. Document any obvious issues with photos for reference.
Tip: Take notes on the location of any leaks or unusual moisture first. - 5
Insert the inspection camera and feed carefully
Gently insert the camera into the drain, advancing slowly to avoid snagging on elbows or roots. Feed it through each bend until you reach the main line. Stop and back up if you encounter resistance and re-align.
Tip: Maintain a steady pace and avoid forcing the camera through tight spots. - 6
Record findings as you advance
Capture both video and still images at key points along the run. Note blockages, root intrusion, cracks, or misalignment. If your camera has a display, watch for changes in water level or flow that indicate problems.
Tip: Keep a running log of what you see at each section of the pipe. - 7
Back out and review footage at checkpoints
Slowly retract the camera and review footage frame by frame if possible. Cross-check what you saw with the symptoms you noted earlier. This step helps distinguish transient issues from persistent damage.
Tip: Pause at unusual features to confirm whether they’re a temporary obstruction or a structural issue. - 8
Assess the need for professional inspection
If you detect significant cracks, roots extending beyond a cleanout, or heads-up signs of structural failure, plan to bring in a licensed professional. Some problems require specialized equipment and expertise to fix safely.
Tip: A professional may offer a more cost-effective long-term solution than DIY fixes. - 9
Schedule follow-up or remediation
If remediation is needed, schedule it promptly and request a written plan with milestones and expectations. For minor maintenance, set a routine cleaning schedule to prevent recurrence.
Tip: Obtain written estimates and consider warranties on repairs. - 10
Clean up and restore safety
Remove tools, wipe down surfaces, and properly dispose of waste. Return access panels to their original condition and verify that all fixtures function after the inspection.
Tip: Double-check that all safety devices and covers are securely in place.
Got Questions?
What is included in a professional drain inspection?
A professional inspection typically includes a visual assessment, camera scope of the pipes, a written report, and recommendations for fixes. Some inspections also include dye testing or hydrostatic testing to verify flow and leaks.
A pro will inspect accessible areas, run a camera through the pipes, and provide a written report with recommendations.
How often should I have my drains inspected?
For homes with aging pipes or recurring issues, annual or biennial inspections are common guidance. If your drains are functioning well and recently inspected, you may extend the interval.
If you’ve had repeated clogs or signs of trouble, plan for a yearly or every-few-years check.
Can I perform a drain inspection myself?
You can perform basic surface checks and traps maintenance, but a full camera inspection and accurate diagnosis usually require a professional.
You can do simple checks, but a camera inspection is typically best left to a pro.
What are common issues found during inspections?
Tree roots in sewer lines, cracks in pipes, misalignment, heavy buildup, and venting problems are frequent findings that influence repair decisions.
Common findings include roots, cracks, and heavy buildup in the pipes.
How long does a drain inspection take?
On-site inspections typically take from 30 minutes to about 90 minutes, depending on the system size and findings.
Most inspections are under an hour, but larger or more complex systems can take longer.
Do repairs require permits?
Most minor repairs do not require permits, but major replacements or code-required work may. Check local regulations and obtain guidance from your inspector.
Big repairs may need permits; always verify with local codes and your contractor.
Watch Video
The Essentials
- Schedule inspections to prevent hidden damage
- Choose camera-based inspections for accurate diagnostics
- Document findings and plan remediation before problems escalate
- Perform basic DIY checks to narrow down issues
- Regular maintenance reduces the risk of costly repairs