Drain Mechanics: A Practical DIY Guide
Master drain mechanics with this practical, step-by-step guide for homeowners. Learn safe diagnostics, common fixes, and preventive tips to keep drains flowing smoothly and avoid costly calls.

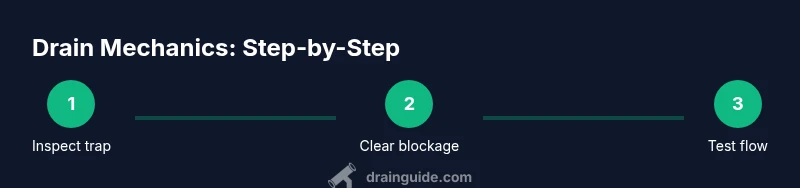
In this guide, you will learn a safe, step-by-step method to diagnose and fix common household drain issues. You'll start by inspecting the P-trap, then clear blockages with a plumber's snake or hand auger, flush with hot water, and assess for lingering odors or gurgling. Gather basic tools before starting and avoid harsh chemicals.
Understanding drain mechanics: how residential systems move water
Drain mechanics govern how wastewater travels from fixtures to the sewer or septic system. A basic residential setup relies on gravity, venting, and properly sloped pipes to maintain steady flow. The key components include the fixture drain, the trap (often a P-trap under sinks), the drain lines, and the vent stack that prevents siphoning. When you understand these elements, you can diagnose why a sink drains slowly, why a gurgling sound appears, or why a foul odor lingers. According to Drain Guide, most clogs start near the trap or in horizontal sections where grease, hair, soap scum, and mineral deposits accumulate over time. By mapping the drain path in your home, you can identify likely trouble spots and plan a safe, effective repair strategy. This knowledge also helps you decide whether a DIY fix is appropriate or if a pro is needed, especially in multi-story systems with complex venting.
Tools, safety, and workflow: setting up for success
Before you touch any drains, assemble a basic, safe toolkit and establish a clean, dry workspace. Always wear gloves and safety glasses to protect against splashes and sharp edges. Keep a bucket under the trap to catch water and a towel handy for quick cleanup. A flashlight helps you see inside the pipe, while a drain snake or hand auger allows you to tackle clogs beyond the trap. Avoid mixing chemical drain cleaners with hot water, boiling, or other household cleaners, as reactions can release fumes or damage pipes. For safety reasons, always disconnect power to nearby appliances if you’re working near electrical outlets, and never work alone if you’re unsure about a fixture’s configuration. Drain mechanics experts emphasize a measured, methodical approach: test the simplest solution first, then advance to mechanical clearing if needed, minimizing risk and expense.
Step 1: Identify the drain layout and isolate the problem
The first actionable step is a visual inspection of accessible sections: the sink trap, nearby piping, and any visible blockages in the trap arm. Look for standing water, slow drainage, or unusual noises like gurgling after draining. Confirm the issue location by running water in different fixtures and noting where drainage is slowest. If the problem is isolated to a single fixture, the trap or trap arm is the likely culprit. If multiple fixtures are affected, the venting system or main drain line may be compromised. Document findings with photos for reference, which helps you stay organized and reduces the chance of reassembling parts incorrectly.
Step 2: Remove the P-trap and inspect for blockages
The P-trap is the most common site of clogs and odors. Place a bucket under the trap, loosen the slip nuts with adjustable pliers, and carefully detach the trap. Clear out standing water and remove hair, grease, or debris with a small brush or cloth. Rinse the trap with warm water and inspect for cracks or wear that might require replacement. Reassemble loosely first to ensure proper alignment before tightening fully. If you notice missing washers or damaged threads, replace the trap before testing. This step is crucial because a clean trap often resolves many slow-drain issues without more invasive work.
Step 3: Clear clogs with a plumber’s snake or hand auger
Insert the snake into the drain, turning the handle to feed the coil into the pipe. When you encounter resistance, rotate and push gently to break up the blockage. Avoid forcing the tool, which can damage pipes. Work in slow, deliberate motions and pull the snake back occasionally to remove debris. If you hit a stubborn blockage, attempt a shorter section of snake from the next access point, such as another fixture, to determine whether the clog is isolated or part of a larger line. After removing debris, retract the snake slowly and clean the head.
Step 4: Flush the system and reassemble
With the blockage cleared, run hot water through the system to flush out remaining residue. If odors persist, you may add a small amount of baking soda followed by hot water to help neutralize scents. Reinstall the P-trap with careful alignment and tighten the nuts securely, ensuring no leaks. Once reassembled, run water for a few minutes and observe for drip-free performance. If leaks occur, recheck connections and tighten as needed. This flush-and-test step confirms your repair is effective and reduces the chance of future clogs from residual debris.
Step 5: Inspect ventilation and test multiple fixtures
A gurgling sound or slow drainage across multiple fixtures often points to venting issues rather than a single clog. Check visible vent openings on the roof if you’re comfortable and safe, or observe whether the airflow changes when multiple fixtures are used. If venting appears blocked, consider contacting a professional. You can also test the system by running water in a sequence (sink, tub, and dishwasher) to see if drainage remains consistent. Regularly inspecting the vent path and ensuring proper slope reduces the likelihood of future problems and keeps drain mechanics functioning smoothly.
Step 6: Preventive maintenance and common-sense practices
Preventive maintenance is the best defense against recurring drain problems. Clean traps and screens regularly, avoid pouring grease down the sink, and use a drain strainer to catch hair and solids. Periodically flush drains with hot water to dissolve soap scum and mineral buildup, especially in hard-water areas. Consider an inexpensive enzyme-based cleaner to promote healthy biofilm balance in pipes without harsh chemicals. Document maintenance activities so you know when parts were last inspected and replaced. A proactive approach saves time, money, and stress over the long term.
Step 7: When to call a professional and what to expect
If you encounter persistent odors, recurring clogs, or multiple fixtures affected, it’s time to bring in a licensed plumber. A professional can perform a camera inspection to locate hidden blockages, test vent integrity, and assess the overall health of the drainage system. Ask for a written estimate, clarify whether any pipe replacement is needed, and discuss preventative strategies to avoid future issues. Drain mechanics is a skill built over time; knowing when to escalate protects your home and your budget.
Tools & Materials
- Flashlight(Hands-free is best; headlamp allowed)
- Bucket(Catch water when you open traps)
- Adjustable wrench(Loosen slip nuts on traps)
- Pliers(Grip and steady hardware without slipping)
- Plumber’s snake / hand auger(8–25 ft length preferred; choose manual over powered for safety)
- Gloves(Protect hands from dirty water and sharp edges)
- Safety glasses(Eye protection against splashes)
- Rags or towels(Clean up spills and wipe tools)
- Dish detergent or mild soap(Helpful for a gentle wipe-down of parts)
Steps
Estimated time: 45-90 minutes
- 1
Prepare the workspace and safety gear
Clear the area, shut off nearby taps as needed, and put on gloves and safety glasses. Place a bucket under the trap and lay towels to catch spills. This prepares you to work calmly and prevents accidents.
Tip: Double-check the area for electrical outlets near damp surfaces before starting. - 2
Locate and inspect the trap
Identify the P-trap under the sink and inspect for obvious cracks or leaks. If the trap is blocked, you’ll likely see water pooling in the basin or slow drainage. Take a photo for reference before removing.
Tip: Loosen the slip nuts with a wrench first, then loosen by hand to avoid cross-threading. - 3
Remove and clean the trap
Place a bucket beneath the trap, loosen the nuts, and detach the trap. Remove debris by hand or with a brush, rinse the trap, and inspect washers for wear. Reassemble with fresh connections if any component looks degraded.
Tip: Keep the trap upright during removal to prevent losing small parts. - 4
Snake the drain to clear deeper blockages
Insert the snake into the drain, rotate the handle to feed it forward, and pull back to remove debris. If you hit resistance, twist and push gently in small increments. Repeat until flow returns.
Tip: Avoid forcing the snake; forcing can push debris further or scratch pipes. - 5
Flush and test the system
Run hot water to flush loose debris, then run water from multiple fixtures to verify consistent drainage. Check for leaks around the trap and connections, tightening if needed.
Tip: If odors persist, a small amount of baking soda followed by hot water can help neutralize smells. - 6
Assess venting and plan preventive maintenance
Evaluate whether gurgling occurs after draining and consider vent access. If venting seems blocked, do not force hardware; call a professional. Schedule regular maintenance such as routine trap cleaning and screen replacement.
Tip: Keep a maintenance log to track when components were cleaned or replaced.
Got Questions?
What is the role of the P-trap in drain mechanics?
The P-trap prevents sewer gases from entering the home while allowing water to flow. It also traps debris, which can be removed if it causes a clog. Keep it clean and intact to maintain proper drainage.
The P-trap blocks gases from coming up through the drain and catches debris. Keep it clean to maintain smooth drainage.
Can chemical drain cleaners fix all clogs?
Chemical cleaners can provide a temporary fix for minor clogs, but they can damage pipes and vent systems if misused. Mechanical methods like a snake are safer and more effective for persistent blockages.
Chemicals may help briefly but can hurt pipes. Mechanical clearing with a snake is safer and usually more effective.
When should I call a plumber for drain issues?
Call a plumber if clogs persist after attempting mechanical clearing, if multiple fixtures are affected, or if you notice foul odors or water backing up. A pro can diagnose venting issues and assess the main drain.
Call a plumber if clogs persist after DIY attempts or if multiple fixtures are involved.
What basic safety steps should I follow?
Always wear gloves and eye protection, disconnect electrical sources near the work area, and work slowly to avoid leaks or injuries. Keep a bucket handy to catch water, and never force tools into pipes.
Wear protection and work slowly to avoid injuries. Have a bucket ready for spills.
How can I prevent future clogs?
Install drain screens, avoid pouring grease down the sink, and perform periodic maintenance such as flushing with hot water and cleaning traps. Regular inspection reduces the chance of unexpected clogs.
Use screens, don’t pour grease, and do regular flushes to prevent clogs.
Is venting always required for drains?
Most drainage systems rely on venting to equalize pressure. If vents are blocked, you may see gurgling, slow drainage, or sewer odors. A professional can assess and clear blocked vents safely.
Yes, vents help pressure balance. If blocked, call a pro to assess.
Watch Video
The Essentials
- Understand the drain path from fixture to sewer.
- Prioritize the P-trap as the first suspect for clogs.
- Use a plumber’s snake safely to clear blockages.
- Ventilation issues require different strategies; know when to call a pro.