Drain Radiator Car: Step-by-Step Guide for DIYers
Learn how to safely drain your car’s radiator, flush old coolant, and refill with fresh coolant. This educational, step-by-step guide covers tools, safety tips, common pitfalls, disposal, and maintenance to prevent overheating.

Drain radiator car: This quick answer outlines the step-by-step process to safely drain a car’s radiator, flush old coolant, and refill with fresh coolant. You’ll need basic hand tools, a drain pan, wheel chocks, gloves, and eye protection. Follow these steps carefully to prevent burns, avoid spills, and prevent engine overheating.
Why Drain Radiator Car: When and Why
Keeping your cooling system healthy is essential for preventing engine overheating and costly repairs. Draining the radiator and replacing the coolant is a routine maintenance task that helps remove rust byproducts, scale, and old coolant that loses its protective properties. According to Drain Guide, a scheduled coolant service every 2-3 years or 30,000 miles (whichever comes first) is a practical guideline for most passenger cars, though you should follow the vehicle’s owner manual. If you notice a sweet smell, white exhaust, or a sludgy coolant color, it’s a sign to drain and flush sooner. Always perform this task when the engine is cool, in a well-ventilated area, and with a suitable container ready to collect spent coolant. This reduces environmental risk and prevents skin contact with hot liquid. The goal is to replace older coolant with the proper mix to protect the radiator, hoses, and the water pump.
Safety First: Risks and Protections
Working under a hot engine risks burns from hot coolant and steam. Wear protective gloves, eye protection, and long sleeves. Work in a ventilated area, and never open a hot radiator cap. If you must relieve pressure, loosen the cap slightly only after the system has cooled. Collect used coolant in a labeled, leak-proof container; never pour it down a storm drain or soil. Keep children and pets away from the work area. Ethylene glycol-based antifreeze is poisonous; if swallowed, seek medical attention. Following local disposal rules helps protect waterways. Finally, verify you’re using the right coolant type and concentration for your vehicle to prevent overheating or corrosion.
Tools and Materials You'll Need
- Drain pan (large enough to hold several liters) - essential
- Wrench or pliers to open drain plug - essential
- Distilled water for flushing - essential
- Fresh coolant suitable for your vehicle - essential
- Funnel for precise pouring - essential
- Protective gloves and safety glasses - essential
- Rags or absorbent towels - helpful
- Wheel chocks to prevent movement - essential
- Container for old coolant disposal - essential
Note: Always consult your vehicle’s manual for the exact coolant type and mixture.
Step-by-Step Overview
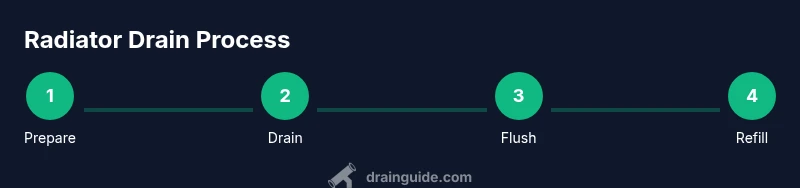
Here is a practical overview of the process: 1) prepare and secure the vehicle; 2) drain old coolant; 3) flush the cooling system; 4) refill with new coolant; 5) bleed air from the system; 6) check for leaks and correct levels; 7) clean up and dispose of waste; 8) monitor after the drive for any signs of trouble. For full, detailed steps, see the dedicated Step-by-Step section.
Step-by-Step Overview (Expanded)
Flushing the System: When and How
Flushing is recommended when the coolant looks old or your engine exhibits overheating, corrosion, or debris in the coolant. Use distilled water to flush through the radiator and heater core where possible. Do not use strong cleaners in a closed system unless specified by your vehicle's manufacturer. Run the engine with the heater on high to help purge air while you flush, then let it cool before rechecking levels.
Refill and Bleed: Getting the Mixture Right
After the system has been flushed and drained, refill with the correct coolant-to-water ratio as specified by your manufacturer. Start with a partial fill, run the engine with the radiator cap off or the bleeder valve open (as your model allows), and top up until the level stabilizes in the reservoir. Replace the cap and continue to run the engine until the thermostat opens and the radiator fans engage to expel any remaining air pockets.
Common Pitfalls and Troubleshooting
Air pockets can cause overheating and poor heater performance. Watch for a sweet smell, green or brown sludge, or a persistently low coolant level after a refill. If you notice leaks around hoses or the drain plug, tighten connections or replace worn gaskets. Never mix coolant types unless explicitly allowed by your vehicle’s manual.
Disposal and Environmental Responsibility
Used coolant is toxic and must be disposed of properly. Transport it in a sealed container to a recycling facility or an authorized automotive shop. Do not pour it on the ground or into storm drains. Always clean up spills with absorbent material and dispose of that material according to local regulations.
Maintenance After Service
Record the service date and coolant type, which helps with future maintenance planning. Periodically check the coolant level and color in the reservoir during warm months and follow the vehicle’s manual for service intervals. A properly maintained cooling system reduces the risk of overheating and extends engine life.
Tools & Materials
- Drain pan (5-7 liters minimum)(Hard plastic or metal with a pour spout)
- Wrench or pliers(To loosen the radiator drain plug)
- Distilled water(For flushing and dilution if needed)
- Fresh coolant(Use the coolant type and mix ratio specified by the vehicle manufacturer)
- Funnel(For clean pouring into the reservoir)
- Protective gloves(Chemical resistant preferred)
- Safety glasses(Protect eyes from splashes)
- Wheel chocks(Prevent vehicle movement)
- Rags or absorbent towels(Clean spills and wipe hands)
- Coolant disposal container(Label and keep until recycling)
Steps
Estimated time: Total time: 60-90 minutes
- 1
Prepare and secure the vehicle
Park on a level surface, engage parking brake, and place wheel chocks. Allow the engine to cool completely before touching any coolant system components. Gather all tools and materials in one accessible area to minimize interruptions.
Tip: Never work on a hot engine; hot coolant can cause severe burns. - 2
Position drain pan and locate drain plug
Place the drain pan under the radiator drain plug or lower hose drain point. If your vehicle uses a drain valve, locate it on the radiator or engine block. Have the funnel ready for controlled draining and note the plug type.
Tip: If there’s no obvious drain, consult the owner’s manual for the drain location. - 3
Loosen the radiator cap (if safe)
With the engine cool, slowly loosen the radiator cap to relieve any residual pressure. Remove completely only if you’re sure no steam will escape. This step ensures a smoother, faster drain.
Tip: If in doubt, skip this step until you’re sure the system is cooled. - 4
Open drain plug and drain coolant
Carefully open the drain plug and allow old coolant to drain into the pan. Let it drain until the flow stops to ensure most of the old fluid is removed.
Tip: Keep hands away from the hot radiator housing and hoses. - 5
Flush the cooling system
Attach distilled water and run the engine with the heater on max for a few minutes to flush out remaining debris and old coolant. Repeat until the discharge runs clear.
Tip: Avoid using strong cleaners unless your vehicle manufacturer approves. - 6
Refill with fresh coolant
Close the drain plug, then begin refilling with the recommended coolant mix using a funnel. Fill slowly to avoid air pockets.
Tip: Check the manual for the exact coolant-to-water ratio. - 7
Bleed air and bring to proper level
With the engine running (and the radiator cap either on or off per your car’s guidelines), watch the coolant level and add as needed until the level stabilizes. Ensure the heater is circulating warm air.
Tip: Heater on max during bleeding helps purge trapped air. - 8
Check for leaks and finish up
Turn off the engine, reseat the radiator cap, and inspect hoses and the drain plug for leaks. Recheck the coolant level after cooling down and top off if necessary. Dispose of old coolant properly.
Tip: Keep a log of the service date and coolant type for future maintenance.
Got Questions?
Do I need to drain the radiator at every coolant change?
Not every maintenance interval requires a full drain. Some vehicles only need a top-off or a simple flush. Check your owner’s manual for the recommended service interval and follow the guidelines for your specific model.
You don’t always need a full drain with every coolant change; check your manual to know what your car requires.
Can I reuse old coolant after draining?
Reusing old coolant is not recommended. Old coolant loses its protective properties and can introduce contaminants. If you drain, flush, and refill, use fresh coolant to maintain system protection.
No, it’s best to replace with fresh coolant to keep the cooling system protected.
What type of coolant should I use?
Use the coolant type and mixture ratio specified by the vehicle manufacturer. Mixing different coolant bases or concentrations can cause corrosion and overheating.
Always follow the manual for the exact coolant type and mix.
Do I need to flush the heater core?
Flushing the heater core is optional and depends on symptoms like poor heating or muddy coolant. If you suspect debris, a targeted heater-core flush may be beneficial.
Only flush the heater core if you’re sure there’s an issue with the heater performance.
How long does the whole process take?
Most car radiator drainage with flushing and refilling takes about 60-90 minutes, depending on vehicle accessibility and how long the system needs to bleed air.
Typically under an hour or so, depending on your car.
What if I see leaks after refilling?
If you notice leaks, inspect hose clamps and the drain plug. Tighten connections if needed and replace worn hoses or seals. If leaks persist, stop and consult a mechanic.
If leaks show up, fix the fittings or get professional help.
Watch Video
The Essentials
- Prepare and secure the vehicle before starting.
- Drain old coolant and flush with distilled water as needed.
- Bleed air to prevent overheating and ensure proper coolant level.
- Dispose of used coolant responsibly at a recycling center.
- Document the coolant type and service date for future maintenance.