Drain Valve Leaking on Water Heater: Quick Fix Guide
Urgent troubleshooting guide for a leaking drain valve on a water heater. Identify causes, safety steps, a step-by-step repair, prevention tips, and when to call a pro. Drain Guide

Most leaks from the drain valve on a water heater come from a loose packing nut or a worn valve seat. Start by tightening the drain valve a quarter-turn and wiping threads clean. If dripping continues, replace the packing or valve. If unsure, shut off cold water, relieve pressure, and call a professional if needed.
Understanding why the drain valve on a water heater leaks
A leaking drain valve is a surprisingly common problem for homeowners, and it can range from a tiny drip to a steady stream. The phrase drain valve on a water heater leaking describes the symptom you see where coolant-like water or hot water escapes from the valve at the bottom of the tank. According to Drain Guide, most small leaks come from the packing nut or the valve seat wearing out over time, not from a cracked tank. In practice, you’ll notice a slow drip when the heater sits idle or a more pronounced leak after the system cycles. Recognizing the difference between a true valve leak and condensation is crucial, because mistaking the latter for a leak could lead to unnecessary repairs. A quick inspection can help you decide if you can safely address the issue yourself or if you should call a professional.
Safety considerations before you begin
Before touching any hot-water plumbing, power source, or gas line, ensure safety first. Shut off the cold-water supply to the heater and, if you have an electric heater, switch off the circuit at the breaker. For gas heaters, set the gas control to the pilot or off position as directed by the manufacurer’s manual. Allow the tank to cool briefly if it’s hot, wear gloves and eye protection, and keep a bucket or towel ready to catch any drips. It’s essential to relieve pressure by opening a nearby faucet to vent air. If you’re unsure about any step, don’t proceed; call a professional. Drain Guide emphasizes safety as the top priority when dealing with hot water and pressurized systems.
Common causes of a leaking drain valve
There are a few frequent culprits behind a leaking drain valve. A loose packing nut around the drain valve is by far the most common, especially after movement or vibration from seasonal plumbing work. A worn or damaged valve seat or stem can also cause seepage even when the packing seems tight. Corrosion on the valve body or mineral buildup from hard water may force leaks at threads or seals. Finally, improper installation or a damaged replacement valve can create misalignment that leads to dripping. By understanding these causes, you can prioritize the simplest fixes first and avoid unnecessary parts replacement.
Quick checks you can perform safely
Start with non-destructive checks to confirm the leak’s source. Dry the area around the valve, then gently wipe the packing nut and threads. Use a bright flashlight to inspect for cracks in the valve body or signs of corrosion. If the leak appears to be coming from the packing, tighten the packing nut by a modest amount (usually 1/4 turn) and recheck after a few minutes. Do not overtighten, as that can damage the packing and worsen the leak. If the leak continues after tightening, prepare to replace the packing or the entire valve. Always test the system after reassembly by letting the water heater refill and re-pressurize slowly.
Step-by-step repair for a loose or worn valve
- Shut off the water supply and power or gas to the heater; 2) Relieve system pressure by opening a nearby faucet; 3) Loosen and then re-tighten the packing nut by a quarter-turn; 4) If dripping persists, remove and replace the packing washer or the entire drain valve; 5) After replacement, reassemble tightly and slowly reopen the cold-water supply while watching for leaks; 6) Restore power or gas and run a test cycle to confirm a leak-free valve.
When to replace the drain valve rather than repair
If the valve shows signs of corrosion, cracks, or persistent leakage after a proper tightening or packing replacement, replacement is usually the best option. A corroded valve head or stem can fail again shortly after a repair, and replacing it reduces the risk of a bigger leak or a tank flood. Choose a compatible replacement valve designed for your heater’s model and capacity. If you’re uncertain about compatibility, consult the heater manufacturer’s guide or a licensed plumber. Replacements should be performed with the same safety precautions described earlier.
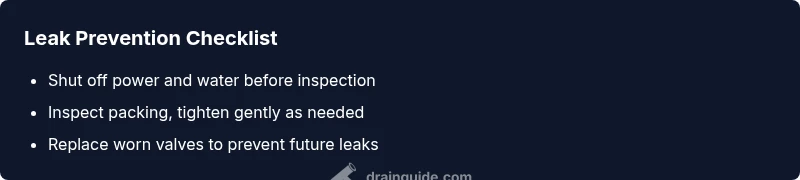
Prevention and maintenance to avoid future leaks
Routine maintenance can dramatically reduce the odds of leaks from the drain valve. Inspect the valve during periodic system checks, keep threads clean and dry, and avoid overtightening the packing nut in the future. If you live in hard-water regions, consider a filtration or water-softening solution to reduce mineral buildup. Use a corrosion-resistant valve packing and periodic replacement intervals to extend life. Keeping a small leak test schedule—quarterly checks—helps catch issues before they become emergencies.
Steps
Estimated time: 40-60 minutes
- 1
Power and water shutoff
Turn off the power to the heater (electric) or set to pilot/off (gas). Close the cold-water supply valve to stop incoming water. This prevents more water from entering the tank as you work.
Tip: Confirm the valve is fully closed by turning clockwise until snug. - 2
Relieve pressure and drain a little
Open a nearby hot-water tap to relieve pressure in the line. If you have a drain hose, drain a small amount of water from the tank to access the drain valve more easily.
Tip: Do not drain a full tank unless you’re prepared to refill and reheat it later. - 3
Inspect and tighten packing
Dry the area around the valve. Tighten the packing nut by a small amount (about 1/4 turn) and re-check for leaks after a few minutes.
Tip: If there’s no leak after tightening, reassemble and resume normal operation slowly. - 4
Replace packing or valve if needed
If dripping persists, remove the packing washer and inspect for wear. Replace packing and washer, or replace the entire drain valve if necessary.
Tip: Take care to keep threads clean and avoid overtightening during reassembly. - 5
Test for leaks and restore service
Reconnect the cold-water supply, slowly refill the tank, and restore power or gas. Check the valve area for any sign of leakage as pressure returns.
Tip: Monitor for 10–15 minutes to ensure a stable, leak-free valve. - 6
Final safety check
Ensure the area is dry and there’s no pooling water. If a steady leak returns, proceed to professional replacement.
Tip: Keep a bucket handy as a precaution during testing.
Diagnosis: Water heater drain valve is leaking or dripping.
Possible Causes
- highLoose or worn packing nut around the drain valve
- mediumDamaged valve seat or stem from wear
- lowCorrosion or mineral buildup causing seepage
Fixes
- easyTighten packing nut by a quarter-turn and clean threads
- mediumReplace the valve packing or the entire drain valve if dripping persists
- hardShut off water, drain the tank as needed, replace valve or consult a pro
Got Questions?
Why is my water heater drain valve leaking after I tightened it?
Leaks after tightening often indicate worn packing or a damaged valve seat. Replacement of the packing or the valve itself is usually required. If the leak continues, stop and consult a professional.
If tightening doesn’t stop the leak, the packing or seat is worn and you may need to replace the valve. Consider calling a pro.
Can I fix a leaking drain valve myself?
Yes for minor leaks if you follow safety steps: shut off power and water, drain small amounts, and carefully tighten or replace packing. For stubborn leaks, contact a licensed plumber.
You can try basic fixes if you shut off power and water, but be ready to call a pro for persistent leaks.
When should I replace the drain valve instead of repairing it?
If corrosion is present or leaks persist after repairs, replacement is usually best. Choose a compatible valve and follow safety steps during installation.
Replace the valve if it’s corroded or keeps leaking after fixes.
Is it safe to drain a water heater to fix the drain valve?
Draining reduces pressure and allows access, but it’s risky. Hot water, scalding, and tank pressure demand care. Proceed only with proper steps and protective gear.
Draining can be risky—take precautions and avoid if you’re unsure.
Do I need a professional if my gas water heater leaks from the drain valve?
Gas heaters require immediate professional attention due to fire risk. Shut off gas and water, ventilate, and call a licensed plumber or the gas company.
Gas heater leaks are dangerous—shut off gas and call a pro now.
Watch Video
The Essentials
- Turn off water and power before inspecting the valve.
- Tighten or replace the valve packing if leaks persist.
- Replace the valve if corrosion or significant wear is detected.
- Regular maintenance reduces future leaks.