GE Washer Will Not Drain: Quick Troubleshooting Guide
Learn practical steps to diagnose and fix a GE washer that won't drain. This Drain Guide troubleshooting article covers common causes, safe checks, and prevention tips to keep your laundry flowing.

GE washer will not drain? The most likely causes are a clogged drain pump filter, a blocked or kinked drain hose, or a failed drain pump. Start by unplugging the machine and clearing the pump basket, then inspect the drain hose for kinks. If the pump still won’t run, test the lid switch and power. See the full guide for details.
Why GE washer will not drain
According to Drain Guide, a GE washer will not drain is typically caused by a clog, a faulty pump, or a kinked drain hose. When water sits in the tub, it can create odors and mold if not addressed quickly. Start by unplugging the machine and moving it away from the wall to access hoses safely. A basic inspection of the pump basket and visible hoses often reveals the simplest fix: a jammed coin, button, or hair clog in the pump impeller or drain line. If you notice standing water after opening the lid, don’t panic—this is a solvable problem with a methodical approach. Remember to work on a dry surface and keep towels handy. Safety first: disconnect power, turn off the water supply, and avoid working with live electricity near water.
Common causes at a glance
In many cases, the root cause is a partial or full clog in the drain path. A GE washer will not drain commonly stems from:
- A clogged pump filter or debris in the filter assembly.
- A blocked drain hose or kinked hose behind the machine.
- A failed drain pump or burnt-out motor.
- A defective lid switch or wiring issue that prevents the motor from running.
- A jam in the drain pump impeller due to coins, buttons, hair, or fabric fibers.
Drain Guide analysis shows that addressing the simplest cause first—like loosening a clog in the pump filter—often resolves the issue without service. If the pump is hot or emits a burning smell, stop and call a professional. Keeping a small maintenance routine can prevent these failures. Drain Guide’s experience suggests checking for newer model changes that might affect access to the pump filter.
Safety first: power down and prepare
Before you touch anything, unplug the washer and turn off the water supply. Move the machine slightly away from the wall to access the rear panel and hoses. Wear gloves to protect sharp edges and use a flashlight to inspect the pump, hoses, and clamps. Keep a bucket or towels handy to manage residual water. If any maintenance tasks require you to tilt the machine, do so slowly and with a second person to prevent injuries. Remember, safety reduces the risk of electrical shock and water exposure.
How to check the drain hose and pump filter
- Locate the drain hose behind the washer; remove the kink or crushing under the cabinet.
- Disconnect the hose and run water through it to verify free flow.
- Check the pump filter or trap (behind a small access panel) for lint, coins, hair, and fabric fibers; remove obstructions with fingers or pliers.
- Reassemble and run a short drain cycle to observe flow.
If you find debris in the filter, remove it entirely and re-test. If water still won’t drain, inspect the clamp and hose for leaks or disconnection. As emphasized by Drain Guide, a clean filter and hose are often enough for a quick fix.
Diagnosing the pump and lid switch
- With the panel removed, manually spin the pump impeller to confirm it moves freely.
- Use a multimeter to test for continuity on the lid switch circuit; replace if open-circuit is detected.
- Check the drive belt if your GE model uses one; a broken belt will prevent draining.
- Verify the control board or timer is sending the drain command during the cycle.
If the impeller won’t turn or the lid switch tests fail, this is a clear signal you may need to replace a component. A failed lid switch can mimic a pump problem, so test both before ordering parts.
Clearing stubborn clogs and age-related failure
- Use a drain auger or flexible snake to clear deeper lines; rotate gently to avoid damage.
- For persistent clogs, a safe, non-corrosive drain cleaner compatible with washers can help; avoid caustics.
- Reseal hose connections and clamps after clearing to prevent leaks.
- If the pump is warm but not running, perform a reset by powering down for a minute and restarting.
Dealing with older machines might reveal worn pump impellers or cracked hoses that require replacement. Drain Guide notes that proactive maintenance minimizes surprising outages and helps extend the life of a GE washer.
When to replace parts vs call a pro
If you’ve verified power, lid switch, hoses, and pump but water still won’t drain, diagnosing beyond basic checks becomes necessary. Replacing a failed drain pump, motor, or control module often restores function. If the model is under warranty, contact GE support; otherwise, a licensed technician can determine if the component failure is due to wear or misconfiguration.
The decision to replace rather than repair depends on the overall cost, age of the washer, and availability of genuine parts. If you see rust, cracks, or consistent leaks, a pro may be the most cost-effective solution. Drain Guide recommends weighing value and safety when deciding on major repairs.
Prevention tips to keep your GE washer draining freely
- Clean the pump filter every few months and after heavy use.
- Use a lint catcher or mesh filters with every load to reduce debris in the drain path.
- Do not overload the washer; high load weights stress hoses and pumps.
- Run a hot water rinse periodically to dissolve soap scum buildup in the drain line.
- Schedule annual professional maintenance if the manufacturer recommends it.
By adopting these simple habits, you’ll reduce the chance of future drain failures. The Drain Guide team recommends keeping a small toolkit handy for quick checks and routine maintenance.
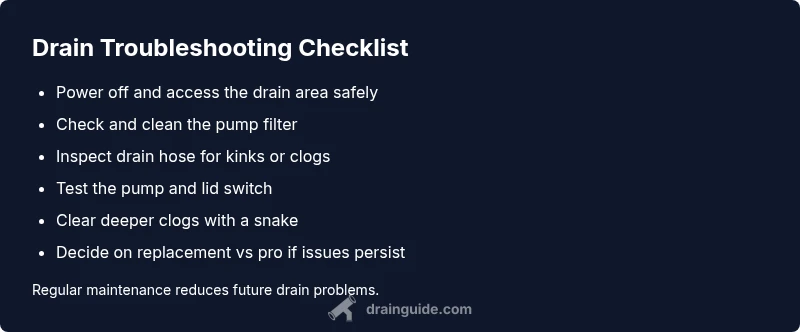
Steps
Estimated time: 60-90 minutes
- 1
Power down and access the drain area
Unplug the washer, shut off the water, and move the unit to access the back or bottom for hoses and the pump. Clear a workspace with towels and a bucket. This initial step reduces the risk of spills and electric shock.
Tip: Take a photo of hose connections before removal for reference. - 2
Inspect and clear the pump filter
Open the access panel, locate the filter or trap, and remove any lint, coins, or fabric. Rinse under running water to ensure a clear path. Reinsert the filter and secure the panel.
Tip: Use gloves to protect fingers from sharp edges. - 3
Check drain hose for kinks
Disconnect the hose from the tub and the wall, inspect for kinks or crush points, and straighten. Reconnect firmly and run a short drain cycle to test flow.
Tip: Ensure the hose is not pressed against the wall or bottom panel. - 4
Spin the pump impeller manually
With the panel off, try to rotate the impeller by hand to confirm it moves freely. If it binds, the pump may need replacement.
Tip: If hard to turn, don’t force it; a seized pump is a sign of failure. - 5
Test the lid switch circuit
Use a multimeter to check continuity across the lid switch leads when the lid is open and closed. Replace the switch if continuity is inconsistent.
Tip: Always unplug before testing electrical components. - 6
Run a test drain cycle
Power on and run a short drain cycle to observe whether water evacuates. Listen for motor hums or grinding that could indicate a motor issue.
Tip: Do not leave the machine unattended if it’s making unusual noises. - 7
Inspect for deeper clogs with a snake
If water remains, use a flexible drain snake to clear deeper lines. Rotate gently and pull out debris as it comes free.
Tip: Avoid forcing the snake; resistance may indicate a more serious blockage. - 8
Decide on repair vs pro
If tests point to a failed pump or control board, weigh replacement costs against service call. For complex electrical issues, a licensed technician is recommended.
Tip: Keep receipts and model info ready for parts and warranty checks.
Diagnosis: GE washer will not drain
Possible Causes
- highClogged drain pump filter or debris in the filter
- highBlocked or kinked drain hose
- mediumFailed drain pump
- mediumDefective lid switch or wiring issue
- lowControl board issue preventing drain command
Fixes
- easyClear the pump filter and remove any debris; re-test drain function
- easyUnkink or straighten the drain hose and ensure it’s properly routed
- mediumTest and replace the drain pump if it fails electrical or mechanical tests
- easyTest lid switch continuity and replace if faulty; verify wiring
- hardInspect the control board or timer and consider professional service
Got Questions?
Why won't my GE washer drain even after clearing the pump filter?
If clearing the filter didn’t fix it, check the drain hose for kinks, test the lid switch, and verify the pump runs during a drain cycle. Electrical issues or a faulty control board may also be responsible. If still stuck, consider a professional assessment.
If clearing the filter didn’t fix it, check the hose and lid switch, and ensure the pump runs during drain. Electrical components may be involved.
How can I tell if the drain pump is bad?
Look for no humming when the drain cycle starts, a motor that won’t spin, or continuity issues on the pump circuit with a multimeter. Any of these indicate a failed pump that may need replacement.
If you don’t hear the pump or it doesn’t spin when draining, the pump is likely bad.
Is it safe to use a chemical drain cleaner in a GE washer?
Most manufacturers caution against caustic drain cleaners in washers because they can damage hoses and seals. Use mechanical methods first, and consult the manual for approved products.
Avoid caustic cleaners; mechanical clearing is usually best for washers.
Can a clogged drain cause leaks elsewhere?
Yes. Clogs increase pressure and can force water toward seals or joints, causing leaks. Check hoses and clamps after clearing a clog.
Yes, clogs can push water to leaks; inspect hoses after you fix the clog.
When should I replace the washer instead of repairing?
If repair costs approach or exceed the price of a replacement, or issues recur after repair, replacement is often more economical. Consider the age and warranty status.
If repairs keep coming back or costs are high, replacement may be best.
Do I need a professional for GE washer drain problems?
For complex electrical problems or uncertain diagnostics, a licensed technician is recommended. Warranty terms may also require professional service.
If you’re unsure or the problem involves electrical parts, call a pro.
Watch Video
The Essentials
- Start with simple checks: filter, hose, and basic pump test.
- Electrical and safety steps protect you during DIY work.
- If the pump or lid switch tests fail, plan for part replacement.
- Prevent future drain issues with regular maintenance and mindful loads.