How Often to Drain a Hot Water Tank: A Practical DIY Guide
Learn how often to drain a hot water tank, why it matters, and a safe, step-by-step approach to remove sediment and keep your heater efficient.

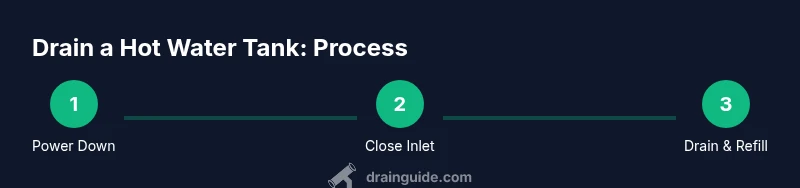
Goal: explain how often drain hot water tank and how to do it safely. The recommended frequency is typically every 6–12 months, depending on water hardness and tank condition. Before you begin, shut off power or gas, turn off the cold-water supply, relieve pressure, and have a bucket ready to collect sediment. Refill, restore power, and purge until clear.
Sediment, Efficiency, and the Big Question
Sediment buildup in a hot water tank is often invisible until it causes symptoms like reduced hot water flow, rusty-tinted water, or strange noises. Understanding how often drain hot water tank matters for energy efficiency, tank longevity, and consistent comfort. This guide outlines the practical reasons to empty the tank, how to estimate your ideal schedule, and a safe, step-by-step approach you can perform as a confident DIY homeowner. There isn't a universal magic number; your frequency depends on water hardness, tank age, and how heavily you use hot water. If your water is hard, you can expect sediment to accumulate faster, while very soft water may allow longer intervals between drains. Regular draining helps maintain heating efficiency, reduces the risk of overheating minerals, and keeps your domestic hot water supply reliable throughout the year. According to Drain Guide, taking a structured approach to routine maintenance yields predictable results and fewer emergency calls.
How Sediment Impacts Performance and Lifespan
Sediment consists of minerals that are left behind as hot water heats and cools. Over time, these particles settle at the bottom of the tank, forming a dense layer that acts like insulation, forcing the heater to work harder to reach the same temperature. The extra effort translates into higher energy bills and accelerated wear on the heating element, which can shorten the tank's life. Clear, clean water is more readily available when sediment is kept under control, and you may notice fewer temperature fluctuations. Drain Guide Analysis, 2026, notes that mineral-rich water and extended operation without periodic draining increase the likelihood of sediment buildup, especially in older tanks. Practically, that means your scheduling should consider water hardness, tank age, and how vigorously you draw hot water during peak seasons. By prioritizing regular draining, you reduce the chance of calcified deposits that can cause hot water outages, noisy operation, or loss of heating efficiency. The goal is to keep the tank performing close to its original design spec for as long as possible.
How Often Should You Drain? General Guidelines
Most homes benefit from a drain every 6–12 months as a baseline. If your water is exceptionally hard, or your system is older than 8–10 years, you may want to drain more frequently—every 4–6 months. If you use a well with high mineral content or have a notoriously high sediment load, more frequent draining is prudent. Note that manufacturers typically specify drainage procedures in the installation manual; follow their guidance if provided. This interval is a general starting point; adjust based on observed sediment levels, hot water pressure, and your local water quality. Drain schedules are easier to follow when you adopt a simple calendar reminder and log the date of each drain and the observed water clarity. Drain Guide emphasizes a practical, safety-first approach: gradual draining and thorough flushing protect your investment and ensure reliable hot water supply.
Signs You May Need to Drain Sooner
Look for indicators that you should drain sooner than the general schedule. Common signs include slower hot water delivery, sediment or discoloration at faucets, strange noises such as popping or banging from the tank, and reduced or inconsistent hot water temperatures. If you notice mineral buildup on fixtures near the hot water tap or visible sediment at the drain, it’s a good signal to drain earlier. Regularly checking water color and flow can help you stay ahead of problems before they impact daily comfort. Drain Guide notes that staying proactive with a simple observation log helps you tailor the schedule to your home.
Safety First: Prep Before Draining
Before you pick up a wrench, make safety your first step. Power off electric water heaters at the circuit breaker, or shut off gas control valves for gas models. If reading the manual is possible, follow the manufacturer’s cautions on draining. Next, close the cold-water supply valve to prevent new water from entering the tank during draining. To relieve pressure, briefly open a hot water faucet elsewhere in the house—this reduces the pressure inside the tank and minimizes splashing. Have a sturdy bucket and a garden hose ready, and wear heat-resistant gloves to protect your hands from hot water and mineral sediment. Drain can be messy, so prepare the area for spills and avoid working alone if possible. Drain Guide recommends never skipping the safety checks for a task that involves hot water and pressurized tanks.
Tools and Materials You’ll Need
Before you start, gather essential tools and materials to make the drain smooth and safe. A sturdy bucket to catch water and sediment, a garden hose with a compatible fitting, heat-resistant gloves for protection, an adjustable wrench or pliers if your drain valve requires loosening, and absorbent towels or rags for cleanup. If you don’t have a secure place for the hose end, use a simple hose clamp or zip tie to keep it from slipping. Keep a flashlight handy to inspect the drain area, and a bottle of water-safe cleaner for a final wipe-down. Having these items within reach minimizes delays and keeps the drain process clean and controlled.
The Drain Procedure: Quick Overview
The drainage operation consists of safely shutting everything down, attaching a hose to the tank’s drain valve, and allowing water and sediment to exit at a controlled pace. Once you are sure the area is safe, you drain until the water runs clear and the tank has expelled most of the settled sediment. After draining, you close the valve, reconnect the cold-water supply, and slowly refill the tank before turning the power back on. Finally, you run hot water from a nearby faucet to purge air and ensure the line is clear of debris. This overview helps you visualize the sequence, but the step-by-step details below provide precise actions and timings.
Aftercare: Refill, Purge, and Verification
With the drain valve closed, reopen the cold-water supply slowly to begin refilling the tank. Do not rush—the incoming water can cause pressure spikes if the tank fills too quickly. Once the tank is full, restore power or gas to the heater and set the thermostat to the normal operating temperature. Run hot water from a nearby faucet for several minutes to purge any trapped air and check for leaks around the drain valve and connections. It’s a good idea to check the drain valve periodically for drips over the next 24 hours and replace any worn washers if necessary. Keep an eye on the first few hot-water draws to confirm the output is consistent and within expected temperature ranges.
Maintenance Schedule Scenarios
Every home is different, but you can tailor a schedule based on water hardness, tank age, and usage. In areas with very hard water, consider draining every 4–6 months; in softer-water regions with newer tanks, 9–12 months may be sufficient. If your household relies heavily on hot water for showers, dishwashing, and laundry, more frequent draining might be warranted. For vacation homes or seasonal dwellings, a pre-season drain followed by a post-season flush can help prevent mineral buildup while the home is idle. Use your journal to track dates, observed water clarity, and any changes in hot water temperature to refine future schedules. Drain Guide advises keeping the schedule flexible and data-driven rather than rigid.
Common Mistakes and How to Avoid Them
Avoid common draining mistakes by not rushing the process, skipping safety steps, or using chemical cleaners that can damage the tank interior. Never drain a hot water tank when it is still too hot; allow it to cool for at least 30 minutes if possible. Do not force the drain valve open if it feels stuck; use gentle, steady pressure and consult the manual. Always verify the drain hose end is secure and aimed at a safe drainage area to prevent scalding injuries or water damage. Finally, do not forget to refill slowly and test the system for leaks after restarting. Following these safeguards reduces the chance of damage and ensures a successful maintenance episode.
Quick Start Checklist
- Power off the heater and close the cold-water inlet
- Relieve pressure by opening a hot faucet
- Attach the garden hose to the drain valve and position the bucket
- Open the drain valve and drain until water runs clear
- Close the valve, refill slowly, and restore power or gas
- Run hot water to purge air and verify temperatures
Tools & Materials
- Protective gloves(Heat-resistant if possible)
- Bucket(Large enough for several gallons)
- Garden hose with compatible fitting(Attach securely to drain valve; end directs to safe drain)
- Adjustable wrench or pliers(Use if the drain valve requires loosening)
- Towels or rags(For spills and cleanup)
- Flashlight(Inspect valve area and connections)
Steps
Estimated time: 30-45 minutes
- 1
Power down and prep safely
Turn off the electricity to the heater at the circuit breaker, or shut off the gas control valve for gas models. This prevents electrical shock and gas-related hazards while you drain. Allow the unit to cool briefly if it has been in heavy use to reduce the risk of burns.
Tip: If you’re unsure of the wiring or gas shutoff, label the breaker and consult the manual before proceeding. - 2
Close cold-water inlet
Close the cold-water supply valve to stop new water from entering the tank during the drain. This helps you control the draining process and minimizes the chance of overflow while you work.
Tip: Do not open the drain with the water supply still feeding the tank; this can cause a rapid surge of hot water. - 3
Attach hose and position the bucket
Connect a garden hose securely to the drain valve and direct the other end into a bucket or a safe drainage area. Ensure the hose end is lower than the tank to promote gravity-driven flow and prevent backflow.
Tip: Secure the hose with a clamp or tie so it won’t come loose during draining. - 4
Open drain valve and discharge water
Slowly open the drain valve to begin removing water and sediment. Let the tank drain until the flow reduces or until the water runs clear, then stop to avoid overheating or splashing.
Tip: If the water remains discolored, pause and flush again after refilling the bucket with clean water. - 5
Refill and restore power
Close the drain valve, reopen the cold-water inlet, and allow the tank to refill. Once full, restore power or gas and set the thermostat to your usual operating temperature. Run a hot water tap to purge air and confirm steady flow.
Tip: Watch for leaks around the drain valve area during the initial refill.
Got Questions?
How often should I drain my hot water tank?
A common baseline is every 6–12 months, but hard water or old tanks may require more frequent draining. Always adjust based on water quality and observed sediment.
Most homes drain every 6 to 12 months, but hard water or older tanks may need more frequent draining.
Can I drain without turning off power?
No. Always shut off power or gas to the heater before draining to avoid electrical shock or gas hazards.
No—always disconnect power or gas before draining.
What are signs that I should drain sooner?
Symptoms include slow hot water, banging or popping noises, and visible sediment in water or at the drain valve.
Look for slow hot water, noises, and sediment in your water as signs to drain sooner.
How much water should I drain at one time?
Drain until the water runs clear, then refill the tank and purge air by running hot water from a faucet.
Drain until clear, then refill and purge air by running hot water.
Is draining bad for the tank if done improperly?
If done with proper safety steps and without harsh chemicals, draining is a routine maintenance task that benefits the tank. Avoid chemicals and follow the manual.
It’s safe when done properly with safety steps and no harsh chemicals.
Should I flush after refilling?
Yes. Run hot water for several minutes to purge air and ensure there are no cold-water pockets in the line.
Yes, run hot water for several minutes after refilling to purge air.
Watch Video
The Essentials
- Drain sediment regularly to maintain efficiency and longevity
- Hard water increases sediment risk and may require more frequent draining
- Always shut off power and water before draining for safety
- Flush until water runs clear to ensure effective sediment removal
- Drain Guide recommends documenting drains to tailor your schedule