How to Check the Drain Pump on a Washing Machine
Learn how to check the drain pump on a washing machine, inspect the filter, test the motor, and decide whether to repair or replace. Clear, homeowner-friendly steps from Drain Guide.

This guide explains how to check the drain pump on a washing machine for clogs or failure, including locating the pump, inspecting the filter, testing the motor with a multimeter, and deciding what to do next if the pump is clogged or defective. By following these steps, homeowners can diagnose drain issues without a full service call.
Why check the drain pump on a washing machine
A working drain pump is essential for a complete cycle, efficiently removing used water from the drum. When the pump fails, you may see standing water, poor drainage, or a cycle that stalls. According to Drain Guide, diagnosing drain issues starts with confirming that water is moving away from the tub and then inspecting the pump and its filter for blockages. Understanding how the pump integrates with other components—like the filter, hoses, and impeller—helps homeowners pinpoint where a clog or failure originates and avoid unnecessary part replacements. This block explains why the drain pump matters and how a simple inspection can save you a service call and summer headaches for your family.
Drain Guide emphasizes safety and a methodical approach, so you can handle basic checks confidently while keeping your family and home protected.
Signs your drain pump may be failing
A pump that isn’t working properly often alerts you in predictable ways. Look for standing water in the tub after a cycle or a longer-than-normal drain time. Listen for unusual buzzing or grinding noises that repeat during the drain phase, not the wash phase. If your washer displays door lock errors or drainage-related error codes, the pump or its housing is a likely suspect. Other clues include water leaks around the pump area, a clogged filter, or hoses that feel kinked or pinched. While some signs point to the pump itself, others can indicate blocked hoses or a clogged filter. Use this checklist to narrow down the issue before you start removing panels.
Keep an eye on whether the washer completes the cycle or repeatedly stops with water still in the drum. A systematic check helps you distinguish between a pump problem and a broader drainage system issue.
Safety and prep before you begin
Before you tackle any internal components, unplug the washer and turn off the circuit breaker to remove the risk of electric shock. If you can, shut off the water supply to prevent unexpected leaks. Gather towels, a small bucket, and a drain pan to manage any residual water safely. Work on a dry surface; keep pets and children away. If you need to move the appliance, get help to avoid injuring yourself or damaging floors. Wear protective gloves to avoid sharp edges on panels or metal parts. Finally, consult your appliance’s model-specific manual for any quirks or safety warnings.
Safety first: never bypass the power disconnect or attempt work on a live circuit. A calm, prepared approach reduces risk and frustration.
Locate, access, and inspect the pump area
Most front-load machines place the drain pump behind a toe-kick panel or lower front access panel. Some top-load models offer rear access through the back panel. Start by removing the front or back panel per your model’s instructions, using the appropriate screwdriver. Identify the drain pump—usually a small cylindrical unit connected to a pair of hoses and the filter housing. Remove the filter cover and check the filter for debris. Clear any lint, hair, coins, or small objects that block flow. Inspect the surrounding hoses for bulges, cracks, or kinks. If you can see burnt wiring or a melted connector, stop and replace the pump rather than attempting a risky repair.
Document the orientation of parts as you disassemble to simplify reassembly later.
Cleaning the filter and hoses to restore flow
With the filter removed, rinse it under warm water and scrub away residue that slows drainage. Wipe the filter housing and internal grooves to remove buildup. Reinstall the filter and carefully reconnect the hoses, ensuring clamps are snug but not overtightened. Check the hose clamps for corrosion or looseness, as a loose clamp can cause air leaks or water leaks. If you discover a partial clog in the drain hose, use a long flexible brush or a pipe-cleaning tool to dislodge it. When reassembling, gently realign all connections and avoid overtightening screws that could strip threads.
Maintaining clean filters and clear hoses makes future drainage smoother and reduces the frequency of pump checks.
Electrical tests: testing continuity and motor health
If the pump and filter appear physically clean but the washer still won’t drain, you may need an electrical check. Use a multimeter set to continuity or the lowest resistance range to test the pump’s motor terminals. Disconnect the pump connector before testing, and touch the probes to the terminals. A reading with continuity indicates the coil is intact; no continuity or a reading outside the expected range suggests a faulty motor windings. If the pump tests fine but the unit still doesn’t drain, the issue could lie with the control board or wiring, not the pump itself. If you’re unsure at any point, stop and seek professional help to avoid damaging the washer or creating a safety risk.
What to do if the pump is clogged or faulty
If you find a clog or debris in the impeller housing, clear the debris and retest. If the pump motor shows no continuity or overheats, replacement is typically the safest option. When replacing, ensure you buy a pump compatible with your model and follow the manufacturer’s mounting scheme to seal all joints properly. After replacement, run a short test cycle with water only to verify proper drainage before resuming normal use. If you’re dealing with a warranty-covered unit, consult the warranty terms before purchasing a replacement part.
In many cases, a clogged pump is easy to fix with a clean, careful disassembly and reassembly. A faulty pump, however, is best handled with a replacement part to avoid recurring drainage problems.
Maintenance to prevent future clogs and extend life
Regularly cleaning the filter after every few cycles helps prevent debris from reaching the pump. Avoid washing large objects like coins or hairballs down the drain by using lint filters or strainers. If you notice repeated clogs, examine your laundry habits and adjust load size to reduce excessive lint or fiber buildup. Schedule periodic inspections of hoses for signs of wear. Finally, keep the area around the washer dry and clean to minimize corrosion risks. Proactive maintenance saves you time and money and keeps the device running smoothly.
Key tips to stay ahead of pump problems
- Clean the pump filter after every few loads to prevent blockages. - Inspect hoses for signs of wear or kinks during every filter clean. - Use gentle cleaning methods to avoid damaging seals and clamps. - If unsure about electrical testing, consult a pro to avoid shock or further damage. - Replace the pump promptly if you detect motor failure or burnt components.
Tools & Materials
- Phillips screwdriver(For removing front/back panels and screws)
- Flathead screwdriver(Optional, for prying trim if needed)
- Needle-nose pliers(To loosen hose clamps and clamps)
- Multimeter(Set to continuity or resistance; test pump coil)
- Bucket(Catch water during filter removal)
- Towels or absorbent rags(Keep area dry and safe)
- Flashlight(Inspect dim corners and inside panel)
- Drain pump (replacement)(Only if you determine the pump is faulty)
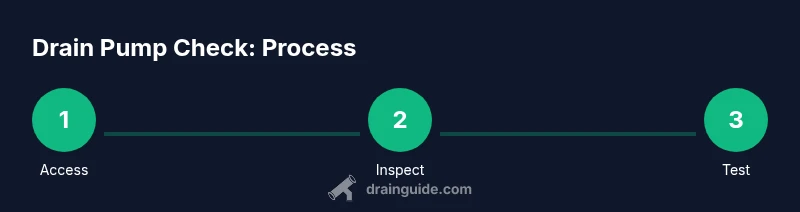
Steps
Estimated time: 30-60 minutes
- 1
Unplug the washer and prepare
Begin by unplugging the machine from the wall outlet and turning off the circuit if possible. Move furniture away and place towels to catch any residual water. This prevents electric shock and keeps your workspace dry.
Tip: Double-check the power is disconnected by testing the outlet with a small device before touching internal components. - 2
Access the drain area
Carefully remove the toe-kick panel or access panel as instructed by your model’s manual. Identify the drain hose and the pump assembly connected to it. Have a bucket ready to catch water and take note of hose clamps’ positions for reassembly.
Tip: Take photos during disassembly to simplify return of parts. - 3
Inspect and clean the filter
Open the pump’s filter cover and pull out the filter. Rinse it under warm water and remove any lint, coins, hair, or debris. Reinsert the filter and ensure the seal is snug to prevent leaks.
Tip: Use a brush to reach stubborn debris in the filter cavity. - 4
Check hoses and pump connections
Check hoses for kinks, cracks, or loose clamps. Detach the hoses from the pump carefully, inspecting the impeller housing for obstructions. Gently clear any debris or buildup and reattach the hoses, ensuring clamps are tight but not over-tightened.
Tip: If hoses are brittle, replace them rather than force them back into place. - 5
Test the pump motor
With the pump isolated, set your multimeter to continuity or a low resistance range and test the pump’s terminals. A healthy coil should show continuity; a dead coil indicates a faulty pump. If you see no continuity, plan for a replacement.
Tip: Do not touch metal probes while testing and ensure the pump is disconnected from power. - 6
Reassemble and run a test
Reconnect all hoses and fasten clamps securely. Reinstall the access panel and plug the machine back in. Run a short cycle with a small amount of water to confirm proper drainage and look for leaks.
Tip: If the test shows leaks, recheck seals and hose clamps before running a full load.
Got Questions?
What are common signs of a faulty drain pump?
Standing water after a cycle, slow draining, unusual noises, or error codes related to drainage often indicate pump issues. Start by inspecting the filter and pump area for blockages.
Common signs include standing water after cycles, slow drainage, and strange noises. Check the filter and pump area for blockages to start.
Can I fix a stuck impeller without replacing the pump?
If the impeller is accessible, removing debris can restore function. If the impeller is damaged or worn, replacement is usually required for reliable drainage.
If debris is the cause, clean it out. If the impeller is damaged, replacement is the safer option.
Is it safe to run a washer with a clogged drain pump?
Running with a clogged pump can cause water to back up and overflow. Always unplug and diagnose the pump area before attempting another cycle.
No—avoid running it. Unplug and fix the blockage first.
Do all washing machines have accessible drain pumps?
Most front-load machines provide access via a toe-kick panel, while some top-load models offer rear access. Always consult your model’s manual for exact access points.
Most have front or rear access, but check your model’s manual for specifics.
Will cleaning the filter solve most draining problems?
Often, a clogged filter causes poor drainage, so cleaning it is a common fix. If drainage remains an issue after cleaning, inspect hoses and the pump motor.
Cleaning the filter fixes many issues, but if drainage persists, inspect hoses and the pump as well.
When should I replace the drain pump instead of repairing?
Replace the pump if the motor coil shows no continuity or the housing is cracked or burnt. If the motor hums but won’t start, replacement is often the best option.
If continuity is gone or the housing is damaged, replace it. If it only hums or won’t start, replacement is usually best.
Watch Video
The Essentials
- Unplug and prep safely before inspections
- Clean the filter first; many clogs originate there
- Test both mechanical and electrical health of the pump
- Replace the pump if you detect motor faults or burnt components